Motivation
Here in Texas with our scorching summers and long droughts, efficiently managing your lawn sprinkler system is paramount to assure good water conservation without killing your lawn. Unfortunately, most sprinkler system controllers are still dumb devices that only operate with a fixed schedule set at the control panel. What I need is a remote control that I can use to turn on or off the sprinkler from a remote location, or at least the comfort of my living room.
Background
My sprinkler system is made by Hunter Industries which is one of the bigger names in irrigation. Hunter produces a wireless remote control called the ROAM. The ROAM connects to the sprinkler system with a round connector called the SmartPort that wires into the control panel. I purchased one of these to control my system but I discovered that it suffers from two major flaws. First, the range is quite limited and it does not work reliably when I'm outside troubleshooting my sprinkler system zones. Second, it uses a proprietary wireless protocol so it is not connected to my WiFi network and cannot be used from a remote location. What's a hacker to do? Build my own WiFi remote control of course.
Hardware
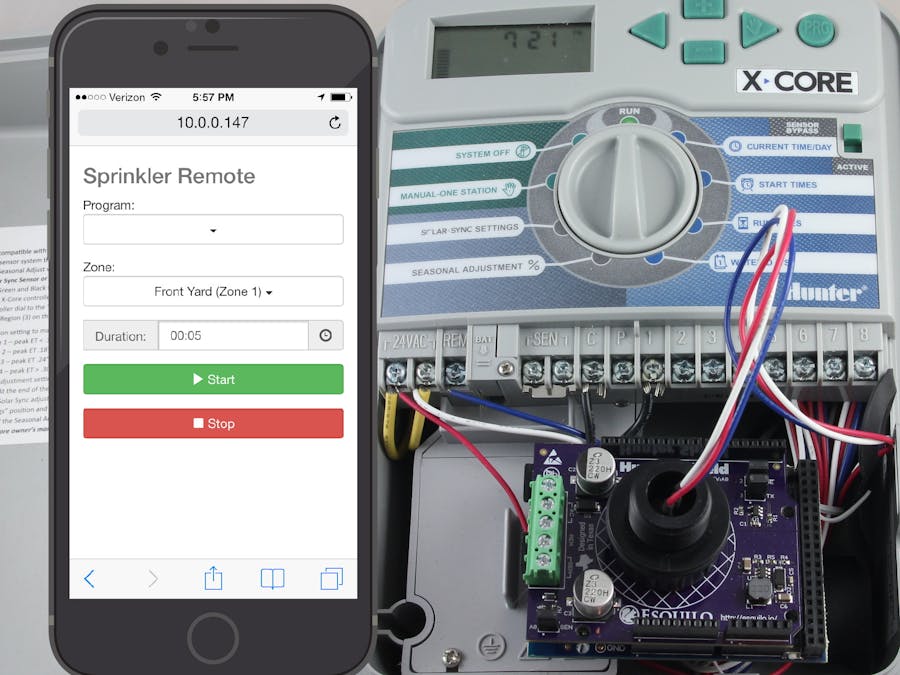
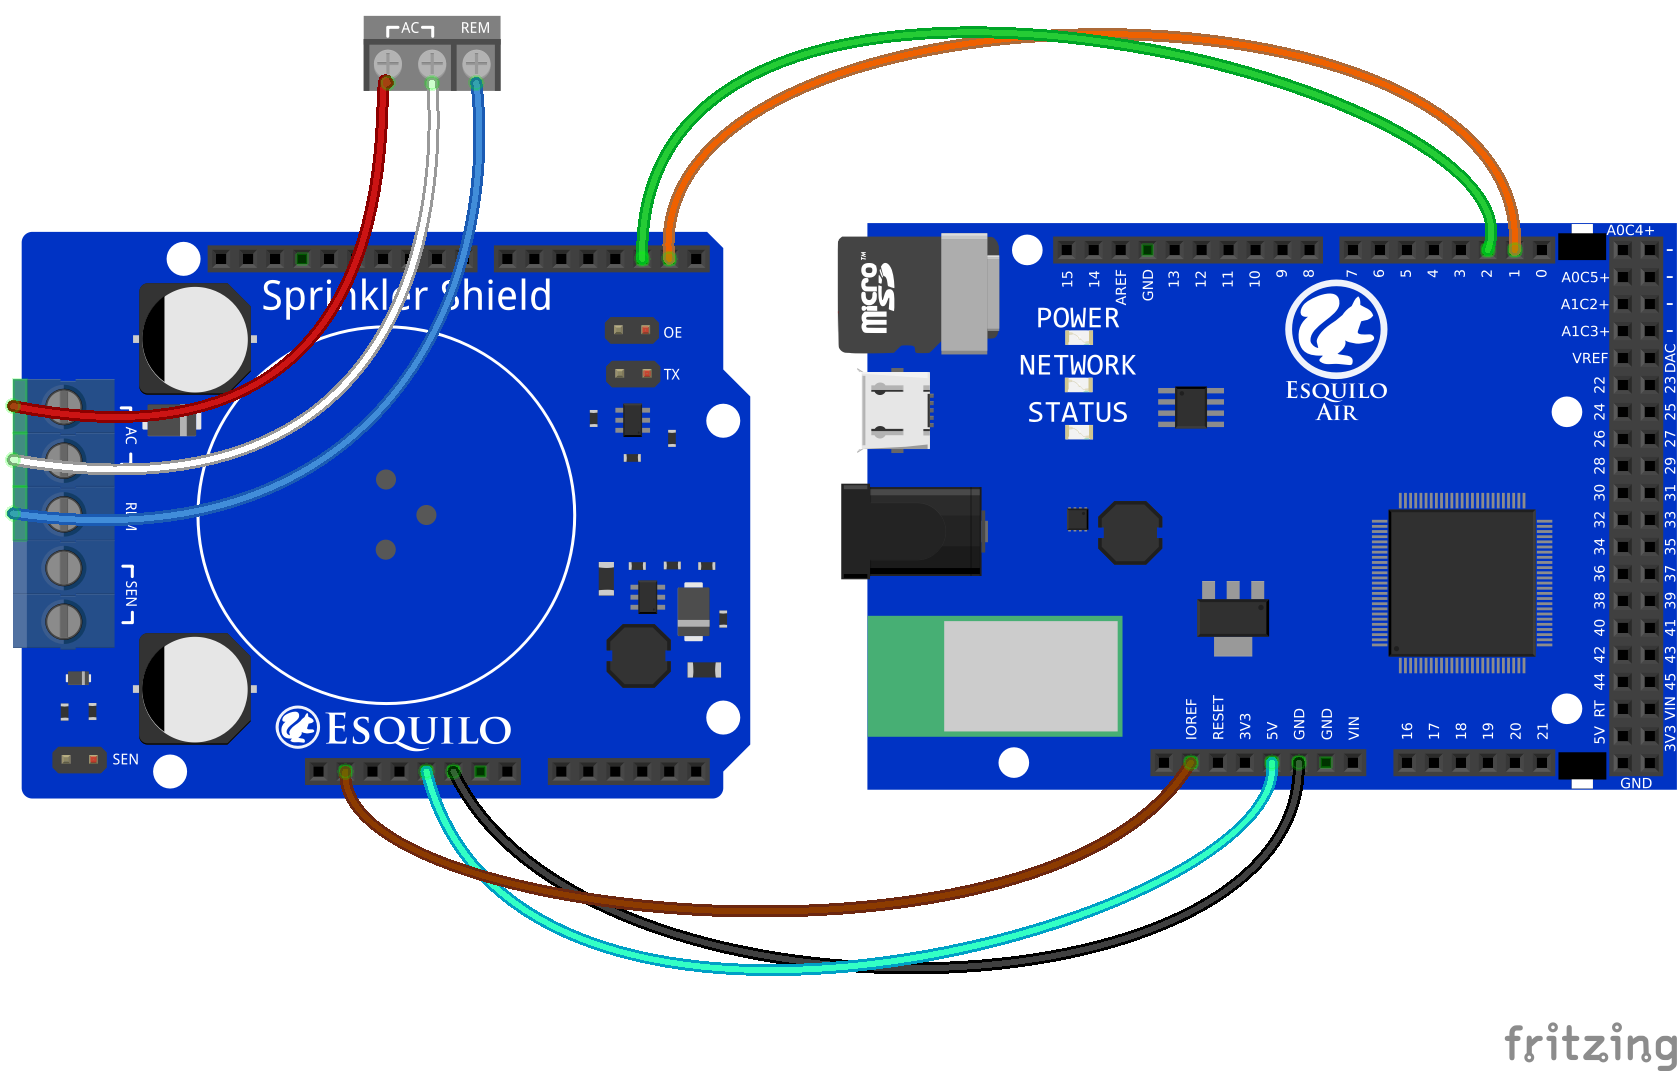
I used the Esquilo Sprinkler Shield to control my Hunter system. The shield provides a 24V AC to 5V DC power supply so it is powered directly from the control panel. It also has circuitry to translate logic level signals to the Hunter remote bus. On top of the board are three pins so it can plug directly into the Hunter SmartPort. There are also terminal blocks in case you want to wire it directly to the control panel without the SmartPort.
I mounted the Sprinkler Shield on an Esquilo Air. The Esquilo Air allows me to easily connect to my WiFi network and gives me a cloud site where I can access my application remotely. Also, Esquilo provides all of the software libraries necessary to communicate with the Hunter control panel using its proprietary protocol. The Hunter protocol is a little limited but I can turn on zones for specific times, run a defined program, or stop a zone if it is running. This gives me the same functionality as the ROAM remote with the benefit of reliable and remote communication.
Software
To test the system out, I wired a SmartPort to my Hunter panel. The wires must be installed in red-white-blue order on the AC and REM terminals. I attached the SmartPort to the Sprinkler shield and the Esquilo Air lit up. I then connected the Esquilo Air to my WiFi network and brought up the IDE from my web browser. I used the following Squirrel code to test out the bus interface on my panel.
// Include the Hunter class from the Esquilo library
dofile("sd:/lib/buses/hunter/hunter.nut");
// Instantiate the Hunter class on UART0
hunter <- Hunter(0);
// Start zone 1 for 2 minutes
hunter.start(1, 2);
The panel responded and turned on zone 1 for 2 minutes. I then changed the code to start a program.
hunter.program(1);
Again the panel responded and turned on program 1. Lastly, I tried to stop a zone and that worked as well.
hunter.stop();
User Interface
After verifying that the shield worked, it was time to move on and hook this up to a user interface. I decided to use a web-based interface using HTML and JavaScript since Esquilo Air has a built in web server and I can use any browser to access it. It also allows me to access the interface remotely with HTTPS via the Esquilo.io cloud site. To build the web interface, I used jQuery and bootstrap which makes it easy to develop a mobile friendly version. The interface is pretty simple but it does exactly what I need. I can turn zones on, start a program, or stop watering that is already in progress.
I used Esquilo RPC (ERPC) to communicate between the JavaScript in the browser and the Squirrel code on the Esquilo Air. This makes it easy to execute embedded functions on the Esquilo Air from my web interface. For example, in JavaScript I wrote the following code to call the stop() function on the Esquilo Air when the stop button is pressed.
$('#stopButton').click(function() {
erpc("stop", null, null, function() {
error("Zone stop failed");
});
});
The first parameter is the function name on the Esquilo Air, the second parameter is the parameters to pass to the function(none in this case), the third parameter is the success callback, and the fourth is the error callback. In this case, the only callback needed is to display an error message if the ERPC call fails. On the Esquilo Air side, I wrote a simple Squirrel function that simply wraps the stop() method call to the Hunter class.
function stop() {
hunter.stop();
}
The complete code is attached to this project.
Installation
Now it was time to get this thing hooked up permanently. I decided to mount it using the SmartPort. I designed a 3D-printed enclosure using DesignSpark Mechanical that has an opening that exactly matches the SmartPort dimensions.
I printed out the case using blue PLA with a 0.2mm layer height using my MakerGear M2 (a great 3D printer BTW). I used 2-56 thread rolling screws to attach the Esquilo Air to the standoffs I designed into the enclosure bottom. For securing the top, I used 4-40 thread rolling screws that are counter-bored into the case top.
Since my control panel is mounted outside, I didn't want to worry with the elements getting inside my enclosure and ruining the electronics. I decided to drill a hole through the garage wall and cut a hole to fit a single gang low voltage electrical box. I screwed the SmartPort to a metal cover plate and wired it into the control panel through the hole in the wall. I then sealed up the hole with some silicone.
Lastly, I mounted the Esquilo Air on the SmartPort and my remote control was done!


Comments