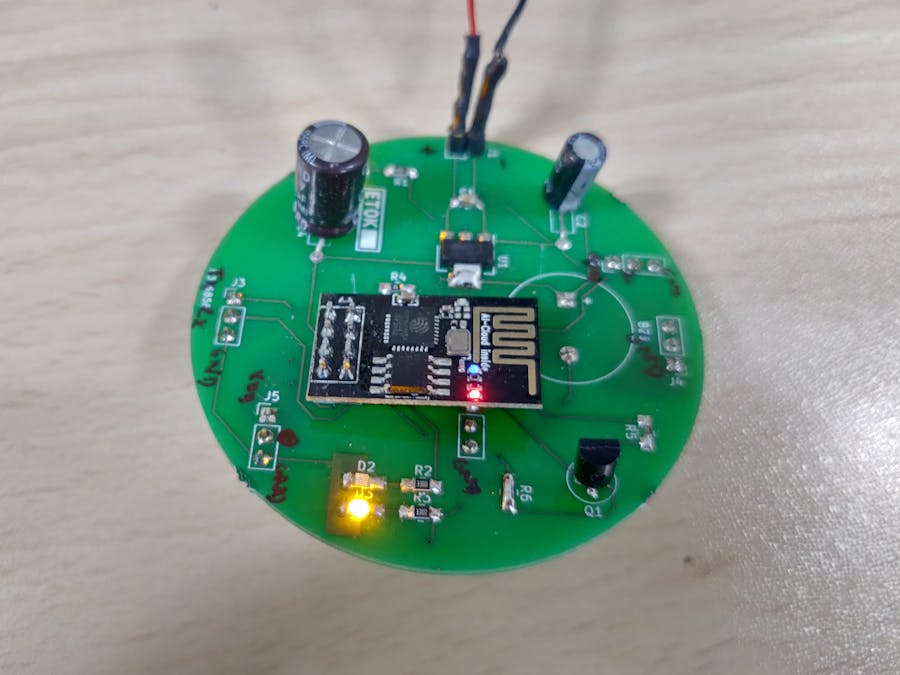
"Accio" happened, basically because it was essential for the smooth functioning of my daily routines. Every morning, while getting ready for work, locating my bike keys and wallet would be a struggle. Yes, everything could have been solved if I could just decide to keep my keys at the same place all the time, but where's the fun in that..
Hence I began looking for technologies I could use to solve my problem. The first set of ideas involved BLE markers and tags, but it felt like an overkill. GPS never was a feasible option, since I was sure that I'll always bring back my bike keys home anyway; the problem was definitely local in nature. The ideal solution seemed to be Wi-Fi based, since it would meet my localization requirement. Power consumption would be an issue, but I decided to go along with it to see how it would work out. And so I chose an ESP-8266 for Accio, since I was slightly familiar with a NodeMCU, which is based on the same Espressif chip used by the ESP-8266, but with an FTDI chip on board, so as to enable communications with the computer directly as a COM port. The ESP-8266 module would save space, but requires an extra FTDI USB to Serial converter module to program or send and receive data.
Now, since all those parts were taken care of, the biggest question was how to trigger the ESP-8266 modules. Buttons were an option; press this button to locate marker A, and press that button to locate marker B. Simple and effective. But I was obsessed with voice. Calling out for marker A, and marker A responding; that was the best solution. Voice would have a nice natural feel to it. And so, I decided to try out Snips.ai, with which all processing could be done locally at the edge(and so need of Internet all the time), and could be run on Raspberry Pi as well.
However, I never realized how easy getting started with Snips.ai would be. Setup was super smooth and easy, with sufficient documentation available for all necessary parts. I had decided to use a Base station(which is a Raspberry Pi 3B+, running all the NLU and hotword algorithms), and a Satellite Kit(Raspberry Pi W, which houses the audio capture microphones, sending audio data to the Base station to be decoded). One Base station could have more than one Satellite station, all linked to each other.
What I basically wanted to implement was, on saying "Accio keys" to the system, the marker named "keys" is supposed to catch my attention, letting me know where I kept it last. This needed two separate parts :
- The hardware stuff, with the ESP-8266, buzzers, and other related electronics I had to incorporate into the PCB, and
- The software stuff, which involved the Snips.ai code, MQTT channels and setting up of communication protocols, as well as the microcontroller program for the ESP-8266.
To give a rough overview of what happens in the system from start to finish,
- Upon uttering the "hotword", for eg, Jarvis, the system must wake up, realizing that I am about to ask it to track one marker.
- When I say "Accio keys", the system understands that I'm asking for my "keys", and so it pings the ESP-8266 module attached to that particular marker over an MQTT channel.
- The ESP-8266 with the identity "keys" understands that it is being called, and so it lights up LEDs and turns on buzzers to let me know where I can find it
All associated codes and CAD files(for the PCB I made for this purpose) have been attached. The cost split-up for one marker board would be:
- ESP-8266 : 7 USD
- Buzzers : 1.5 USD
- Regulators, capacitors etc : 3 USD
Hence, less than 10 USD in total, is the approx cost to build one such marker.
The Snips app I made for Accio is here, under the name "Accio". This same assistant can be used while starting to experiment with Snips. I have used the keywords "alpha", "beta" and "gamma" as the items, which means that the app will give an alert over the relevant mqtt channel whenever it hears one of the above mentioned items in the continuous speech recordings. The program "index.js" (see the attachments) listens to this particular channel, and decodes the output of the Snips app for the ESP-8266 on the hardware markers.
The KiCAD project for the marker board schematic and PCB Layout is at https://github.com/swaglord42/Accio/tree/latest
The complete operation is shown in this video.
For more details on working with ESP-8266, follow this link.
I would suggest using only the Raspberry Pi 3B+ for working with Snips, ie, with only the base station, which would run the entire Snips assistant. However, if you decide to use the Satellite configuration(like I did for this project), there is a good setup description for Satellites here.


_4YUDWziWQ8.png?auto=compress%2Cformat&w=48&h=48&fit=fill&bg=ffffff)


_Ujn5WoVOOu.png?auto=compress%2Cformat&w=40&h=40&fit=fillmax&bg=fff&dpr=2)


_3u05Tpwasz.png?auto=compress%2Cformat&w=40&h=40&fit=fillmax&bg=fff&dpr=2)
Comments
Please log in or sign up to comment.