.NET Core 3.0 has just got its preview release on Jan 2019. As what Microsoft said in their documentation, System.IO.Ports.SerialPort is now supported on Linux. I cannot wait to dirty my hand with it. In this article, I will show you how to do serial read/write with System.IO.Ports.SerialPort and how you can build the source code on Windows and run the binary on linux-arm (Raspbian).
Note- By the time I write this article, .NET Core and System.IO.Ports are on preview, when you read this article, do check if there are any new releases. Run your code with the latest stable release.
- I build and test the codes of this article on Windows 10 and run them in Raspberry Pi Raspbian. If you are using Mac/Linux as development machine, SerialPort library should also work.
1. Download and install.NET Core 3.0 SDK (Not Runtime) on you development machine. After installation, open terminal and type dotnet --version. You should see a dotnet version like 3.0.x.
2. Install Visual Studio Code as C# code editor. Then install C# extension.
3. Install.NET Core on Raspberry pi. If you want to build C# code on development machine and run the binary on PI, you just need to install .NET Runtime. If you want to build and run the source code on PI, you need to install .NET SDK which also includes.Net Runtime. Do note you should use the linux arm32 build for your PI. For simplicity, I will show you how to install.NET Core SDK on PI:
# in raspberry pi terminal
sudo apt-get update
# install .net core dependencies
sudo apt-get install curl libunwind8 gettext
cd ~
# download .net core 3.0
wget https://download.visualstudio.microsoft.com/download/pr/83bca990-9618-46d8-b096-32ecdf3ae492/c2f9d2785e78f20de0c3bb2adb880c5e/dotnet-sdk-3.0.100-preview-010184-linux-arm.tar.gz
mkdir -p $HOME/dotnet && tar vzxf dotnet-sdk-3.0.100-preview-010184-linux-arm.tar.gz -C $HOME/dotnet
echo "export PATH=$PATH:$HOME/dotnet" >> ~/.bashrc
echo "export DOTNET_ROOT=$HOME/dotnet" >> ~/.bashrc
export PATH=$PATH:$HOME/dotnet
export DOTNET_ROOT=$HOME/dotnet
After installation, verify with dotnet --info. You should see installation info like this:
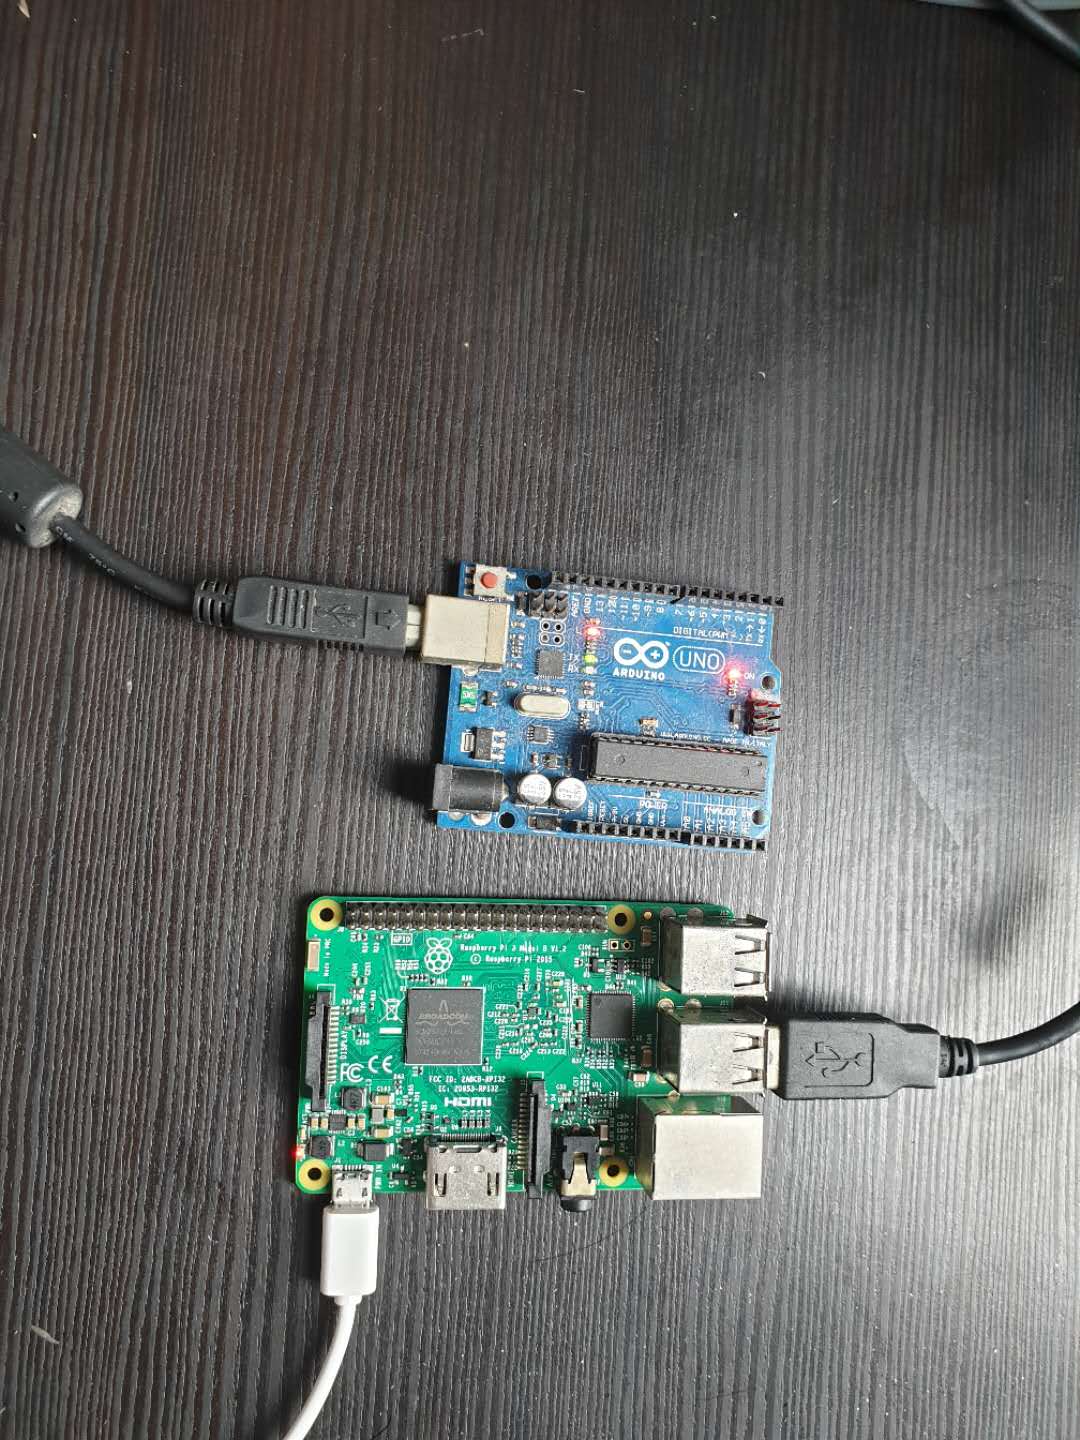
4. Prepare any serial enabled device to receive and send serial messages. For me it is an Arduino Uno.
Hello SerialPortAfter setting up development tools, let's start our journey with a simple C# project which will print all the serial ports available.
On your dev machine, start a dotnet project with following commands:
mkdir hello-serialport && cd hello-serialport
dotnet new console
dotnet add package System.IO.Ports --version 4.6.0-preview.19073.11
Open program.cs file, replace content with following code:
using System;
using System.IO.Ports;
namespace hello_serialport
{
   class Program    {
      static void Main(string[] args)        {             // Get a list of serial port names.             string[] ports = SerialPort.GetPortNames();             Console.WriteLine("The following serial ports were found:");             // Display each port name to the console.             foreach(string port in ports)             {                 Console.WriteLine(port);             }             Console.ReadLine();        }    }}
Type dotnet run to run the code on dev machine.
To build your project for RPi, run:
dotnet publish -r linux-arm --self-contained falsethen go to {your_project_root}\bin\Debug\netcoreapp3.0\linux-arm, copy folder publish to your PI. On Pi, go to the publish folder, run:
chmod +x hello-serialport
./hello-serialport
Your hello-serialport is running on Rapsberry Pi!
In the hello serialport project, we did the development on windows, build the linux-arm binary then run the binary on raspberry pi. According to Microsoft's documentation, we just made an Framework-dependent executable(FDE) which means the executable can only run on raspberry pi with proper version.NET Core Runtime installed.
You can play with different kind of deployment by referring following documents:
Serial ReadOpen Arduino IDE, go to File-->Examples-->03.Analog-->AnalogInOutSerial and upload it to Arduino. Paste the code here:
/*
 Analog input, analog output, serial output
 Reads an analog input pin, maps the result to a range from 0 to 255 and uses
 the result to set the pulse width modulation (PWM) of an output pin.
 Also prints the results to the Serial Monitor.
 The circuit:
 - potentiometer connected to analog pin 0.
   Center pin of the potentiometer goes to the analog pin.
   side pins of the potentiometer go to +5V and ground
 - LED connected from digital pin 9 to ground
 created 29 Dec. 2008
 modified 9 Apr 2012
 by Tom Igoe
 This example code is in the public domain.
 http://www.arduino.cc/en/Tutorial/AnalogInOutSerial
*/

const int analogInPin = A0;  // Analog input pin that the potentiometer is attached to
const int analogOutPin = 9; // Analog output pin that the LED is attached to
int sensorValue = 0;        // value read from the pot
int outputValue = 0;        // value output to the PWM (analog out)
void setup() {
 // initialize serial communications at 9600 bps:
 Serial.begin(9600);
}
void loop() {
 // read the analog in value:
 sensorValue = analogRead(analogInPin);
 // map it to the range of the analog out:
 outputValue = map(sensorValue, 0, 1023, 0, 255);
 // change the analog out value:
 analogWrite(analogOutPin, outputValue);
 // print the results to the Serial Monitor:
 Serial.print("sensor = ");
 Serial.print(sensorValue);
 Serial.print("\t output = ");
 Serial.println(outputValue);
 // wait 2 milliseconds before the next loop for the analog-to-digital
 // converter to settle after the last reading:
 delay(2);
}
This program keep sending out the reading of analog pin. Let's write a C# program to read the message:
using System;
using System.IO.Ports;
namespace serial_read
{
class Program
{
  static SerialPort _serialPort;
  static void Main(string[] args)
  {
    Console.Write("Port no: ");
    string port = Console.ReadLine();
    Console.Write("baudrate: ");
    string baudrate = Console.ReadLine();
    // Create a new SerialPort on port COM7
    _serialPort = new SerialPort(port, int.Parse(baudrate));
    // Set the read/write timeouts
    _serialPort.ReadTimeout = 1500;
    _serialPort.WriteTimeout = 1500;
    _serialPort.Open();
    while (true)
    {
      Read();
    }
    _serialPort.Close();
  }

  public static void Read()
  {
    try
    {
      string message = _serialPort.ReadLine();
      Console.WriteLine(message);
    }
    catch (TimeoutException) { }
  }
}
}
Build and run on Raspberry Pi:
One thing to mention is that SerialPort.ReadLine() is a blocking method. If you don't want main thread be blocked, please use multithreading.
please refer to the example provided by Microsoft to learn how to do serial write and multithreading. Serial Events are also good things to explore.
Further Work- ASP.NET Core is available since v1 of.NET Core. By combining SerialPort API and ASP.NET, we can build a web UI to control some devices like a mobile robot.
- Microsoft open sourced WPF and WinForms which would all be available since.NET Core 3.0. One day we may safely port our old windows desktop serial applications to all platforms or even write a winForm serial communication application on Raspberry Pi!
[1] Installing the.NET Core 2.x SDK on a Raspberry Pi and Blinking an LED with System.Device.Gpio. URL: https://www.hanselman.com/blog/InstallingTheNETCore2xSDKOnARaspberryPiAndBlinkingAnLEDWithSystemDeviceGpio.aspx


_ztBMuBhMHo.jpg?auto=compress%2Cformat&w=48&h=48&fit=fill&bg=ffffff)


Comments
Please log in or sign up to comment.