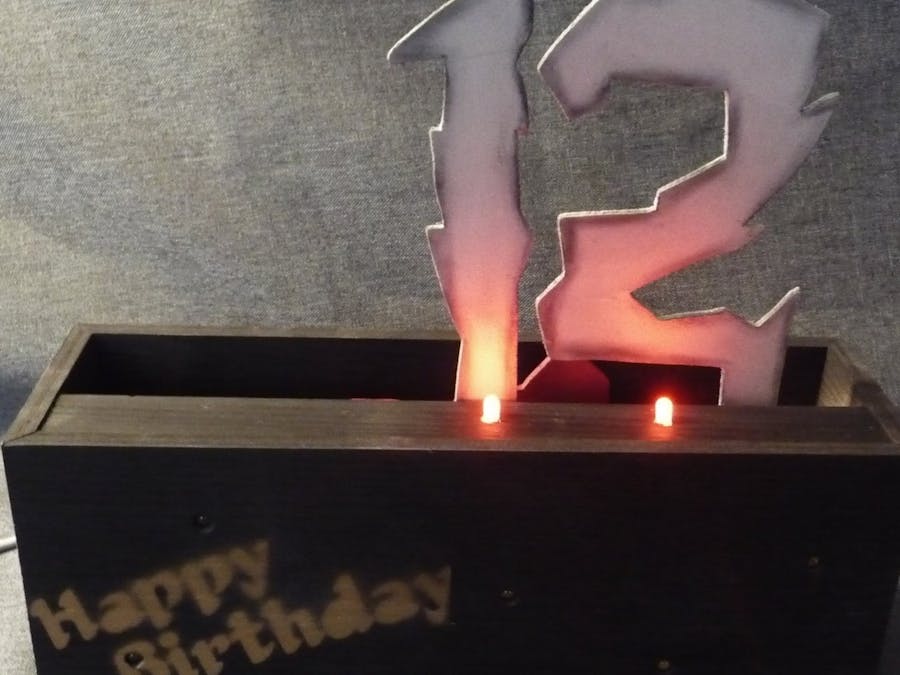
Another year is over and the preparation for the next birthday is running. This time, a bit more movement should come into the table decoration.
For the history of this article you should look at the Project 11 briefly. The implementation of the 11 was fun. This year, I wanted to put some movement on the table. And there's another birthday girl's request: it must have something to do with Harry Potter!
With the keywords Movement and Harry Potter my first idea was the Weasley's house clock, which shows when a Weasley is at home.
ConceptI wanted to implement that so that instead of the persons, the numbers 1 and 2 appear. At the beginning the two numbers are invisible in the box. After switching on they fold out and make a few movements.
The numbers 1 and 2 for the "12" get the look of the font of Harry Potter.
HardwareI've glued the box together out of 4 wooden strips - sawn miter - together. The movement of numbers is done by servos. The installation was very simple in this case. They were only glued to the inside wall of the box with hot glue.
The numbers and 1 and 2 are sawed out of plywood and glued to the usually included arms of the servos.
As a microcontroller, I chose an Arduino Nano. The power comes through a small power bank. Both fit quite well in the box and also holds a party long.
SoftwareSo that the noise level of the servo's does not bother permanently, the "12" should stay in the end position for a while. My simple servo's produces a little noise anyhow. That's why they will be turned off, if they stay longer in one position.
There are two voids for this: ServosOn() and ServosOff().
void ServosOn() {
  servo1.attach(PinServo1);
  servo2.attach(PinServo2);
}
void ServosOff() {
  servo1.detach();
  servo2.detach();
}
A servo is easily moved via a write command. For this I have defined two limit values top / bottom.
int PosBottom=12;
int PosTop=89;
servo2.write(PosBottom);
delay(5000);
servo2.write(PosTop);
For a little more Harry Potter feeling, each number has been enhanced with its own RGB LED. So a few colorful flash effects can be installed when they appear or disappear.
void Blink12(int r, int g, int b, int dauer1,  int dauer2) {
  Led1(r,g,b);
  Led2(r,g,b);
  delay(dauer1);
  Led1(LOW,LOW,LOW);
  Led2(LOW,LOW,LOW);
  delay(dauer2);
}
As a color for the box, I chose black. That was already pretty dark. Therefore came on the front again 6 more LEDs. Each 2 of them are controlled by a pin.
For the LEDs I use a running light effect.
void RunningLight() {
  for (int i=0; i<4; i=i+1){
    digitalWrite(PinLed1, HIGH);
    digitalWrite(PinLed2, LOW);
    digitalWrite(PinLed3, LOW);
    delay(200);
    digitalWrite(PinLed1, LOW);
    digitalWrite(PinLed2, HIGH);
    digitalWrite(PinLed3, LOW);
    delay(200);
    digitalWrite(PinLed1, LOW);
    digitalWrite(PinLed2, LOW);
    digitalWrite(PinLed3, HIGH);
    delay(200);
   }
  digitalWrite(PinLed3, LOW);
}
To the two servo's 1 and 2 came another with a sign "Congratulations". You find some impressions in the Youtube video.
So Happy Birthday!
PS: Wenn Sie diesen Artikel in deutsch lesen möchten, schauen Sie doch auf techpluscode.de


Comments
Please log in or sign up to comment.