


Today in this tutorial you will learn how to print your own PCBs at home using simple toner transfer method.
There is also the video tutorial for the same, down there.
https://www.utsource.net/ is an online platform for technicians, Makers, Enthusiasts, Kids to buy electronic components
MATERIALS REQUIRED--
1. Copper Clad board
2. Etching solution ( ferric chloride)
3. print out of your schematic on photopaper
4. Iron
5. A pair of gloves for saftey
That's all :)
Take the print out on photo paper with laser printer.
Cut down the Copper clad board to the size equal to your print out and clean it with thinner.
Now place the printed side of photo paper on the copper clad board and make sure that the traces or the printed area is completely on the copper.
Put thick insulation tapes as shown in the photograph.
Now, pre-heat the iron at maximum temperature and put it on circuit for about 30-45 seconds an then use the iron tip to heat and press the traces for the optimum pressure.
Do it for approximately 5-8 minutes and then put the circuit in the water glass or mug for about 2 minutes.
After taking it out from water rub out all the paper from the surface of PCB and you will see that toner is now completely transferred to the copper surface ,this is the reason why this process is called toner transfer method.
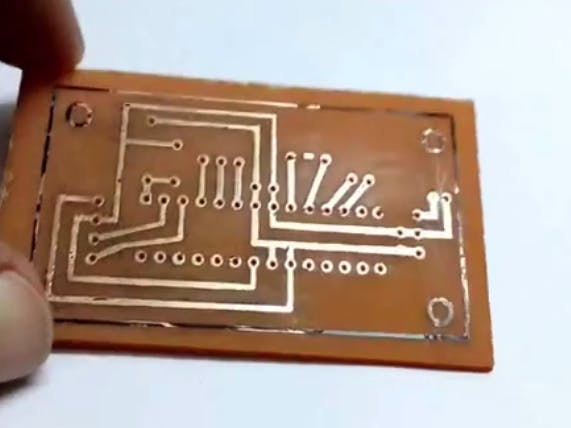
After removing all the paper you will see something like this.
Pour some Ferric Chloride solution in a plastic container. Fumes are harmful so do this in a proper ventilated area, use gloves and put your PCB into the solution and shake/stir the solution.
After some tome you will see that the extra copper is completely etched out of the board and only the traces are left.
And now you can scratch all the toner.
Congratulations!! you are ready with your first PCB.
If you want to see the real time PCB etching you can watch the video
Hope you enjoyed the tutorial.
Thank you!
Tanishq Jaiswal
Comments
Please log in or sign up to comment.