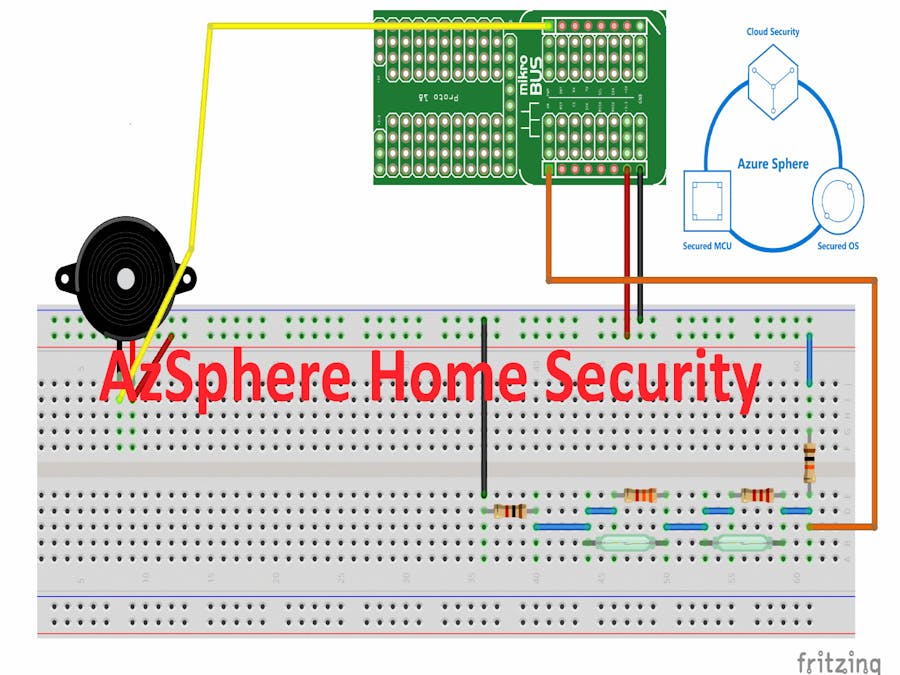
Using Azure Sphere modules, you can create a secure home security system that can be safely monitored and controlled remotely over the Internet. Here is my first security system prototype that can be controlled through Azure IOT Central. The project uses the MT3620-kit from Avnet.
I used only 2 sensors for the proof of concepts but additional sensors can easily be added if needed. I use ADC input and voltage divider to check sensor states.
The MT3620 module has 3 ADC inputs that could be used as inputs. Avnet's mtk3620-kit has an ADC0 used for an ambient light sensor. ADC1 and ADC2 are available from the MikroBUS socket.
In addition, I added the temperature logging option using the LSM6DSO iNemo sensor on the board.
Configure Azure Sphere MT3620 kitFollow the instructions on how to set up the module at: https://docs.microsoft.com/en-us/azure-sphere/ .
- Install SDK
- Enable development mode
- Configure WiFi network: https://docs.microsoft.com/en-us/azure-sphere/install/configure-wifi
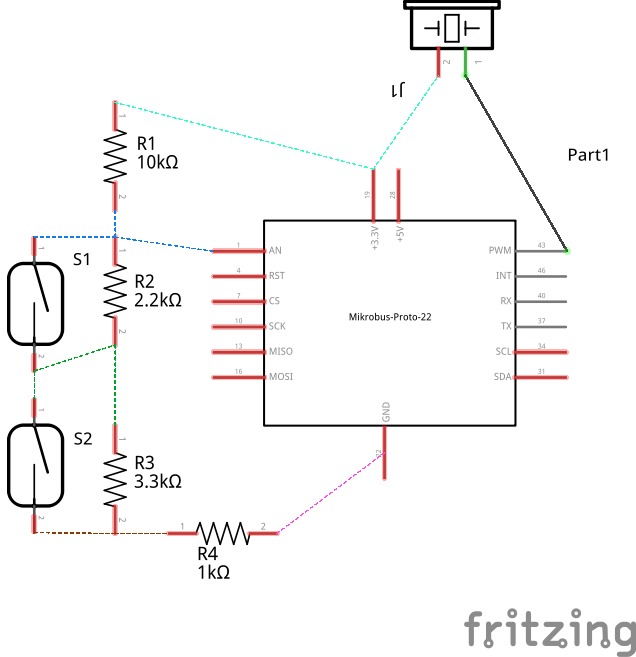
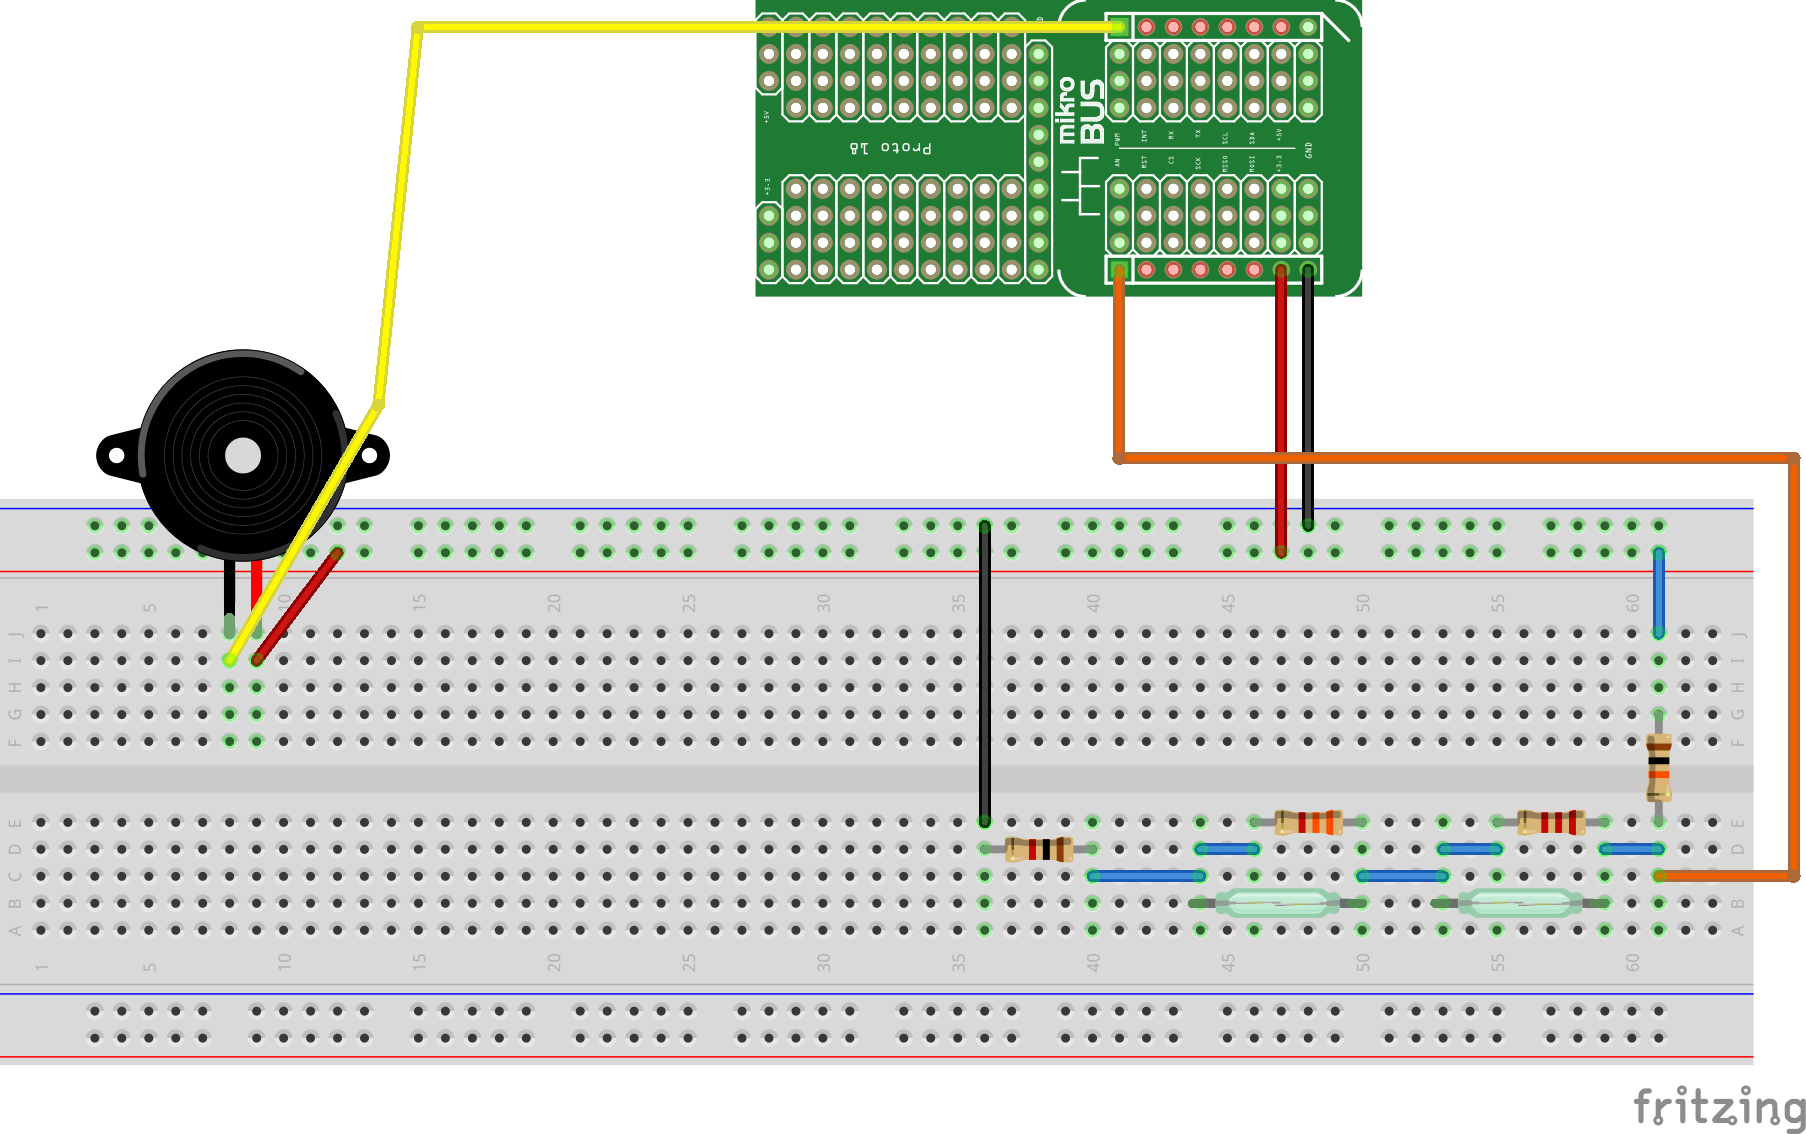
Connect the components as shown in the schematic:
Use the MikroBus 1 Click Board socket to connect sensors to the Azure Sphere kit.
Connect Piezo buzzer (-) to the MikroBus-1 PWM pin, (+) wire to the 3.3V pin.
The cable with the sensors must be connected to the pin 1 (AN).
The reed switches may also be replaced by mechanical switches or other sensors (PIR, smoke detector, etc.). A wire may also be used for testing.
R2 and S1 is one sensor pair; R3 and S2 is another. R4 is tamper resistor and must be installed at the end of the cable.
Place magnets near to the reed switched to close switches.
Set up Azure IOT CentralThere is a good step-by-step guide to setting up your device: https://www.element14.com/community/groups/azuresphere/blog/2019/05/09/avnets-azure-sphere-starter-kit-out-of-box-demo-part-3-of-3
Below is a brief description of how to set up a portal for a specific application.
Open https://apps.azureiotcentral.com/build
- Select Build page and choose Custom app
* Application name "AzHomeSecurityApp"
* Custom application
* Subscription or 7 day trial
- Create templates
Add -> Custom template
Device template name :HomeSecurityTemplateAdd Measurments :
+ Add Telemetry:
    Name: Temperature
    Field name: temperature
    Units : C
    Minimum: -40
    Maximum: 50
    [Save]
+ Add Event
    Name: Alarm event
    Field name: alarm_sensor
    Severity: Warning
    [SAVE]
+ Add Event
    Name: System alarm event
    Field name: alarm_cable
    Severity: Error
    [SAVE]
+ Add Event
    Name: State changed
    Field name: alarm_mode
    Severity: Information
    [SAVE]
Add Settings :
+ Toggle
    Display name: Mode Button
    Field name: alarm_mode
    ON text: ARM
    OFF text: DISARM
    Initial Value: Off
    [SAVE]
Open Devices page to add your device to IOT central.
- Select
HomeSecurityTemplate - Add Real Device , you can change the name if you wish. Click the Create button.
- Open device view and click the Connect button. Copy values for later use:
* ID Scope
* Device ID
* Shared Access signature - Primary key
Make sure the device is approved and provisioned
To create connection string, I used tool called dps-keygen. Node.JS must be installed to install and run this tool.
npm i -g dps-keygenRun tool with copied Scope ID, Device Id and key:
dps-keygen -si:<ID scope> -di:<device ID> -dk:<device SAS primary key>Save created connection string.
Launch the Visual Studio and open project folder.
- Open the configuratio.h file and replace the connection string with the one created in the previous chapter.
- Open the app_manifest.json file and add your hostname to the AllowedConnection field.
Connect the Azure Sphere MT3620 KIT to your computer.
In Visual Studio select Remote GDB Debugger as startup item. Clean, build and deploy code to the module.
How to useArming can be done by pressing a button on board or controlled via Azure IOT Central.
To begin, close all switches. The user LED on the board is lit green (RGB LED5). Press the onboard push button A (GPIO12) to set the delayed arming. The delay time is 20 seconds and the LED blinks red and green. When arm mode is activated, the LED will blink red only.
Disconnect one of the switches and the unit must go into alarm mode. The red LED stays on now and the piezo buzzer is activated.
Press the A button again to deactivate the alarm. For practical use, button deactivation must be disabled and only deactivated throw Azure IOT Central or by the special authentication device (a button panel, NFC reader, or other device) attached to the module.
Sign in to the Azure IOT Central to control your device over the Internet. Select your device from the list of devices. From the settings page, change the position of the toggle button and press the Update button to change the mode.
Select the Measurements page to view alarms and mode changes. The timeline shows recorded events. In addition, a temperature graph is displayed. The time range can be changed.
- https://docs.microsoft.com/en-us/azure-sphere/
- https://docs.microsoft.com/en-us/azure-sphere/install/configure-wifi
- https://docs.microsoft.com/en-us/azure-sphere/app-development/setup-iot-central
- https://github.com/Azure/azure-sphere-samples/blob/master/Samples/AzureIoT/IoTCentral.md
- https://www.element14.com/community/docs/DOC-92359/l/azure-sphere-starter-kit-user-guide-v14?ICID=azuresphere-kit-datasheet-widget
- https://www.element14.com/community/groups/azuresphere/blog/2019/04/24/avnets-azure-sphere-starter-kit-out-of-box-demo-part-1-of-3
- https://www.element14.com/community/groups/azuresphere/blog/2019/05/09/avnets-azure-sphere-starter-kit-out-of-box-demo-part-3-of-3
- https://www.st.com/resource/en/datasheet/lsm6dso.pdf


Comments