


Hardware components | ||||||
 |
| × | 1 | |||
 |
| × | 1 | |||
| × | 1 | ||||
| × | 1 | ||||
| × | 1 | ||||
Software apps and online services | ||||||
 |
| |||||
The Raspberry Pi is a series of small single-board computers by the Raspberry Pi Foundation to promote the teaching of basic computer science in schools and in developing countries.
The Raspberry Pi 3 uses a Broadcom BCM2837 SoC with a 1.2 GHz 64-bit quad-core ARM Cortex-A53 processor, with 512 KB shared L2 cache. The Raspberry Pi 3, with a quad-core Cortex-A53 processor, is described as 10 times the performance of a Raspberry Pi 1. Benchmarks showed the Raspberry Pi 3 to be approximately 80% faster than the Raspberry Pi 2 in parallelized tasks.
The following is technical specification of Raspberry Pi 3 device:
- Broadcom BCM2837 64bit ARMv8 Quad Core Processor powered Single Board
- Computer running at 1.2GHz
- 1GB RAM
- BCM43143 WiFi on board
- Bluetooth Low Energy (BLE) on board
- 40pin extended GPIO
- 4 x USB2 ports
- 4 pole Stereo output and Composite video port
- Full size HDMI
- CSI camera port for connecting the Raspberry Pi camera
- DSI display port for connecting the Raspberry Pi touch screen display
- MicroSD port for loading your operating system and storing data
- Upgraded switched Micro USB power source (now supports up to 2.4 Amps)
- Same form factor as the Raspberry Pi 2 Model B, however the LEDs will change position.
Raspbian is the Foundation’s official supported operating system. It Raspbian is an Operating system based on Debian Linux for the Raspberry Pi hardware.
Raspbian comes pre-installed with plenty of software for education, programming and general use. It has Python, Scratch, Sonic Pi, Java, Mathematica and more.
The Raspbian with Desktop image contained in the ZIP archive is over 4GB in size, which means that these archives use features which are not supported by older unzip tools on some platforms.
Download the image
Official images for recommended operating systems are available to download from the Raspberry Pi website Downloads page.
Alternative distributions are available from third-party vendors.
If you're not using Etcher (see below), you'll need to unzip .zip
downloads to get the image file (.img
) to write to your SD card.
Note: the Raspbian with PIXEL image contained in the ZIP archive is over 4GB in size and uses the ZIP64 format. To uncompress the archive, a unzip tool that supports ZIP64 is required. The following zip tools support ZIP64:
- 7-Zip (Windows)
- The Unarchiver (Mac)
- Unzip (Linux)
Writing an image to the SD card
You will need to use an image writing tool to install the image you have downloaded on your SD card.
Etcher is a graphical SD card writing tool that works on Mac OS, Linux and Windows, and is the easiest option for most users. Etcher also supports writing images directly from the zip file, without any unzipping required. To write your image with Etcher:
- Download Etcher and install it.
- Connect an SD card reader with the SD card inside.
- Open Etcher and select from your hard drive the Raspberry Pi
.imgor.zipfile you wish to write to the SD card.
- Select the SD card you wish to write your image to.
- Review your selections and click 'Flash!' to begin writing data to the SD card.
Now you are ready to boot your Raspberry Pi. Connect Monitor via HDMI, a keyboard via USB and power into Raspberry Pi.
- Turn on the power for your Raspberry Pi.
- Raspbian OS will boot for the first time.
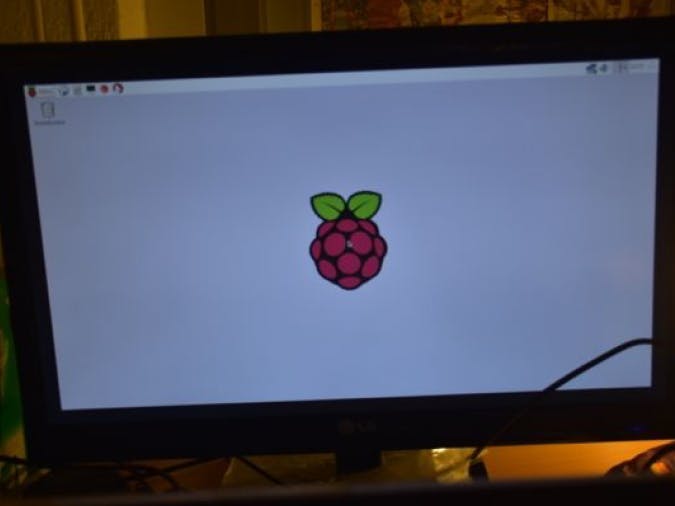
- If success, you will get the first screen of Raspberry Pi Jessie desktop.
- On desktop mode, if you want to work with Terminal, you can click black monitor icon.
After running Jessie OS, you can configure it by expanding Filesystem via raspi-config to optimize your micro SD storage. Type this command on Terminal.
sudo raspi-config
Then you get the following form.
Select 1 Expand Filesystem. After that, you are be required to restart Raspbian.
Configure TimezoneIf you want to change timezone in Raspberry Pi 3, you can do it in console with typing
sudo raspi-config
- Then, you will get a dialog.
- Select 5 Internationalisation Options.
- Then I2 Change Timezone.
- Select your Geographic area.
- Then, select your city or region.
- After that, Raspbian will configure your Timezone.
If you want to reboot your Raspberry Pi, write this script on Terminal.
sudo shutdown -r now
You also can do it with writing this script on Terminal.
sudo reboot
It’s better to shutdown your Raspberry Pi If you don’t use it. Please don’t turn off the power directly.
Write this script to shutdown and turn off your Raspberry Pi
$ sudo shutdown -h -P now
By default, Raspbian provides username: pi and password: raspberry. If you want to change password, you can do it by calling passwd:
$ passwd
Then type the current password and new password.


Comments
Please log in or sign up to comment.