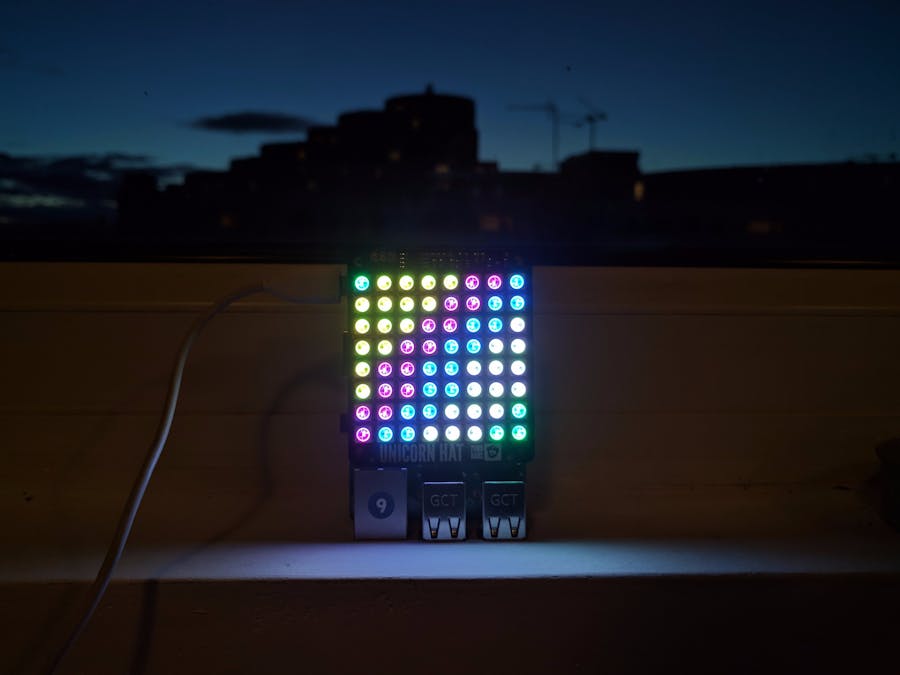
Use Raspberry Pi and Unicorn HAT to show when trains are departing from your station (UK).
OverviewThe application connects to National Rail's Live Departure Board API (UK) using a Python library called NREWebServices by George Goldberg.
It then displays the minutes until the next train departing for {a station specified by the user} from {a station specified by the user}. (e.g. trains departing for London Victoria from East Croydon).
The minutes until the next train are displayed on the Unicorn Hat (an 8x8 LED matrix).
The number of green LED's lit up, starting from the top left corner of the Unicorn Hat, indicate the number of minutes until the next train.
E.g. if there are 3 green LED's lit up in the top-left corner, there are 3 minutes until the next train departing from your station. The next group of LED's (grouped by colour) indicate the minutes until the next train, and so on and so forth.
If you're happy with that, we can get started with the tutorial.
Tutorial1. This tutorial assumes you're using a Raspberry Pi 3 (RPi) with a Unicorn Hat (UH), but if you modify the code slightly, you should be able to use any internet enabled RPi with any LED matrix (or LCD, or OLED display).
2. We're going to use Resin.io to program the RPi with in the tutorial, but you can just as easily run this directly on a RPi yourself, just use 'rPiTrainDepartures.py', 'coordinates.py', and set the environment variables on the RPi directly, or hardcode them into the program (more details in step 7).
Resin is essentially a container that runs on the RPi, which pulls updates to the application on-the-fly from Git. Which, means I can program with my regular laptop and sync the code to the RPi with just a 'git push' (nice because I don't have an external monitor).
It's free for up to 10 devices, which should be just fine for most casual use cases.
3. First clone the code base to the working directory of your choice:
> git clone https://github.com/teejK/raspberryTrainTimes.git
4. Register and create your first application on Resin.io.
You can name the application whatever you want; I suggest 'rPiTrainDepartures'.
Use this tutorial to get set up on Resin
Come back when you've inserted the microSD card back into your RPi after flashing the Resin image (we'll take it from there).
5. Add the Resin repo to your working directory git. This will allow us to push code to the RPi.
In your terminal, cd into the working directory where you cloned raspberryTrainTimes.git.
E.g.:
> cd raspberryTrainTimes
On the Resin webpage, click into the Resin application you just created. On the top right corner there's a field with a string that starts with 'git remote add ...'
Copy that string into your console and run it, e.g.:
> git remote add resin gh_yoursn@git.resin.io:gh_yoursn/rpitraindepartures.git
6. Try to push the code to your Resin application.
> git push resin master --force
If everything's gone right up until this point, you should see something like this:
7. Add environment variables
You'll notice we haven't specified which station we'd like to get train departures for, nor which destination we're interested in.
While Resin uploads everything to the device for the first time, this is a good opportunity to get all that set up.
The first thing you're going to need to do is to get an OpenLDBWS access token from National Rail to access their API. You can do that by filling out a short form here.
Once you've done that, go back into the Resin application webpage and click 'Environment Variables' on the left side-panel.
Add an environment variable called 'NRE_LDBWS_API_KEY' and paste your OpenLDBWS access token into the values field.
Next, add two more environment variables:
'FROM_STATION'
and
'TO_STATION'
These are, you might have guessed, the stations that we're going to be checking train departures FROM and TO. The stations are specified with a 3 letter code (e.g. Birmingham International is 'BHI'), which you'll need to lookup on a CSV that National Rail provides here.
Save your environment variables. Then, restart the running application on the Raspberry Pi. You can do this by going to 'Actions' on your Resin console and click the yellow button 'RESTART ON ALL DEVICES'.
8. Enjoy
Forget digging out the phone last minute while you're running out the door. Enjoy your coffee in the warm bask of knowing when the next train is.
9. Debugging
If your RPi is connected to your Resin application online, you can see the console logs of your RPi on the device page. This seriously helps with debugging.
If you think you've found a bug with the program, please create an issue on GitHub, or better yet, a pull request with your fix!
10. Further Tinkering
coordinates.py holds a couple ways of lighting up the LED's (which you can select on line 62 of rPiTrainDepartures.py): a diagonal zig-zag pattern, and a straight left-to-right pattern.
You can experiment with your own ways of lighting up the LED's in this document.


Comments
Please log in or sign up to comment.