Kandybot is an Internet-controlled, multipurpose robot which can be controlled anywhere from the world using Android app. Kandybot can be used for surveillance, home automation, to kill zombies and whatever you want to do - the limit is your imagination. Kandybot is powered by Firebase and Kandy.io.
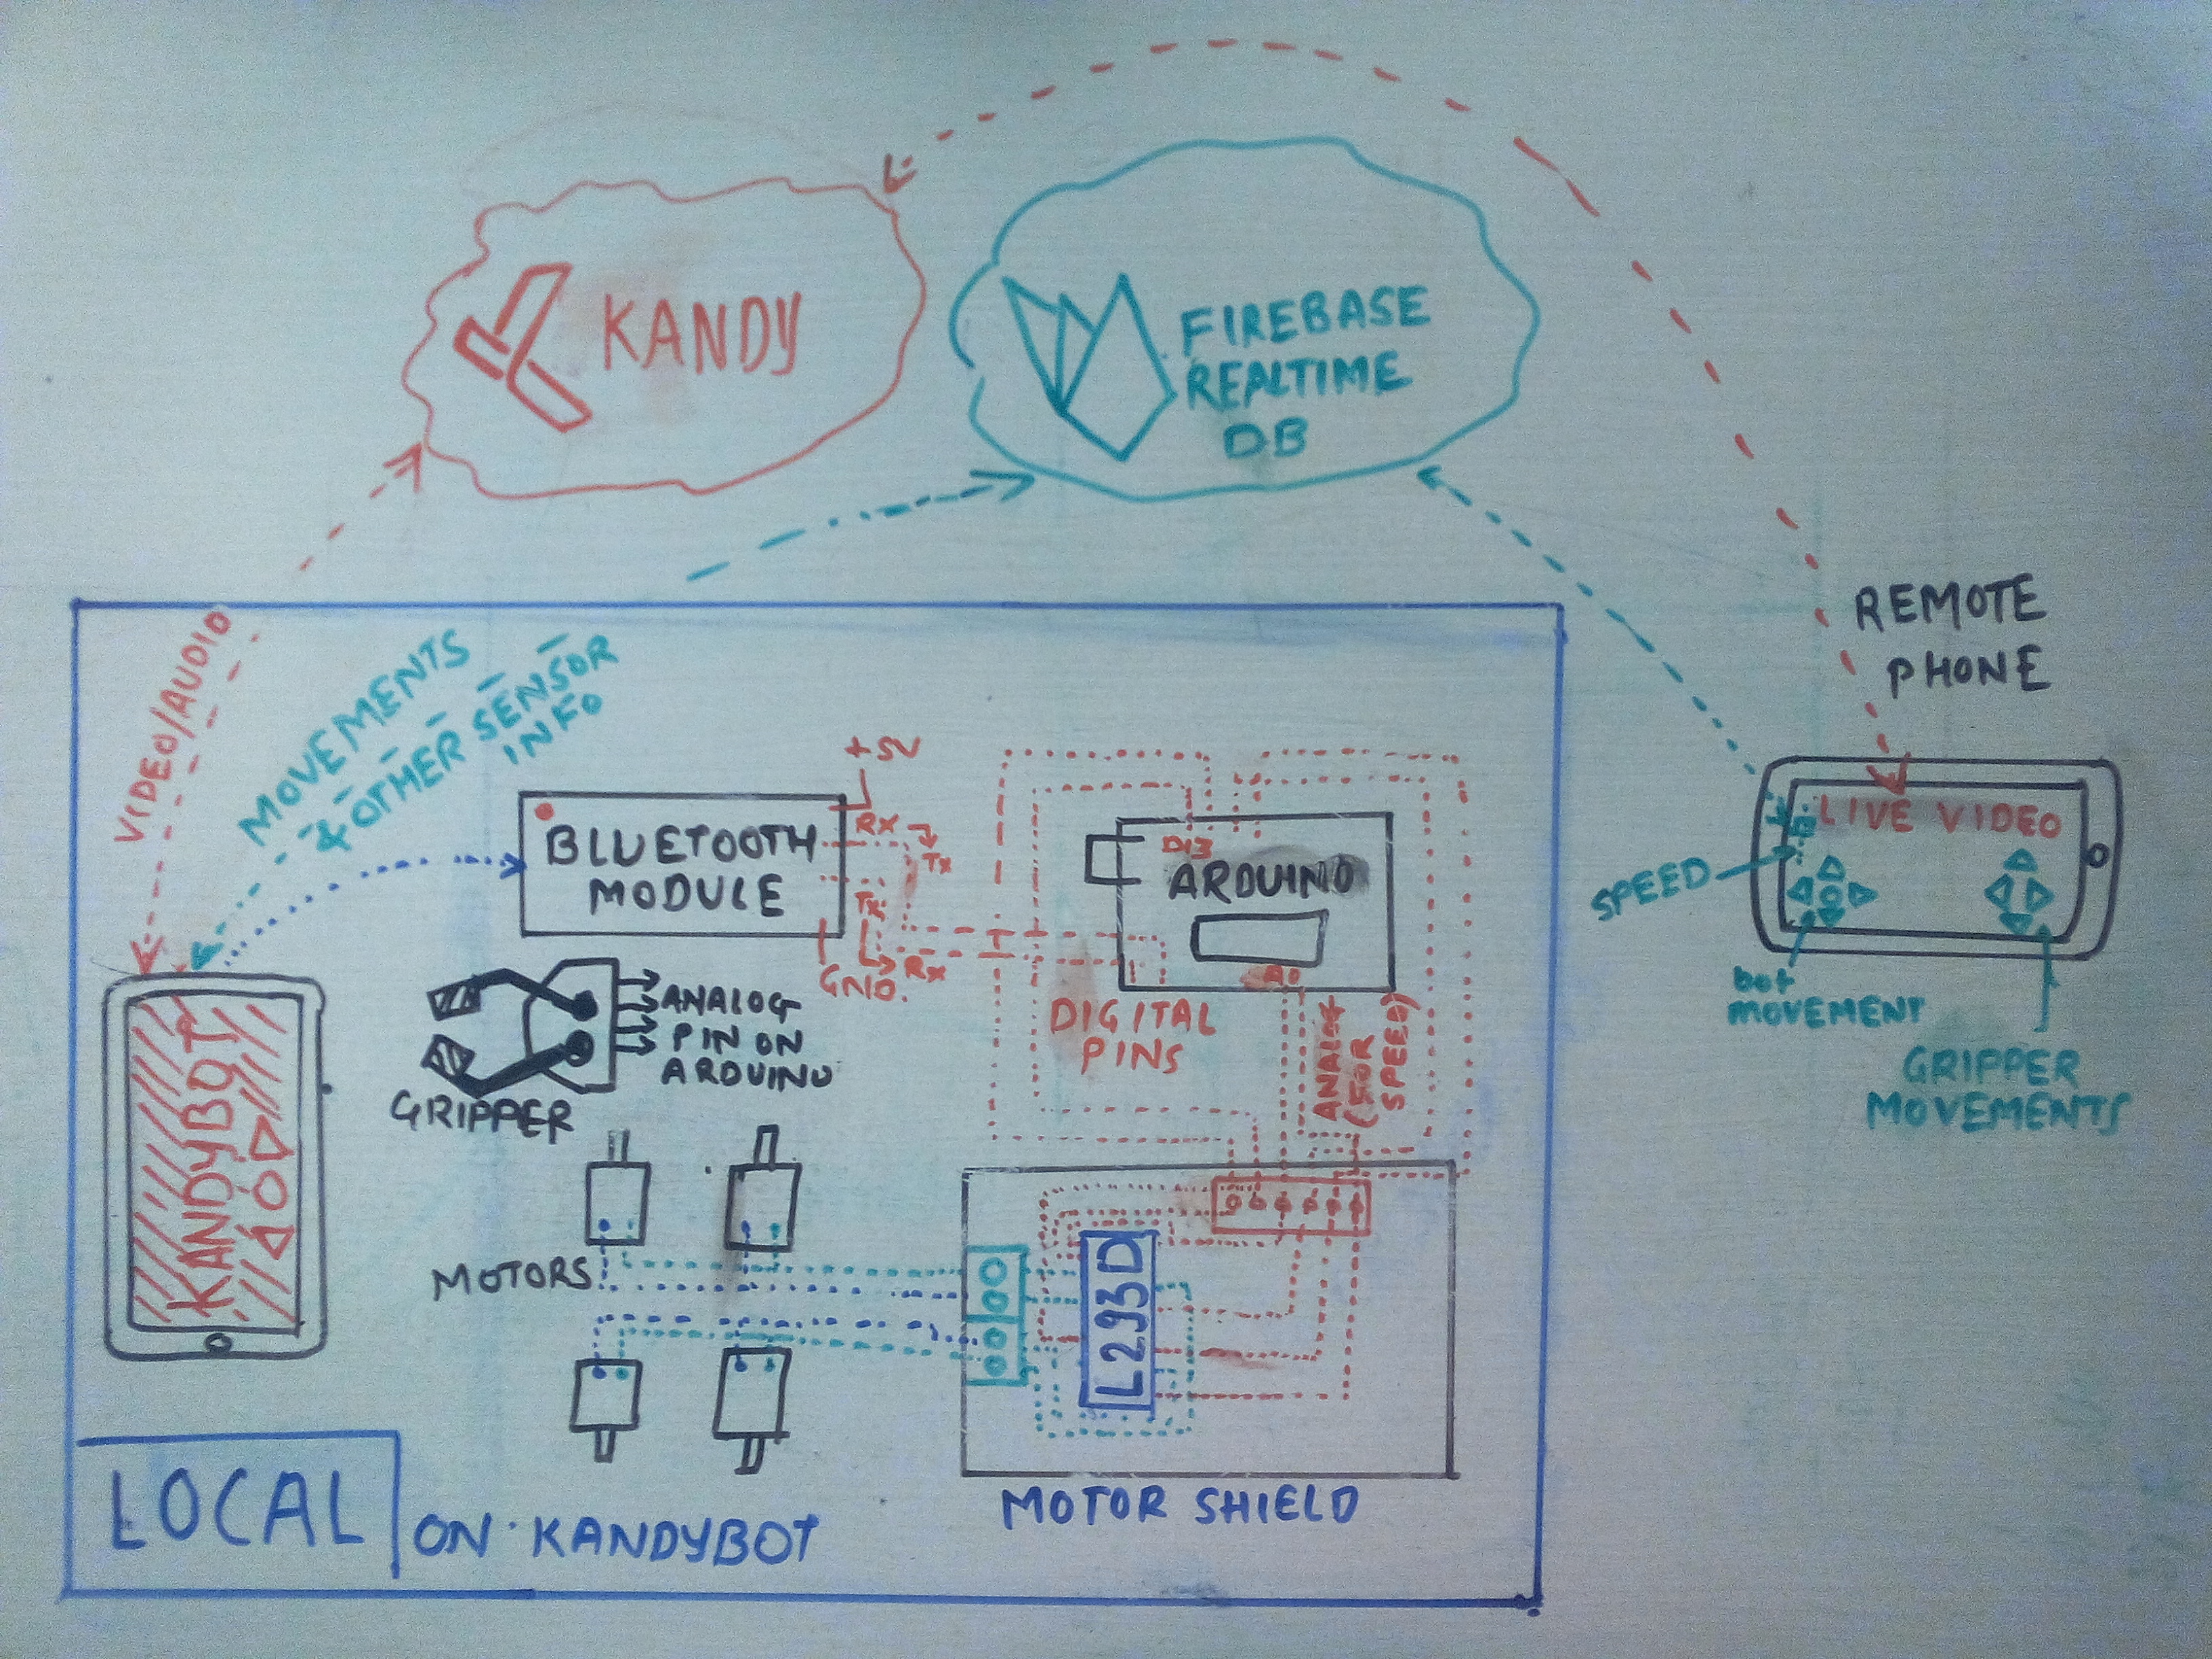
How does it work?There are two main things we need to make an Internet-controlled robot. First is to control the robot movements and gripper in real-time; second is to transmit video from the Kandybot to the Internet. To control the movements of bot in real-time, we are using Firebase Realtime Database. And to transmit livestream video, we are using Kandy.io.
We are using two Android phones both are connected to Kandy.io and Firebase. One phone is directly installed onto the robot's head (let's call it "Kandy mobile"), and the other is used as a controller which can be used anywhere by virtue of being connected to the Internet (let's call it "Controller Mobile").
Suppose the user presses the forward movement button, the message will be sent to the Firebase Realtime Database. Kandy mobile is also connected to this database, therefore it will know the user pressed the forward movement button. Kandy mobile will control the movement by sending a Bluetooth message to the Arduino. After receiving the message from Bluetooth, the Arduino controls the motors.
Note: We can directly connect Kandy Mobile with the Arduino using serial connection, but I used Bluetooth so that I can control the bot without using the Internet at home.
Designing the modelI used Google Sketchup for designing. It's simple and easy to use. Also, you can make a model for 3D printing. I don't have a 3D printer so I hand cut everything. I also attach the file.
Building modelI used acrylic sheets to build the model.
Attaching Electronics1) Connect the Motor Shield to the first Arduino.
2) Solder the A0-A5 pins onto the Motor Shield shown in pic.
3) Connect the A0-A5 pins of the Motor Shield to the A0-A5 pins of the second Arduino.
4) Connect the HC-05 Bluetooth Module to the second Arduino:
- VCC => VCC
- GND => GND
- TX => RX
- RX => TX
5) Connect the wheel motors and Servo motors from the head and hand to the Motor Shield.
6) Just attach the electronics to Kandybot.
7) Connect the LiPo Battery.
8) Upload the code in the Arduino program and install the APKs in the two Android phones with the Internet.
Done.
TestingTouch upInstead of painting the Kandybot, I used velvet paper and black tape.
Done!


_ztBMuBhMHo.jpg?auto=compress%2Cformat&w=48&h=48&fit=fill&bg=ffffff)


Comments
Please log in or sign up to comment.