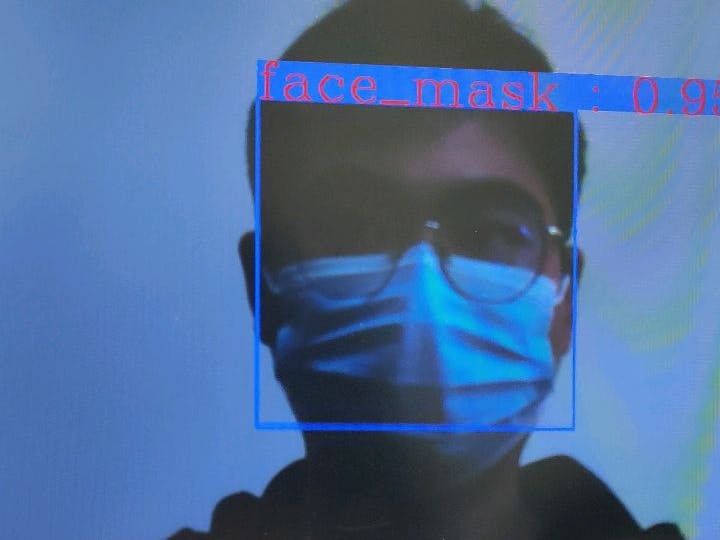
Xilinx provides Vitis™ Video Analytics SDK, which we can use to run our own object detection. We will show how to train your custom dataset using yolov4-tiny and run it on the KV260.
Make sure you have the following work-ready:
- Install the smart camera application: https://xilinx.github.io/kria-apps-docs/main/build/html/docs/smartcamera/docs/app_deployment.html
- Install Vitis AI: https://github.com/Xilinx/Vitis-AI (release 1.4)
a. git clone https://github.com/XiongDa0001/yolov4-tiny-keras
b. make a dataset in VOC format
c. run voc_annotation.py get 2007_train.txt and 2007_val.txt for training
d. modify the content in the classes_path to include content that you detect
e. install tensorflow-gpu==1.13.1 and Cuda 10.0 or 10.1
For more training procedures, please refer to https://github.com/bubbliiiing/yolov4-tiny-keras
2. convert h5 to pbOur code provides a conversion script keras2pb.py.
You should revise the variables as follows:
a. specify input_model
b. specify output_model
c. specify num_class
Then you will get the freeze pb file.
3. Model quantizationThis project uses Vitis-AI 1.4. Start by getting into the docker environment,Then
conda activate vitis-ai-tensorflow.
Before quantizing, you can use the following command to view the input and output nodes of the mode
vai_q_tensorflow inspect --input_frozen_graph=~.pbQuantization needs to be prepared as follows:
The input_fn.py is as follows:
from PIL import Image
import numpy as np


def letterbox_image(image, size):
    '''resize image with unchanged aspect ratio using padding'''
    iw, ih = image.size
    w, h = size
    scale = min(w/iw, h/ih)
    nw = int(iw*scale)
    nh = int(ih*scale)

    image = image.resize((nw,nh), Image.BICUBIC)
    new_image = Image.new('RGB', size, (128,128,128))
    new_image.paste(image, ((w-nw)//2, (h-nh)//2))
    return new_image

#image = Image.open(img_path)

def preprocessing_fn(image, model_image_size=(416,416)):
    if model_image_size != (None, None):
        assert model_image_size[0]%32 == 0, 'Multiples of 32 required'
        assert model_image_size[1]%32 == 0, 'Multiples of 32 required'
        boxed_image = letterbox_image(image, tuple(reversed(model_image_size)))
    else:
        new_image_size = (image.width - (image.width % 32), image.height - (image.height % 32))
        boxed_image = letterbox_image(image, new_image_size)
    image_data = np.array(boxed_image, dtype='float32')
    image_data /= 255.
    return image_data

calib_image_dir = "calibrate_images"
calib_image_list = "calibrate.txt"
calib_batch_size = 8
def calib_input(iter):
  images = []
  line = open(calib_image_list).readlines()
  for index in range(0, calib_batch_size):
    curline = line[iter * calib_batch_size + index]
    image_name = curline.strip()
    image = Image.open(image_name)
    image = preprocessing_fn(image)
    images.append(image)
  return {"input_1": images}
We provide get_name.py to get the name of each image.
#!/usr/bin/python
#coding:utf-8
import os
num=0
path_imgs = './calibrate_images'
for files in os.listdir(path_imgs):
    print(files)
    img_path = path_imgs + '/' + files
    num  = num + 1
    with open("./calibrate_images/calibrate.txt", "a") as f:
        f.write(str(img_path) + '\n')
Create a ''quantized'' folder to hold the quantized files
* The next step is to quantize the model.
vai_q_tensorflow quantize \
     --input_frozen_graph ./yolov4-tiny-voc.pb \
     --input_nodes input_1 \
     --input_shapes ?,416,416,3 \
     --output_dir ./quantize \
     --output_nodes conv2d_21/BiasAdd,conv2d_24/BiasAdd \
     --input_fn input_fn.calib_input \
     --calib_iter 25
calibrate_images number = calib_iter * calib_batch_size
Then you will get quantize_eval_model.pb under the quantized folder
4. Compiling the modelThe common options for VAI_C are illustrated as follows.
--arch: DPU architecture configuration file for VAI_C compiler in JSON format. It contains the dedicated options for cloud and edge DPU during compilation.
You need to create arch.json file as follows:
{
    "target": "DPUCZDX8G_ISA0_B3136_MAX_BG2"
}- --frozen_pb: Quantized file(quantize_eval_model.pb)
- --output-dir: The folder where the compiled output is store
- --net_name: Name of DPU kernel for network model after compiled by VAI_C
Sometimes, a T ensorFlow model does not contain input tensor shape information, causing compilation to fail. You can use
--options '{"input_shape":"1, 224, 224, 3"}' specify the input tensor shape.
Create a ''compile'' folder to hold the quantized files
Use the following command to obtain the xmodel file
vai_c_tensorflow \
    --f ./quantize14/quantize_eval_model.pb \
    --a   kv260arch_B3136.json \
    --output_dir compile \
    --n   mask_detection \
--options '{"input_shape": "1,224,224,3"}'We need to prepare the following files which are in my github https://github.com/XiongDa0001/yolov4-tiny-keras
├─face_mask
	|_____aiinference.json
	|_____drawresult.json
	|_____preprocess.json
└─mask-detection-yolo4-tiny
	|_____mask-detection-yolo4-tiny.prototxt
	|_____mask-detection-yolo4-tiny.xmodel
	|_____label.json
Put the "face_mask" folder in the /opt/xilinx/share/ivas/smartcam folder
at the same time, put the "mask-detection-yolo4-tiny " in the /opt/xilinx/share/ivas/vitis_ai_library/models/kv260-smartcam folder
6. Run the modelsudo xmutil unloadapp
sudo xmutil loadapp kv260-smartcam
sudo smartcam --mipi -W 1920 -H 1080 --target dp -a face_maskHere is a demonstration of a running example


Comments
Please log in or sign up to comment.