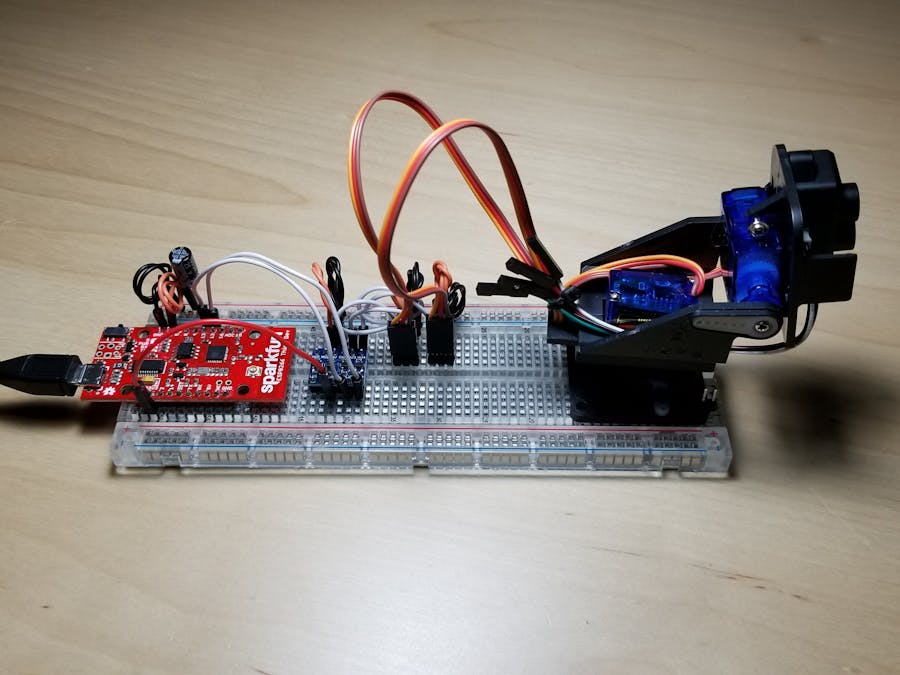
Overview
Update Arduino IDE with Blynk library
Add Blynk app to phone
Download the Arduino programs
Read more- This project uses Blynk and Servo libraries. The servo library is already part of Arduino IDE. You will need to download the Blynk library to Arduino IDE and the Blynk App to your phone. Blynk is free for small projects.
- It is assumed you have some knowledge with Arduino IDE and ESP8266
- A bi-directional 3.3v-5.0v logic level converter is needed for the servo signal pins. The ESP8266 runs at 3.3 volts, while the servo motors require 5 volts. The 5 volts comes from VIN, which is the USB power.
- You need an assembled mini pan-tilt camera mount (like Ximimark), or similar. See my previous project on how to assemble the mount.
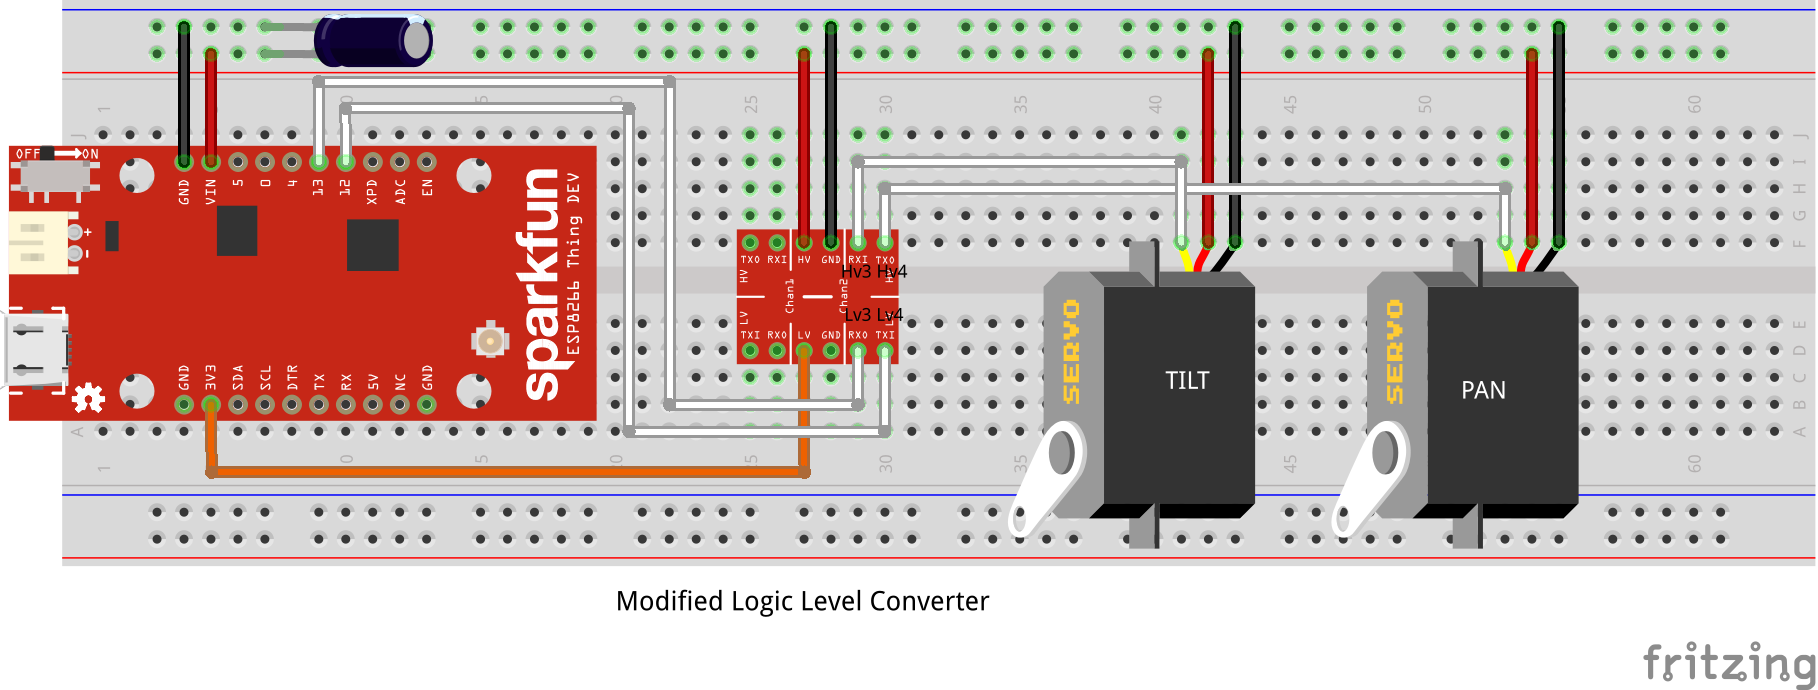
There is a Fritzing diagram you can download in addition to the pictures below.
- Secure the pan-tilt mount to the motherboard with long male breakaway headers. Use 2 pins per corner, secure at lease 2 corners.
Secure the camera mount
- Wire up the logic level converter. Be mindful of the low and high voltage sides.
Logic Level Converter Wiring
- Add power and ground to the servos. Add the 1000uf capacitor (for stable power to servos).
Servo Power Wiring
- Start Arduino
- Go to Manage Libraries
Manage Arduino Libraries
- Type in "blynk"
- Find it.
- Click on More Info, then click on "install"
Install Blynk
- Go to your favorite App store
- Search for Blynk
- Click on Install
- See picture below for some tips before you start.
Blynk Primer
- Start the Blynk app.
- Tap to add a new project.
- Type in project name, Select ESP8266 device. Select WiFi connection type. Tap create. Blynk will send you an Auth Key which you will need for the Arduino program.
- After you tap Create (project), you will be in the "Joystick Project".
- Tap the + at the top right for the widget menu.
- Select the joystick widget.
Add joystick widget to project
- You will be back at the project screen
- Tap the joystick widget to configure
- Select Virtual Pins V0 & V1
- Edit the ranges as shown in the picture below
- Tap <- to return to the Joystick project.
- The project is ready to run, but we still need to add and configure the Arduino program(s).
Configure joystick
- Download/copy the 2 arduino programs; the interactive_servo and the blynk_joystick programs.
- Edit and save the blynk_joystick program. Add your WiFi SSID and password. Add the Blynk auth key that was emailed to you when you created the Blynk joystick project.
The interactive_servo is a good first test to verify your breadboard buildout. The test only tests 1 servo, the servo connected to pin 12. You can plug in different servos for testing.
- Start Arduino IDE
- Select the interactive_servo test.
- Select SparkFun ESP8266 Thing Dev, or similar ESP8266 device.
- Select your Port
- Click on Serial Monitor
- Compile and download the test to the ESP8266 Thing.
- Type in a value between 0 and 180 in the Serial Monitor and hit Enter/Send. The servo should move. Test the range of the servo, which is usually more that 0 and less than 180.
The blynk_joystick should be updated with your ssid, password, and auth key.
- From the Arduino IDE, select the blynk_joystick test.
- Select SparkFun ESP8266 Thing Dev, or similar ESP8266 device.
- Select your Port
- Click on Serial Monitor
- Compile and download the test to the ESP8266 Thing.
- On your cell phone, select the Blynk Joystick project, and tap the run icon (upper right).
- Move the joystick on your cell phone and the pan-tilt mount should move, and you should see the servo commands on the Serial Monitor.
- If nothing works: a) retest with the interactive_servo program, b) recheck your SSID, PASSWORD, and AUTH KEY.
- Good luck! :-)


_3u05Tpwasz.png?auto=compress%2Cformat&w=40&h=40&fit=fillmax&bg=fff&dpr=2)
Comments
Please log in or sign up to comment.