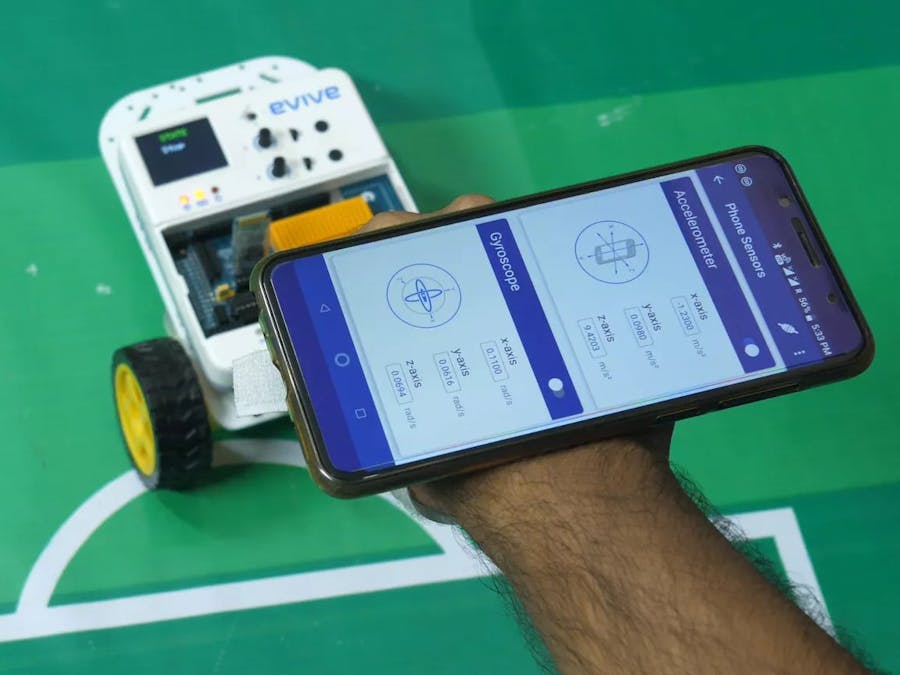
Controlling robots with conventional controllers, be it handheld or a virtual one in your Smartphone, has become too mainstream. How about we go a step (or maybe two?) forward and use something different, such as hand gestures? Sounds interesting? Well, that’s settled then! We’re going to control our robot using a Smartphone; not by tapping some buttons but by moving our hand! How in the world is it even possible, you ask? With the help of PictoBlox, our amicable graphical programming software, and Dabble our state-of-the-art project-making mobile application.
Download PictoBlox from HERE and get Dabble on Play Store! Ready to let gestures take the control?
Let’s begin!
Step 1: Shopping CartHardware:
- HC05 Bluetooth Module
- DC Motors
- Wheels
- Motor Mounts
- Caster Wheels
- Nuts and Bolts
- Jumper Cable
Software/ Application:
All the above Components can be found in the STEMpedia Starter Package.
Step 2: Making of the RobotAs I want to control something through the gestures of my hands. I will make a basic 2- wheel drive robot using evive.
Let's assemble it first.
Take the base plate and attach two motor mounts on it. Onto the mounts, mount the DC Motor.
Attach wheels to the DC Motor.
You need a minimum of three supports for any vehicle to stand still. Thus, we need to add the third support, which is the caster wheel.
Attach it as shown in the above figure.
Step 3: Completing the Assembly of the RobotOnce done, attach evive on top of using M3 nuts and bolts as shown in the figure.
Attach the Bluetooth Module on top of it so that the robot can communicate with your Smartphone.
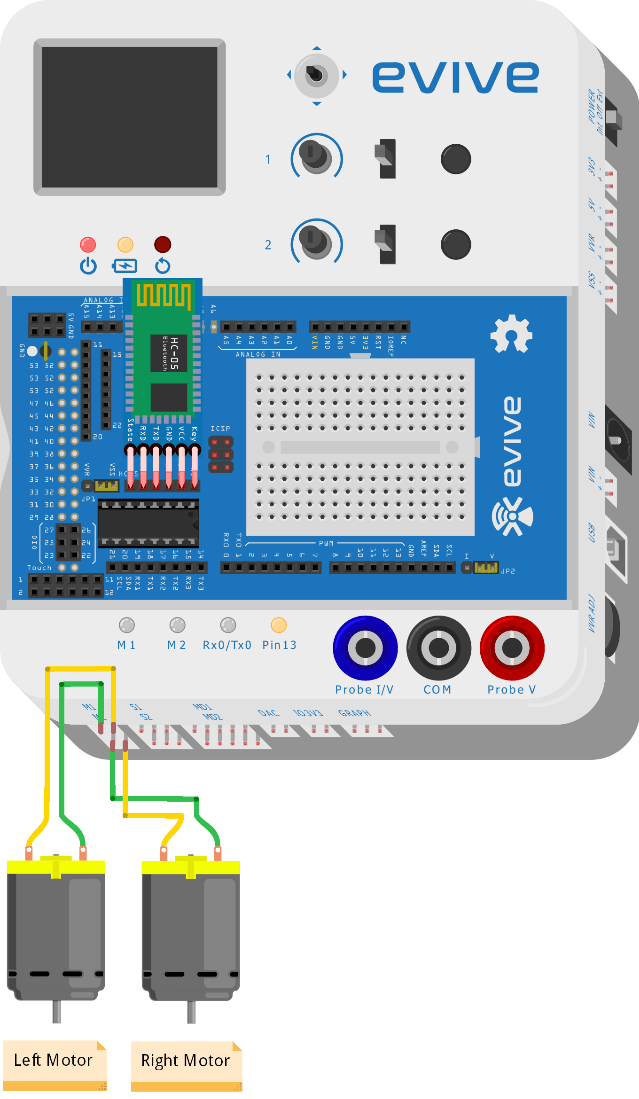
Make the connections as shown:
Connect the Bluetooth Module to the Bluetooth Holder Pin and the DC Motors to Motor Channel M1 and M2 of evive.
PictoBlox is a graphical programming software based on Scratch 3.0 that makes learning how to code easy and fun. It allows you to interface and control evive with your computer and even uploads code to it.
You can download PictoBlox from here.
Upload the following script to evive:
Firstly, open Dabble in your Smartphone. Then, connect Bluetooth. Select the Phone Sensor module.
You will find a number of sensors in this module like the accelerometer, gyroscope, magnetometer, proximity meter, light meter, sound meter, location, temperature, and barometer. You will also notice that these sensors are showing values of the quantities they measure. In this project, we are going to use the accelerometer. Toggle the switch corresponding to it. In doing so, the data that is being measured is sent to evive which is connected to your car.
When we tilt the phone either forward or backward, acceleration along the X-axis changes. If the acceleration along X-axis goes above 3 m/s2, then the robot will move in the forward direction. If it goes below -3 m/s2, then the robot moves in the backward direction.
If we tilt the phone either left or right, acceleration along the Y-axis changes. If the acceleration along Y-axis goes above 3 m/s2, then the robot moves in the left direction. If goes below -3 m/s2, then the robot will move in the right direction.
If the acceleration along both the axes i.e X-axis and the Y-axis is between -3 m/s2 and 3 m/s2, then robot does not move.
Step 7: ConclusionWith this, your robot is all set to catch the slightest of your gestures and report to you!
PS. Our Indiegogo campaign, which we decided to extend owing to the wonderful response, is going to end soon! So, if you haven’t had the time to have look till now, go check it out NOW!


_wzec989qrF.jpg?auto=compress%2Cformat&w=48&h=48&fit=fill&bg=ffffff)


Comments