


Hardware components | ||||||
| × | 1 | ||||
| × | 1 | ||||
 |
| × | 1 | |||
 |
| × | 1 | |||
| × | 1 | ||||
Software apps and online services | ||||||
 |
| |||||
| ||||||
Hand tools and fabrication machines | ||||||
 |
| |||||
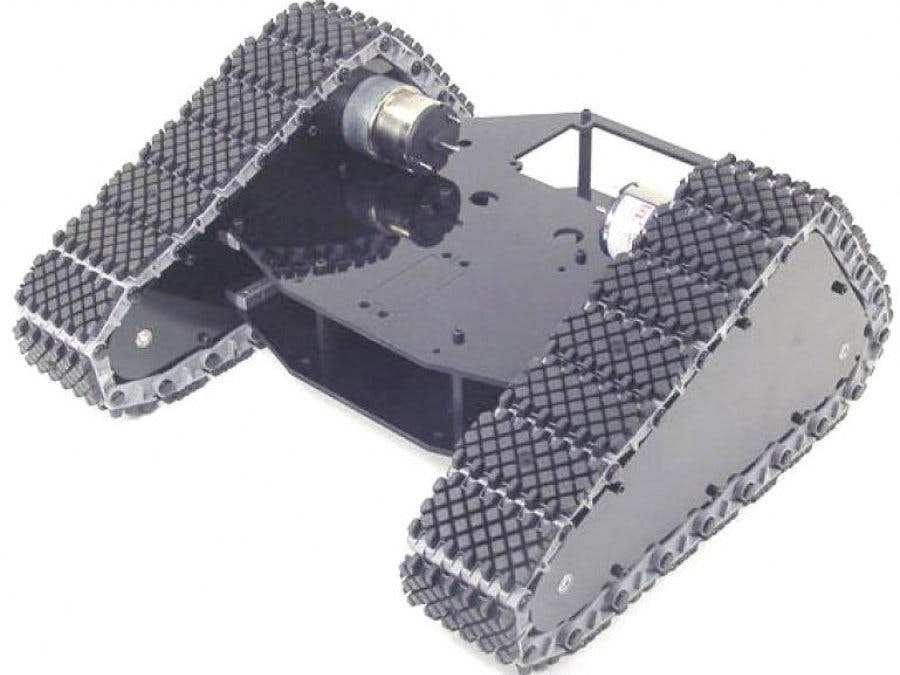
Well I had an idea to making a large robot so because I have never controlled motors before I just had to start small. This simple project is made to just be a proof of concept for me alone.
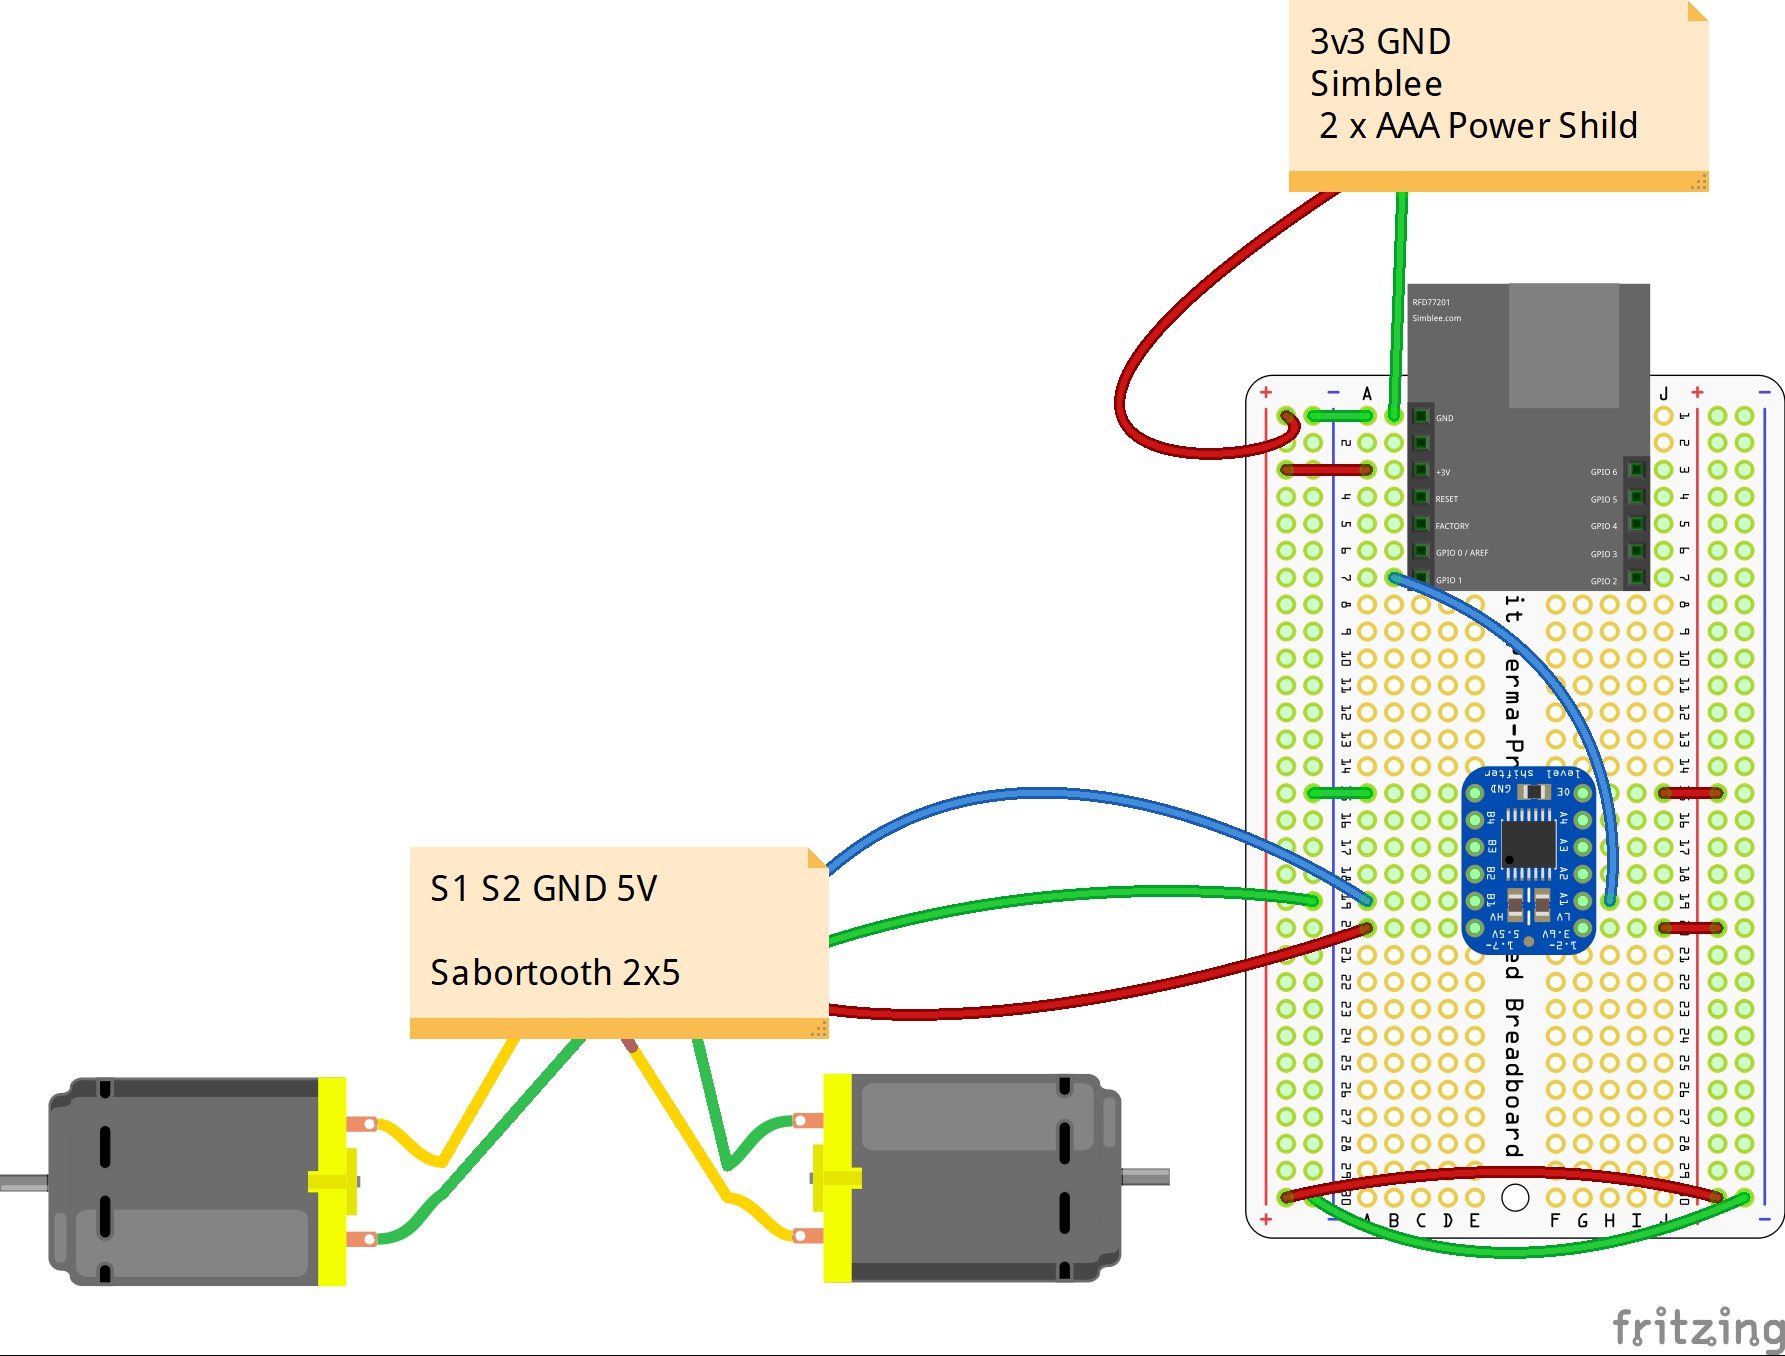
In this project I am using a simblee micro controller for my communication. A Level Shifter for the TX(pin 1 on the Simblee) to S1 communication to the simblee and the Sabortooth. If I did not uses this Level Shifter I would have blue smoke of death. 3.3v does not mix well with 5v.
Where to find the libraryhttps://www.dimensionengineering.com/info/arduino
The Sabortooth motor controllerI like using the Sabortooth motor controller because I like to uses serial communion. PWM (Pulse-width modulation) is good and I could uses it but I like simple.
This is the link you need to start with Sabortooth. https://www.dimensionengineering.com/datasheets/Sabertooth2x5.pdf
The soldering of the TXB0104 with is the level shifter I uses because when using a 3.3v logic level to a 5v logic level things just don't jive together. The soldering is very straight forwarded place on bread board and solder away just don't let the iron be there to long else you will damage the break out board.
On the TXB0104 the pins B1 - B4 and A1 - A4 are the TX or RX commutations don't matter if you put the TX or RX because it is bi-directional. You do have a high voltage side with is for your 5v reference and a low voltage side 1.5v to 3.3v reference. There is also a pin that is the OE pin if this pin is HIGH then the TXB0104 is ON if this pin goes to ground then the board is OFF. Then you have your ground pin.
Here is the link to the TXB0104 datasheet.
https://cdn-shop.adafruit.com/datasheets/txb0104.pdf
The GUI for the project#include <SimbleeForMobile.h>
#include <SabertoothSimplified.h>
SabertoothSimplified ST;
uint8_t ui_button[4];
The #INCLUDE are SimbleeForMobile that give you to ability to communicate with the phone. It also has the way to make the GUI for the Phone.
The SabertoothSimplified give you away to communicate with the sabertooth motor controller by serial using the default serial pins on your device.
The SabertoothSimplified ST; this is calling a instants of a class "ST" (this can be name what ever you like.) with this is the foundation of the commutation to the sabortooth. And instants is just a object that is held in a variable. This give you when you call this later on in the code to make it drive and turn.
The type is called uint8_t with a variable name ui_button[4]; this is a array of 4 buttons from 0-3 in the array. This array is a unsigned integer of 8 bits that hold all the buttons.
void setup() {
SabertoothTXPinSerial.begin(9600);
ST.drive(0);
ST.turn(0);
// put your setup code here, to run once:
 SimbleeForMobile.deviceName = "Robot";
 SimbleeForMobile.advertisementData = "tank";
SimbleeForMobile.domain = "tank.simblee.com";
// Begin Simblee UI
SimbleeForMobile.begin();
}
In the Void setup() there is only three different things going on and that is the
SabertoothTXPinSerial.begin(9600); that set the communication speed from the serial of the Simblee and or the Arduino to the Sabertooth.
ST.drive(0); and ST.turn(0); The Sabertooth won't act on mixed mode until it has received power levels for BOTH throttle and turning, since it mixes the two together to get diff-drive power levels for both motors. So, we set both to zero initially.
 void loop() {
 // put your main code here, to run repeatedly:
 // process must be called in the loop for Simblee UI
 SimbleeForMobile.process();
}
The Void loop() only have the SimbleeForMobile.Process called that makes the simblee for mobile to work.
void ui()
{
 SimbleeForMobile.beginScreen();
 SimbleeForMobile.beginScreen(WHITE);
 //SimbleeForMobile.drawText(90,230, "", BLUE, 50);
 ui_button[0] = SimbleeForMobile.drawButton(100,300,85,"FOWARD");
 ui_button[1] = SimbleeForMobile.drawButton(30,350,85,"LEFT");
 ui_button[2] = SimbleeForMobile.drawButton(175,350,85,"RIGHT");
 ui_button[3] = SimbleeForMobile.drawButton(100,400,85,"REVERSE");
    SimbleeForMobile.setEvents(ui_button[0], EVENT_PRESS | EVENT_RELEASE);
    SimbleeForMobile.setEvents(ui_button[1], EVENT_PRESS | EVENT_RELEASE);
    SimbleeForMobile.setEvents(ui_button[2], EVENT_PRESS | EVENT_RELEASE);
    SimbleeForMobile.setEvents(ui_button[3], EVENT_PRESS | EVENT_RELEASE);
 SimbleeForMobile.endScreen();
}
The Void ui() this is the code that give the GUI that you have seen.
void forward(){
 ST.drive(127);
}
void revirce(){
 ST.drive(-127);
}
void lift(){
 ST.turn(127);
}
void right(){
 ST.turn(-127);
}
void turnstop(){
 ST.turn(0);
}
void fstop(){
 ST.drive(0);
}
The Voidforward(), revirce(), lift(), right(), turnstop(), and fstop(), this is the main workers of the code this is what makes the Robot move. the Drive and turn functions can go to a value of -127 to 127 on the Sabortooth. 0 is stop on both turn and drive.
void ui_event(event_t &event)
{
 if (event.id == ui_button[0]){
  if (event.type == EVENT_PRESS){
   forward();
  }
 }
  if (event.id == ui_button[0]){
  if (event.type == EVENT_RELEASE){
   fstop();
   }
  }
  if (event.id == ui_button[1]){
  if (event.type == EVENT_PRESS){
   lift();
  }
 }
  if (event.id == ui_button[1]){
  if (event.type == EVENT_RELEASE){
   turnstop();
   }
  }
  if (event.id == ui_button[2]){
  if (event.type == EVENT_PRESS){
   right();
  }
 }
 if (event.id == ui_button[2]){
  if (event.type == EVENT_RELEASE){
   turnstop();
   }
  }
 if (event.id == ui_button[3]){
  if (event.type == EVENT_PRESS){
   revirce();
  }
 }
 if (event.id == ui_button[3]){
  if (event.type == EVENT_RELEASE){
   fstop();
   }
  }
The Void ui_event(event_t &event) is where the device looks for what button is pressed and what event it has throw then it does the function for it button and event.


Comments
Please log in or sign up to comment.