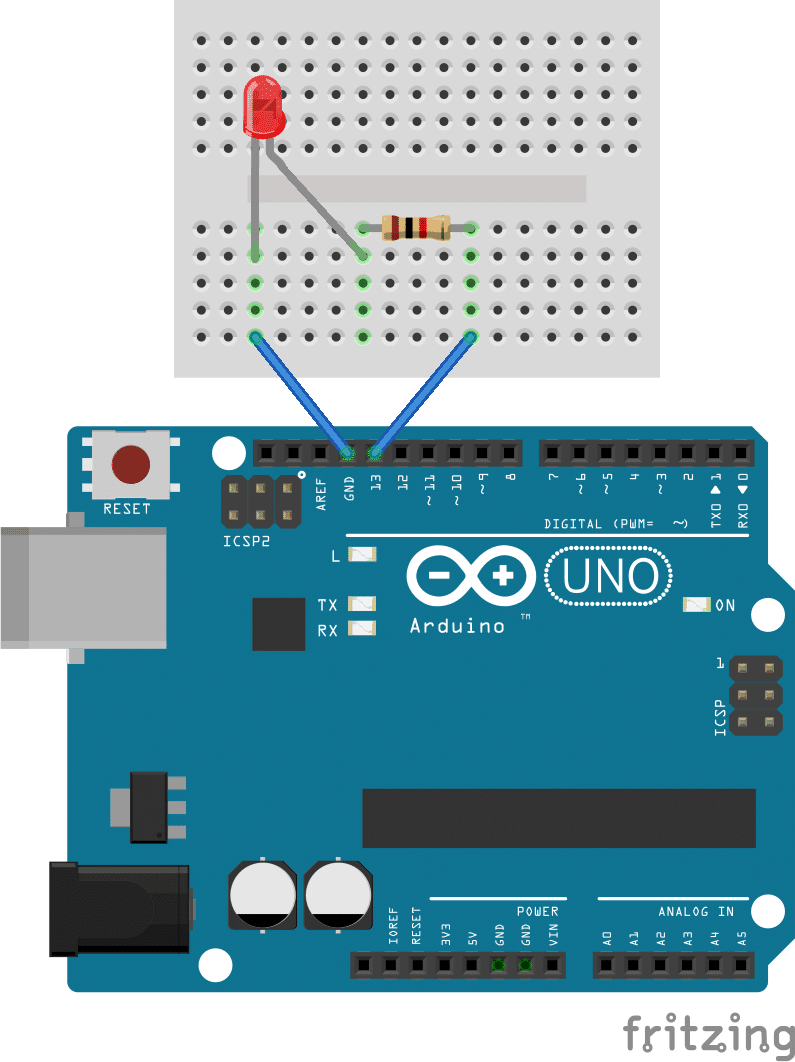
There was an annoying issue when I was testing an LED connected to my Arduino for power. If I wanted to turn the LED on or off, I would have to deal with STRANDED wires in the pin header. The only other way to make this work was to use the Serial Monitor on my computer. I'd instead use a pushbutton to toggle the LED, but I had no buttons.
But I did. The RESET button is a button, after all.
CircuitAll I needed for the circuit was a LED, a resistor (if necessary), and the Arduino.
Once that was all hooked up, I started making the program:
#include <EEPROM.h>
#define LED_PIN 13 // change to the pin of the LED
#define EEPROM_ADDRESS 0
void setup(){
 pinMode(LED_PIN, OUTPUT);
 Serial.begin(9600);
 if (EEPROM.read(EEPROM_ADDRESS) == 0){
   EEPROM.put(EEPROM_ADDRESS, 1);
   digitalWrite(LED_PIN, HIGH);
   Serial.println("LED ON");
 } else {
   EEPROM.put(EEPROM_ADDRESS, 0);
   digitalWrite(LED_PIN, LOW);
   Serial.println("LED OFF");
 }
}
void loop(){}
The code is pretty self-explanatory, and utilizes the built-in EEPROM to keep a value even when reset.
How to useTo turn the LED on or off, press the RESET button.
Be careful, the LED could randomly turn on if the circuit is shorted.
I like to put the LED on a pin other than 13 to avoid flashing on reset:
#define LED_PIN 12 // change to the pin of the LED


_ztBMuBhMHo.jpg?auto=compress%2Cformat&w=48&h=48&fit=fill&bg=ffffff)


Comments
Please log in or sign up to comment.