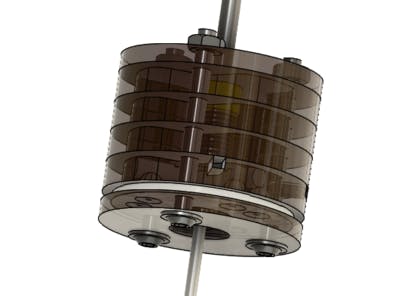
if you like to try a 3d probe with a cheap price, then let us start :)
The component physics design is here:
https://grabcad.com/library/supper-cheap-simple-3d-probe-digitizing-cnc-1
parts Include: the 5mm acrylic, 3mm acrylic, one broken cnc knife, 1.6mm PCB, four bot and nuts 3mm, and AB glue, one spring from a pen or an empty soap dispenser :)
there are two version of the probe, the first version using ball bearing 4.7, the second version using cone-cylinder milling from alumilum, what ever it is, both of them are working, I have tested by my self.
and here is circuit driver for the probe:
explain:
The D1 is protection from wrong polarity.
When the probe doesn't collision to the surface, the P2 short to the GND, the Q1 is close, so there is no current go throung PC817, there is no output from Q3, there is no 5V or GND go thought P3, also Q4 close will make Q2 open too and the LED1 is turn off
when the probe collision something, the P2 is open, so the Q1 open, and GND go throught D2 and opto PC817 will be trigger, so the Q3 will be close, finally, P3 is short to the GND. also when P2 open then Q4 open then Q2 close and trigger the LED1 turn on.
the capacitor 4.7u could be replace as 100n as document of LM7805.
BTW: if you think the circuit is complex, then just craft one by your self with the arduino or Attyni 13, it even cheaper than electric components above.
if you have problem when solder ball bearing or aluminum to the PCB board, i think you could solve it by buying a GOOT-120 or put some wires to the hole then using "hammer" to put cylinder down =))
here is the PCB component placement.
Here is the board in the real world :)
have fun with the toys :D


Comments
Please log in or sign up to comment.