#include <Wire.h>
#include <RTClib.h>
//DP G F E D C B A
const byte segmentMap[10] = {
B00111111, //0
B00000110, //1
B01011011, //2
B01001111, //3
B01100110, //4
B01101101, //5
B01111101, //6
B00000111, //7
B01111111, //8
B01100111 //9
};
RTC_DS3231 rtc;
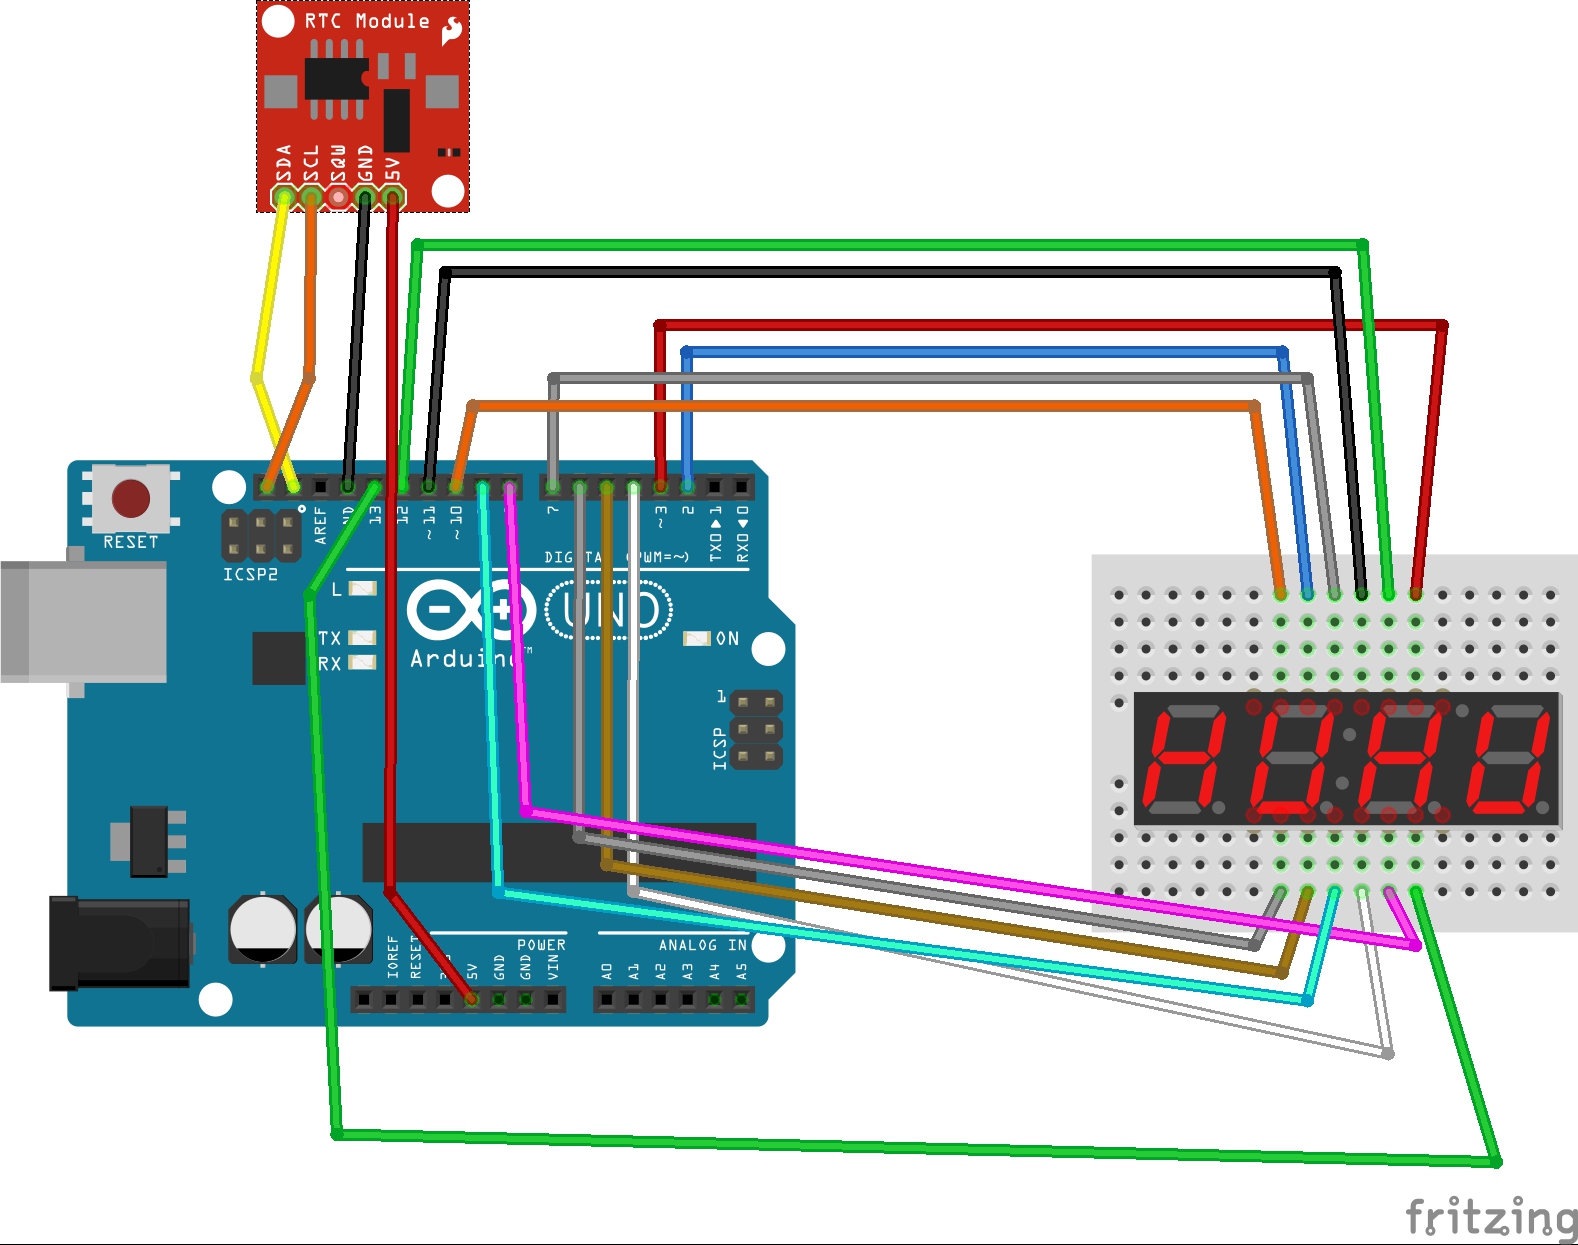
const int segmentPins[8] = {2,3,4,5,6,7,8,9}; // A B C D E F G DP
const int digitPins[4] = {10,11,12,13}; //DIG1 DIG2 DIG3 DIG4
void setup() {
// Set the segment pins as outputs
for (int i=0; i<8; i++) {
pinMode(segmentPins[i], OUTPUT);
digitalWrite(segmentPins[i], LOW);
}
// Set the digit pins as outputs
for (int i=0; i<4; i++) {
pinMode(digitPins[i], OUTPUT);
digitalWrite(digitPins[i], HIGH);
}
if (! rtc.begin()) {
while (1);
}
if (rtc.lostPower()) {
// following line sets the RTC to the date & time this sketch was compiled
rtc.adjust(DateTime(F(__DATE__), F(__TIME__)));
// This line sets the RTC with an explicit date & time, for example to set
// January 21, 2014 at 3am you would call:
// rtc.adjust(DateTime(2014, 1, 21, 3, 0, 0));
}
}
void loop() {
int digits[4];
int hour;
int minute;
DateTime now = rtc.now();
// Convert 24 -> 12 hour
if (now.hour() > 12) {
hour = now.hour() - 12;
} else {
hour = now.hour();
}
minute = now.minute();
// Figure out individual digits
digits[0] = hour / 10;
digits[1] = hour % 10;
digits[2] = minute / 10;
digits[3] = minute % 10;
for (int i=0; i<=3; i++) {
displayNumber(digits[i], i, 5);
}
}
void displayNumber(int number, int digit, int duration) {
if ((number >=0 && number <=9) && (digit >= 0 && digit <=3)) {
// Turn on appropriate digit
digitalWrite(digitPins[digit], LOW);
// Turn on appropriate segments
for (int seg=0; seg<8; seg++) {
digitalWrite(segmentPins[seg], bitRead(segmentMap[number], seg));
}
delay(duration);
// Turn off digit
digitalWrite(digitPins[digit], HIGH);
}
}


_ztBMuBhMHo.jpg?auto=compress%2Cformat&w=48&h=48&fit=fill&bg=ffffff)


Comments
Please log in or sign up to comment.