


Hardware components | ||||||
_ztBMuBhMHo.jpg?auto=compress%2Cformat&w=48&h=48&fit=fill&bg=ffffff) |
| × | 1 | |||
| × | 4 | ||||
| × | 1 | ||||
 |
| × | 1 | |||
Software apps and online services | ||||||
 |
| |||||
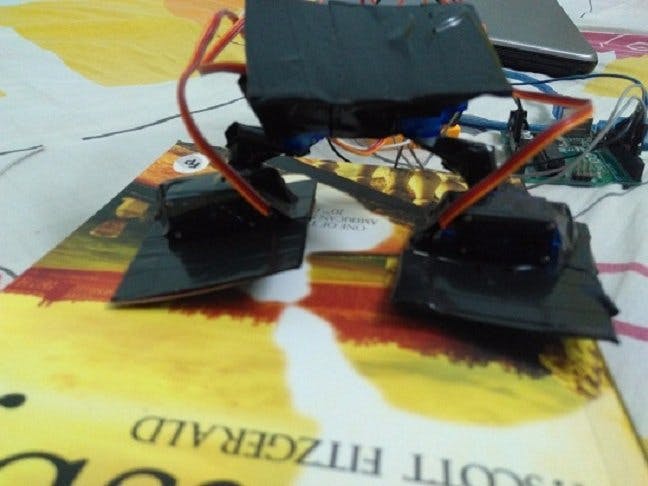
First make two pairs of four micro servos. Attach the two micro servos perpendicular to each other as shown. I used tapes, but using epoxy/glue would give a proper grip to your robo-legs.
Out of this the upper servos will serve as thighs and the lower as foot of the robot.
Attach two cardboard bits on lower servo. This ensures the grip of the body to the robot. And attach the micro servo pair with epoxy/glue, as shown.
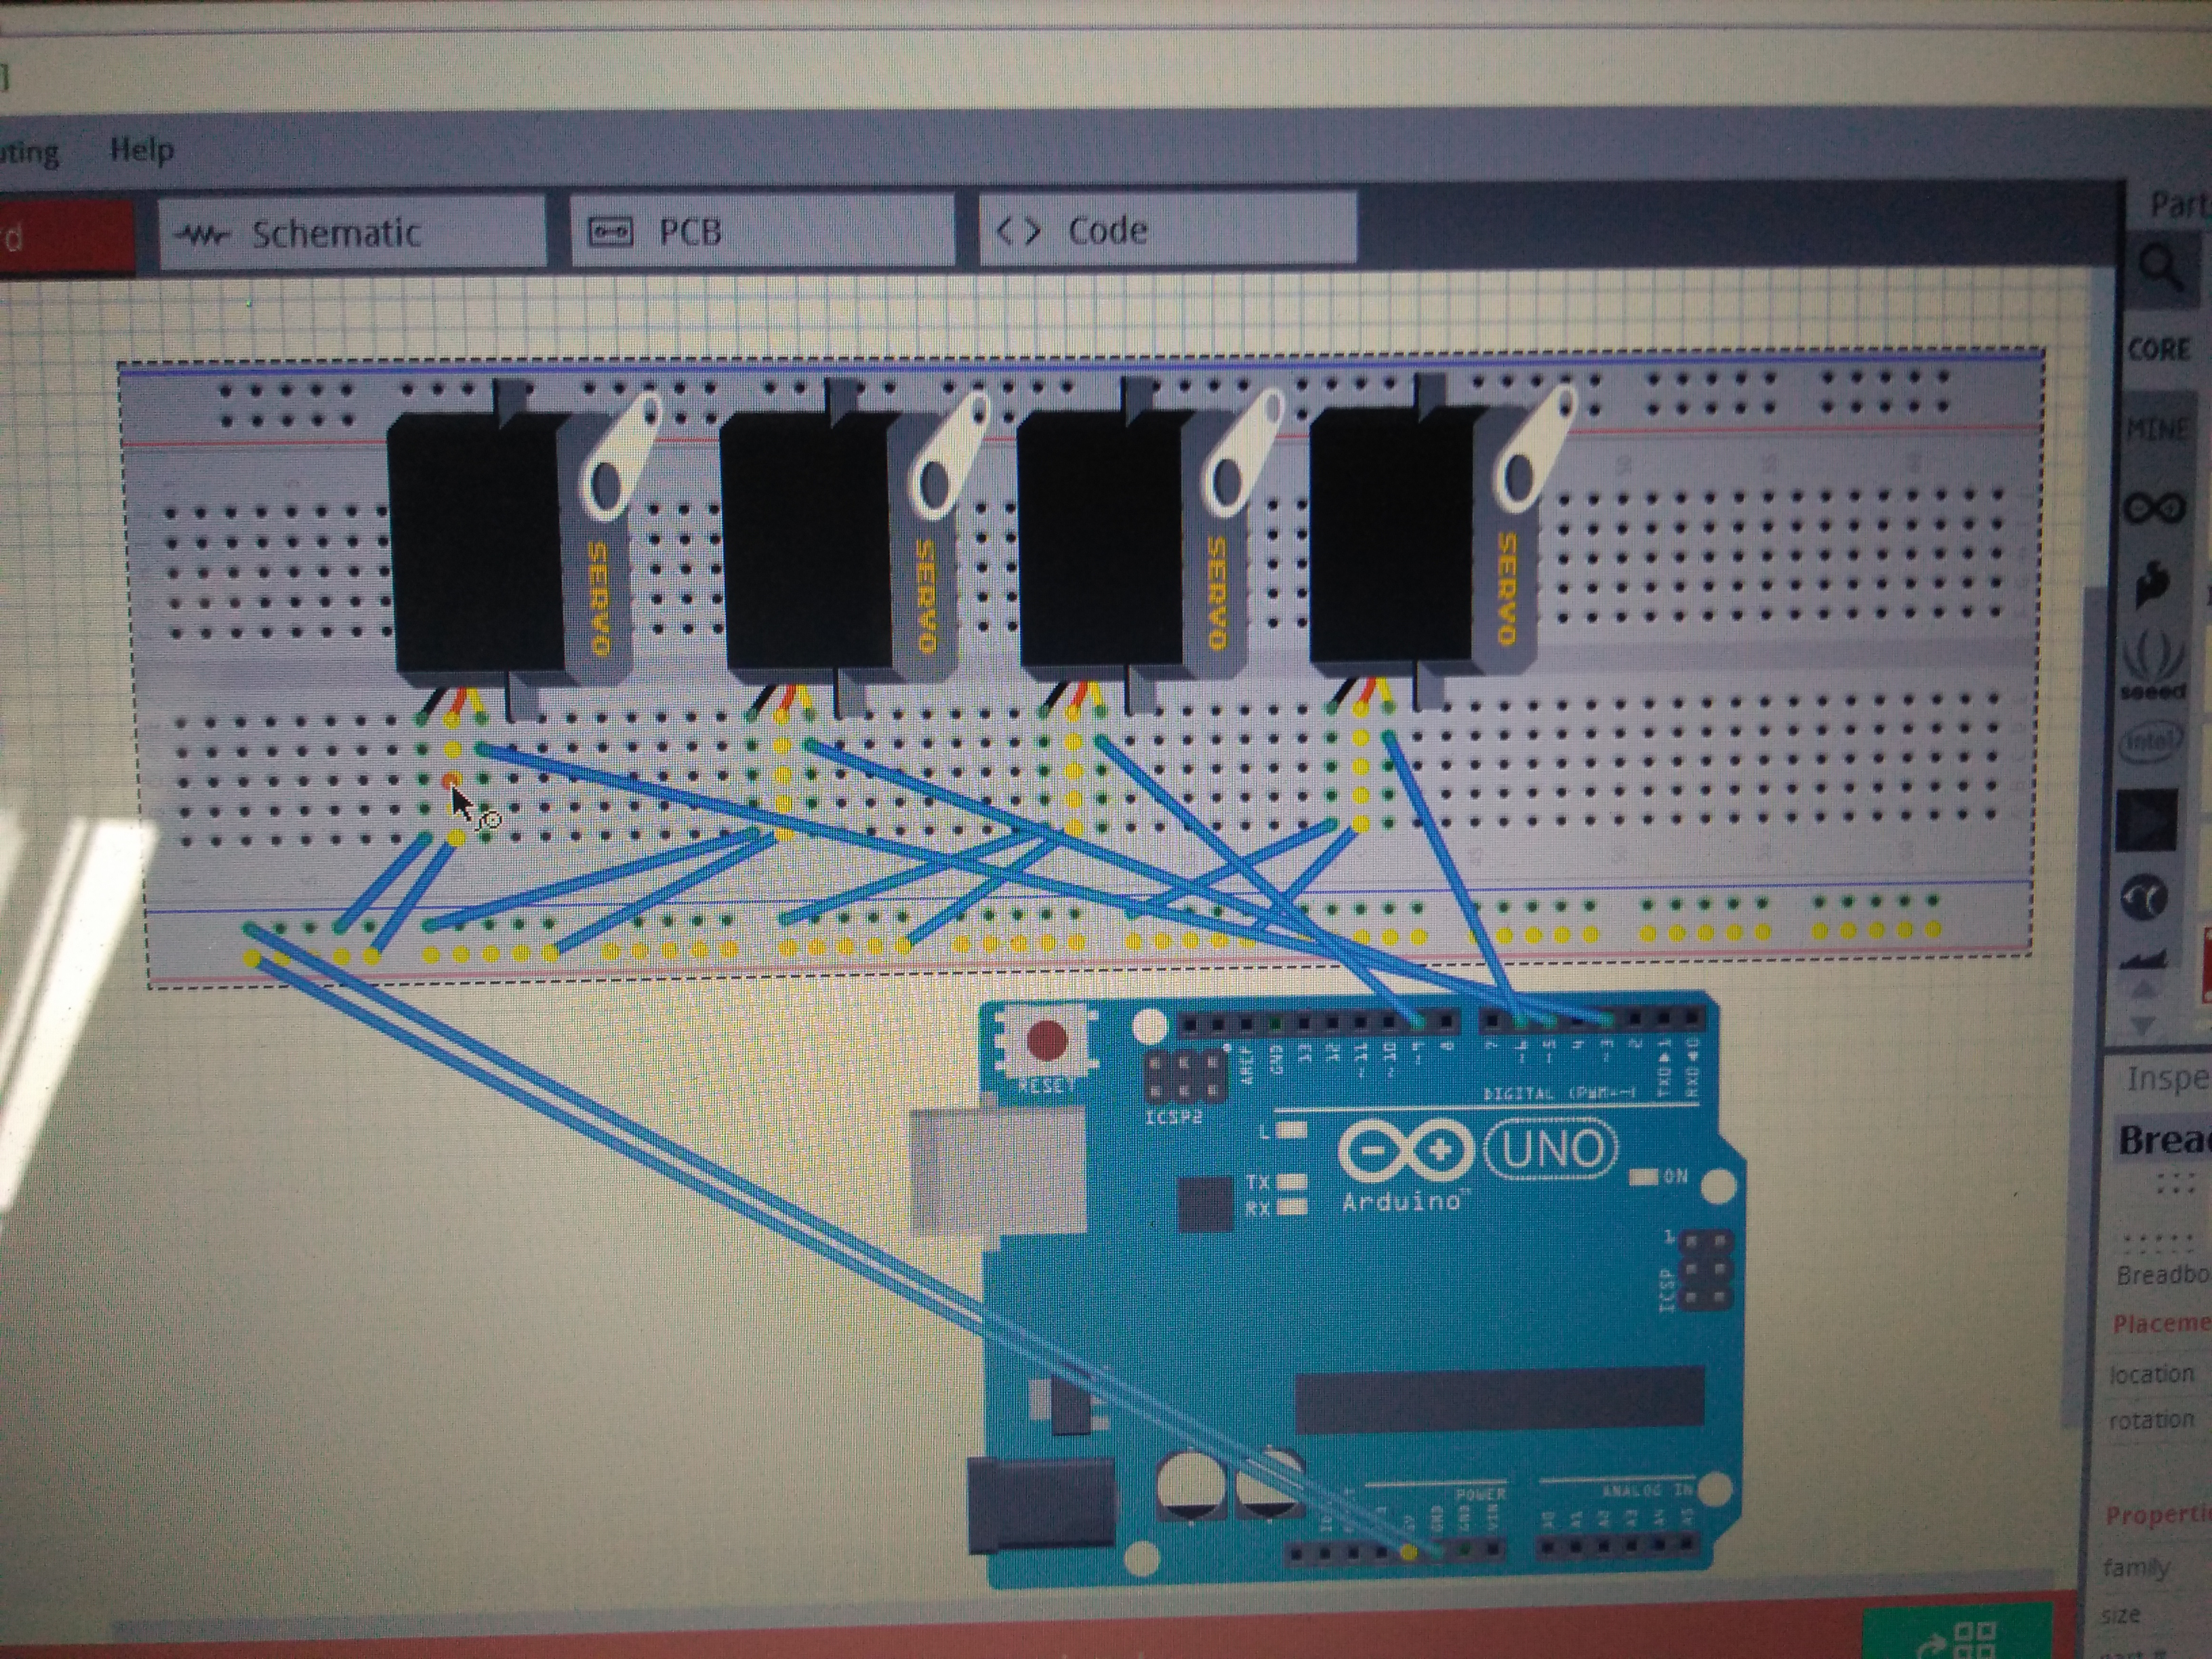
The circuit is pretty simple. Learn the basics of servos from arduino.com or just google it. Well the pin showing a small arrow is the pin which is attached to PWM of Arduino, the middle pin is the pin on which high voltage is given, and the last pin is the one where ground voltage is supplied.
On the mini bread board, give a supply of +5V on one side and GND on the other. Now drag all the wires with GND port to the middle of the servo. Similarly, drag all the +5V wires to the first port of servo. The third part of PWM is to be connected to PWM pins, see the code attached below for reference.
This way attach the micro servo to the breadboard. Make sure you don't get confused between right toe and right thigh and similar for left side.
Once everything is assembled, your biped should look somewhat like this or better (I am not too good in craftwork). You can even tie up Arduino and the breadboard and make upper portion of robot. It'll look better than this.


Comments
Please log in or sign up to comment.