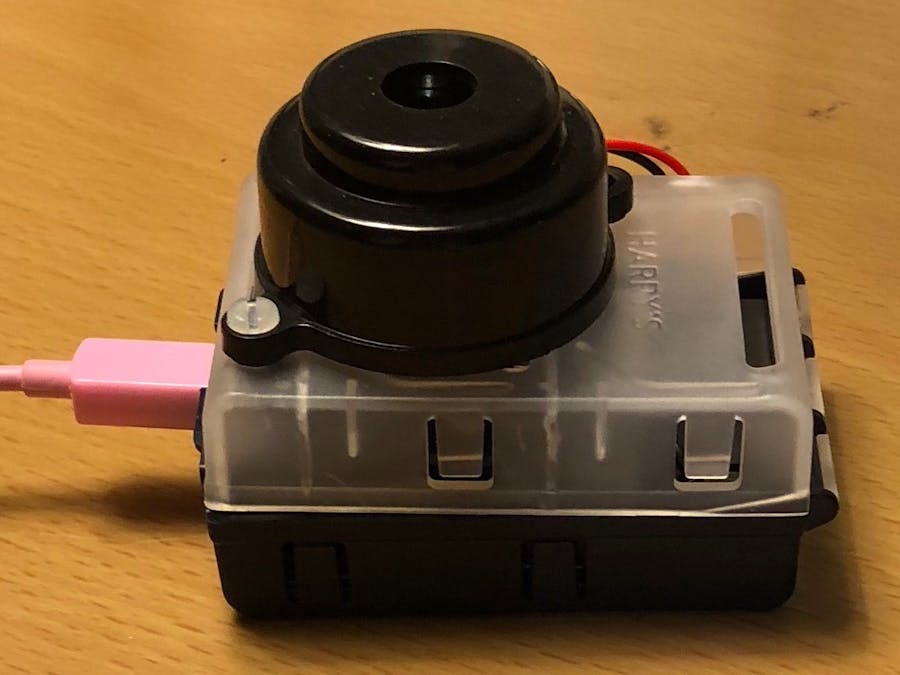
Last year my wife signed me up for a monthly Harry's Shave Plan. I really like these razors, their price and that they are shipped to my home. After a few months I'd accumulated quite a large number of these recylable plastic boxes, which are used to ship Harry's replaceable razors. I kept eyeing them, because they were just too cool to throw away. This led to my first project based on the "Harry's Project Box".
The Harry's project box has several openings that are perfect for cooling and to pass wire to external devices. You need to cut out the section dividers inside each project box to mount most of your electronics.
I use a razor blade knife and a pair of needle nose pliers to remove the dividers.
Nathan Henrie's Belkin Emulator (Python)During the holidays I ran across Nathan Henrie's Belkin emulator, which acts as a bridge to Amazon's Alexa devices, e.g., Echos and Dots. Building a fauxmo server looked like the perfect way to integrate voice recognition into my home automation system. My home automation system is composed of several Raspberry Pi headless servers and I call it Diyhas for "Do It Yourself Home Automation System".
It was a simple hack to modify the fauxmo Python source code to send MQTT messages to my Mosquitto server (Raspberry Pi). After that it was a piece of cake to send voice commands to all of my sensors and actuators.
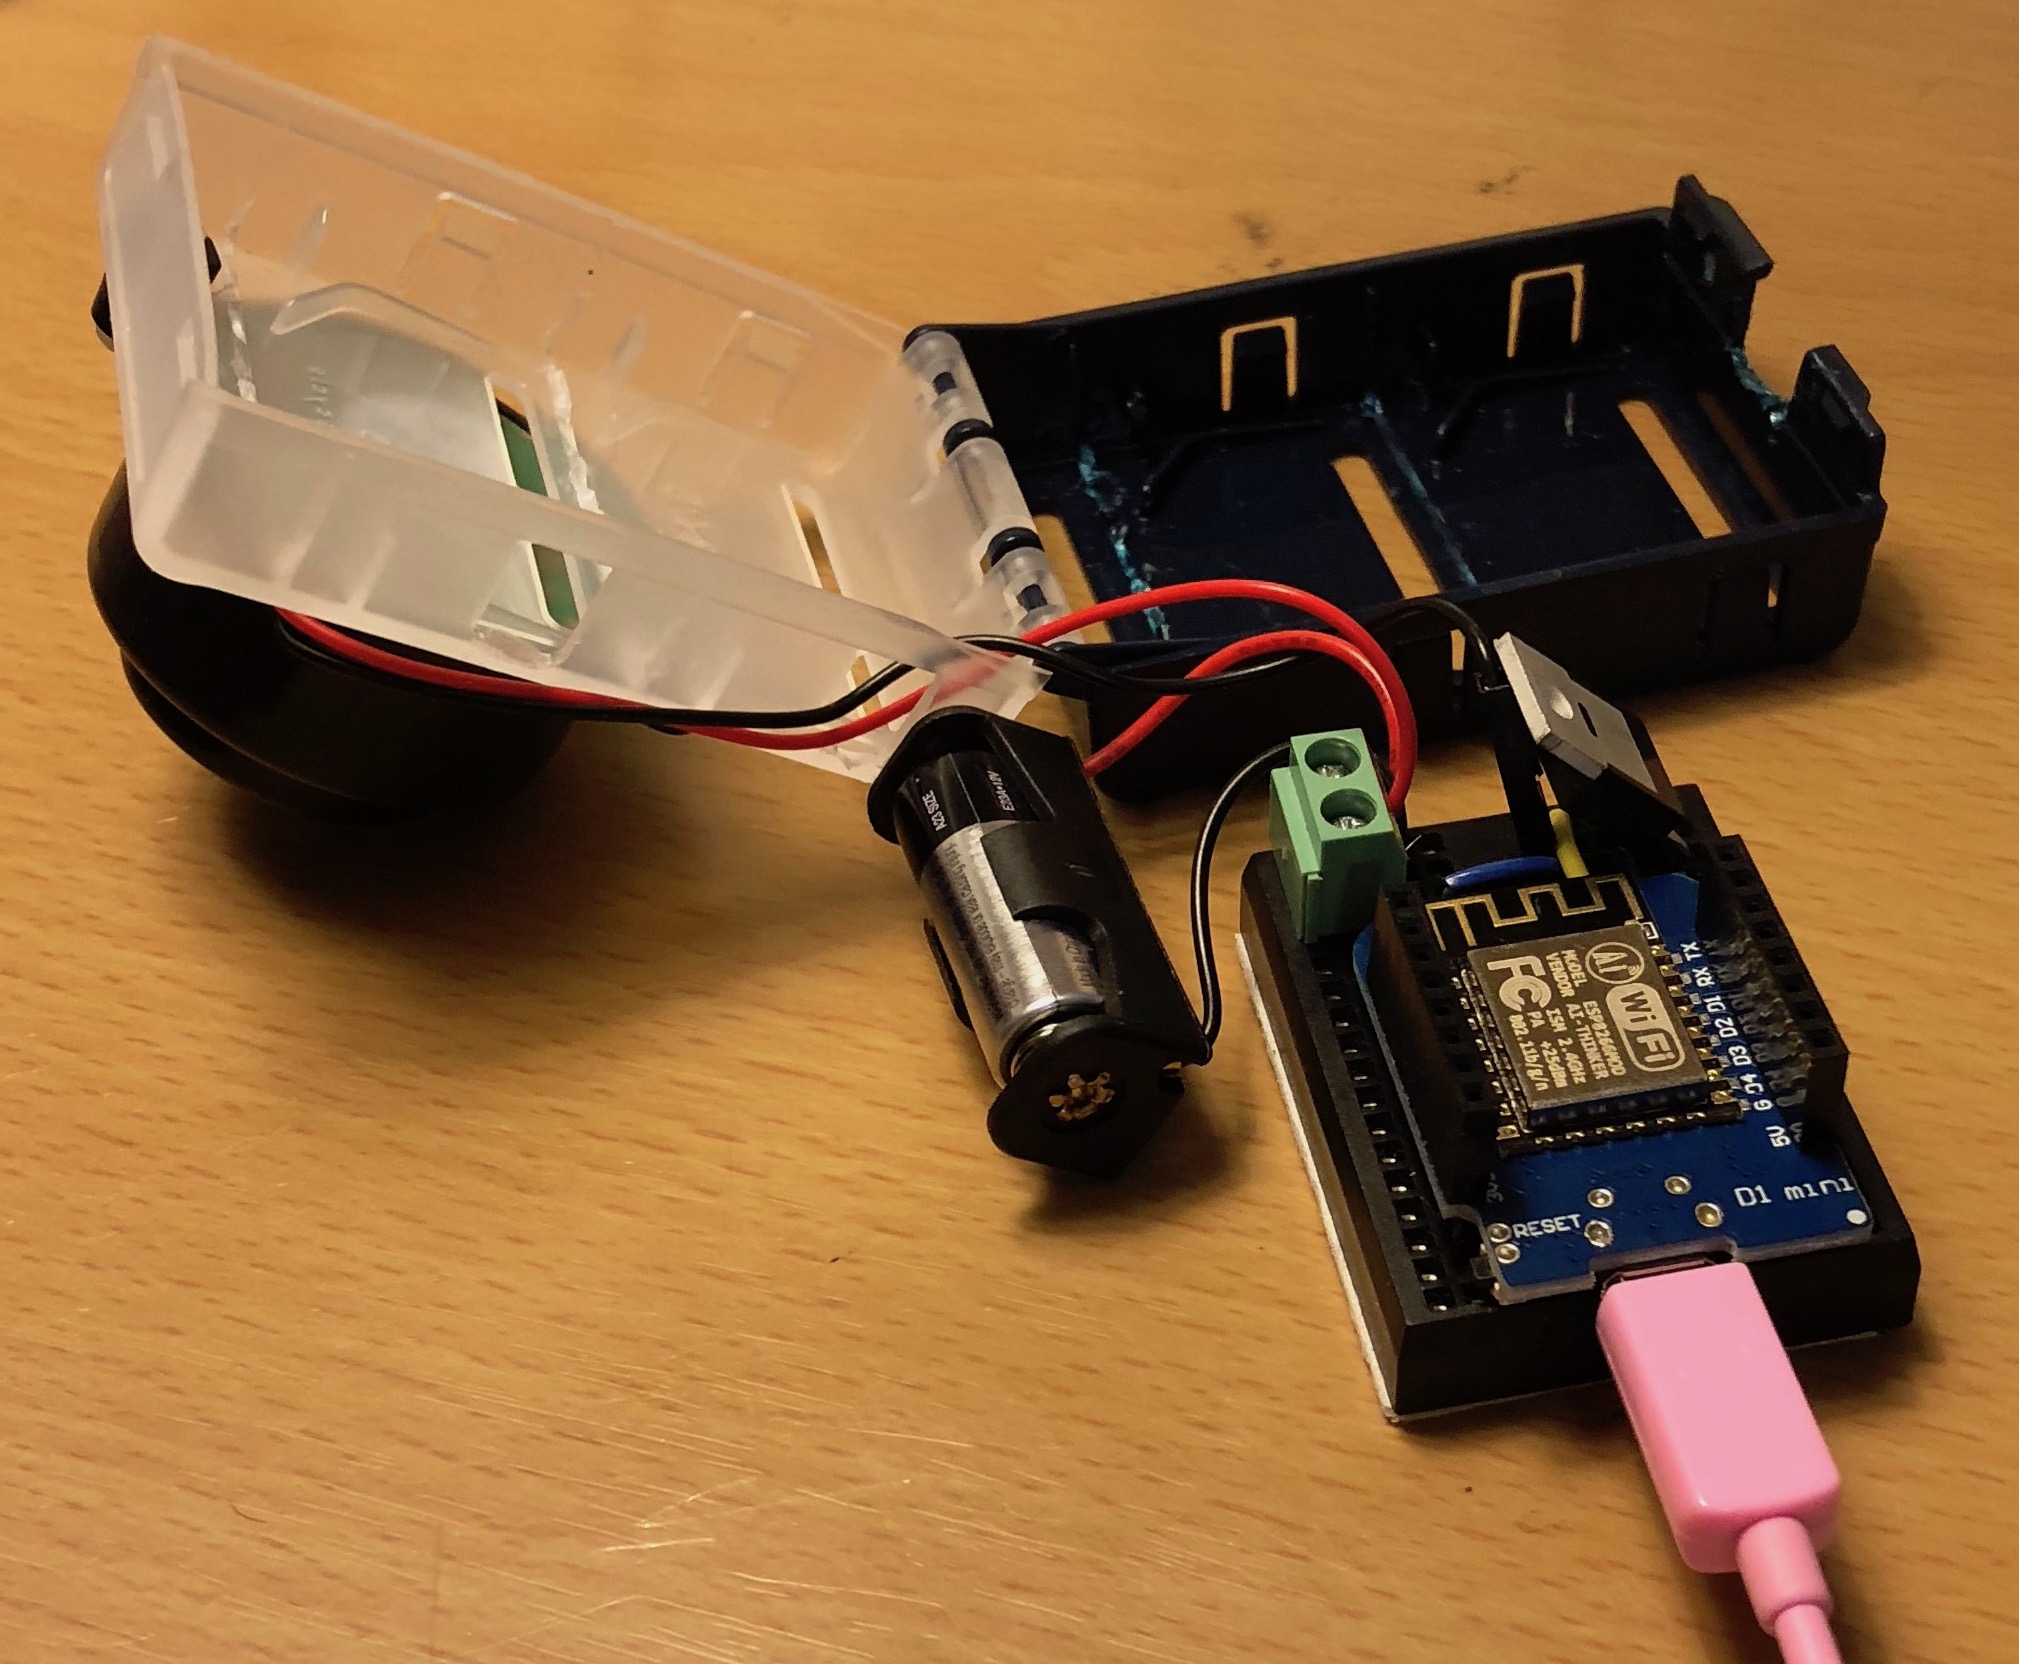
Harry's Horn ProjectHarry's Horn was inspired by the need to sound a panic alarm in the house to signal an intruder, fire or other emergency. I had all the parts on hand: Wemos ESP8266, a loud 12 volt piezo alarm, MOSFET switch, A23 12 volt battery with battery spring clip, tiny solderless breadboard and of course a Harry's project box.
It's a really tight fit and yet I didn't need to solder anything! You could substitute one of several types of piezo speakers. I'm planning on using two types: one is a pulsing siren to indicate an intruder and the other is a continuous loud siren to indicate a fire.
ConstructionThere are five steps to construct the Harry's Horn. No soldering is required although you may have to solder headers on your Wemos ESP8266.
I like to use solder less breadboards because my projects are always prototypes!
Step 1 - Adapt the Harry's Blade BoxYou will need to cut out four top and bottom plastic dividers in a Harry's project box to make room for a tiny solder less breadboard and an A23 battery clip. You will also need to cut out a squarish hole at the open end of the Harry's project box to insert a USB power plug into the Wemos ESP8266 device. Test the size of the hole using your USB power plug as the guide.
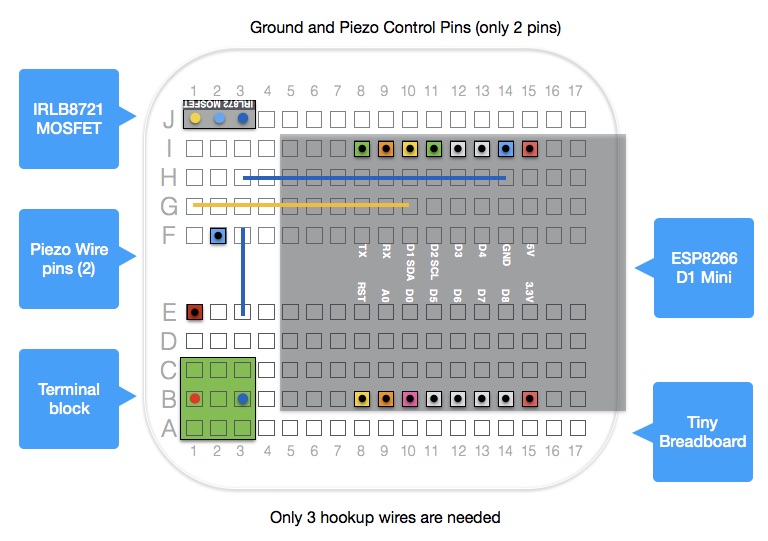
Step 2 - Add 22 Gauge AWG Wires to a Tiny BreadboardTwo 22 gage wires are used to create a common ground between the 12 volt battery and the ESP8266 ground pin. A third wire is used to control the MOSFET switch. The lengths of each wire can be found on the project diagram.
Step 3 - Connect Wires to the Terminal BlockCut and strip the wires on the battery clip and piezo speaker. They need to be short to fit into the project box. Add a male pin adaptor to the ground wire on the piezo speaker.
I use a single plastic screw and nut to attach the piezo speaker to the outside of the Harry's project box. You could use glue or double backed tape but I had lot of plastic screws on hand. Position the piezo speaker in the middle of box, tighten the screw and push the piezo wires through the side openings in the Harry's project box. ( I use plastic screws and washers to reduce the chance of a short circuit. )
Warning - Now comes the hardest part of the project: attaching three wires to the terminal block. I think you need three hands or a lot of patience! First attach the ground battery clip wire to terminal block so it faces the center of the tiny breadboard. Connect the red wires from the battery clip and piezo together at the other end of the terminal block.
Step 4 - Final AssemblyIts now a simple matter of inserting all of the components into the tiny breadboard ( see the diagram for positions ). I did need to make a few adjustments to the plastic box with the razor blade knife to make everything fit.
Step 5 - Program and Test the ESP8266 Arduino ApplicationI use the Arduino development environment to build my ESP8266 and ESP32 projects. You will need to download (github) the MQTY libraries and configure your environment for the latest port of the Espressif SDK. You will need to customize the network and MQTT settings in the include files if you use my examples.
Final ThoughtsI hope you like the idea of using Harry's Shaving Plan plastic boxes for small Arduino projects. My next Harry's Project Box application will use an Adafruit HUZZAH32 - ESP32 Feather Board as a portable weather station with BME680 and VCNL4010 sensors.


Comments
Please log in or sign up to comment.