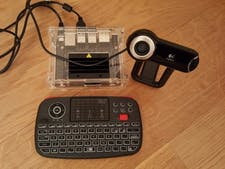
NVIDIA Jetson Nano Developer Kit is a compact, yet powerful computer equipped with a GPU (Graphics Processing Unit) and capable of running Machine Learning models at the edge.
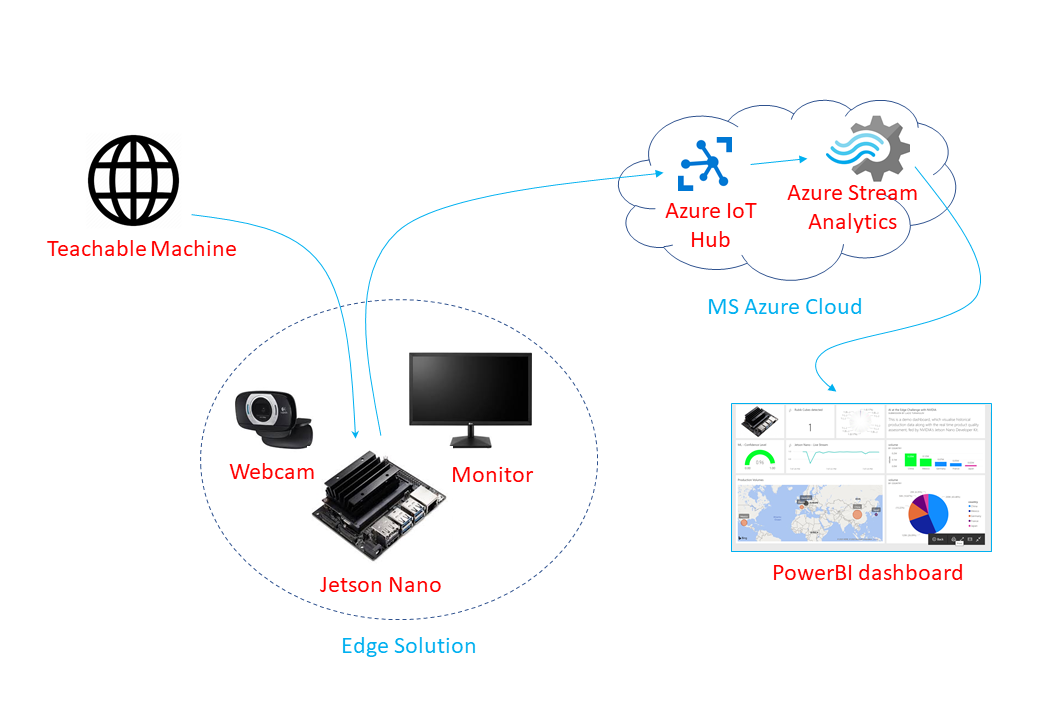
Here I'll show how you can easily train your Machine Learning model in the cloud using Google's Teachable Machine Web site, then bring it over to NVIDIA Jetson Nano and execute locally.
As a further enhancement, you may transfer some of the findings back to your backend of choice (in my case - Microsoft Azure) to store it in a target data store for the future reference or visualise collected data real time in a dashboard.
Potential areas of implementation: Imagine a production line equipped with the camera and Jetson Nano -like processing unit. If trained to recognise standard and defective versions of the product, this may easily automate the quality control process. Or you can monitor availability of the products on the shelves to re-order them when needed. Or detect anomalies in the working engine's sound as the system may sense the changes in the audio signal. And so on and on and on: anywhere you have patterns, such smart solution can help to detect potential deviations to report or react to.Jetson Nano setup:
- If you have not purchased NVIDIA Jetson Nano Developer Kit yet, you can order one from the Jetson Store;
- Flash microSD Card with the latest version of the JetPack software package as per instruction on this NVIDIA Web site;
- Then deploy Jetson inference libraries, as explained on this GitHub repo's page;
- And, finally, install TensorFlow framework on your Jetson Nano device as per instruction on this NVIDIA Web site.
Note: Last step, installation of TensorFlow, is required only for the current version of my solution (Version 1). In the future, I plan to release Version 2, which would describe conversion of the TensorFlow model into Jetson Nano-optimised TensorRT model / engine. It would then allow more effective use of the Jetson's hardware and software capabilities.Train the model with the Teachable Machine:
Google drastically simplified process of the Machine Learning model training through the release of their online "Teachable Machine" platform. It's a visual, no-code environment, where without writing a single line of code you can build reusable model, capable of recognising your own custom images, sounds or even human poses !
- To start, first open Teachable Machine Web site and click "Get Started" button;
- Then create required number of classes (objects that your model should recognise) and either upload images that you prepared in advance or click "Webcam" button to record with your computer's camera. I usually prepare 200 images per object, but model will definitely work even with less number of images, especially if your objects have distinctive shapes;
- If you will press "Train" button, Teachable Machine will start training your new model. By default, it will run through the 50 epochs (training cycles), but if necessary you may adjust this and other system settings;
- Upon completion of the training process, you will be able to test it in the Preview section of the Web page, where you can either upload some test images or verify objects recognition real-time in the stream of your Webcam, as shown on the screenshot below;
- If you are happy with the results, in Preview section click "Export Model" button, then switch to TensorFlow tab and save it to your computer.
Note: For this tutorial, I trained the model with 3 classes: "Rubik Cube" (to simulate standard product), "Wrong Puzzle" (where another puzzle is used to simulate defective product) and "Nothing" (empty screen, that the system will use when no objects are shown).Python code walk-through:
If you configured your Jetson Nano device and then trained your Machine Learning model with the Teachable Machine, then you can use provided NANO_camera_v1.py from this GitHub repo to perform object recognition at the edge.
As you can see below, there are only 3 libraries required here: TensorFlow (GPU-version for Jetson), Numpy and Jetson Utils (the latter gets installed automatically as a part of the Jetson Nano Setup section above.)
import tensorflow as tf
import numpy as np
import jetson.utils as jsu
I set the width and height of my camera as 1280 x 720 and specified that I use USB camera with /dev/video0 value. If you want to use MIPI CSI camera instead, you may need to set CAMERA_TYPE variable to 0 or 1 (depending on your system environment). I also set image diemsnion to 124x124, as that's what my Machine Learning model expects.
CAMERA_WIDTH = 1280
CAMERA_HEIGHT = 720
CAMERA_TYPE = '/dev/video0'
IMAGE_WIDTH = 124
IMAGE_HEIGHT = 124
Attached camera and display can be initiated using relevant methods from the Jetson Utils.
camera = jsu.gstCamera(CAMERA_WIDTH, CAMERA_HEIGHT, CAMERA_TYPE)
display = jsu.glDisplay()
I then open video stream and capture frames, using CaptureRGBA method of camera instance.
while display.IsOpen():
    # Capture the image
    img, width, height = camera.CaptureRGBA(zeroCopy=1)
As can be derived from the method's name, image is captured in RGBA format, while our Machine Learning model expects image in RGB format. That's why, Jetson Utils method is used here to export the image kept in the CUDA memory into Numpy array, which I then convert into RGB format. I use the conversion function (rgba2rgb) here, published by Feng Wang on Stackoverflow as referenced in my program's comments.
rgba2rgb(jsu.cudaToNumpy(img, width, height, 4))I then use Keras's method for loading models by pointing to the folder where we extracted TensorFlow SavedModel, originally trained on the Teachable Machine Web site.
saved_model = tf.keras.models.load_model('savedmodel')After some manipulations of the image array's shape, I feed it into our Machine Learning model to get my prediction.
prediction = nano_model(tf.constant(nano_image, dtype=float))['sequential_3'].numpy()You can overlay required details (e.g., level of confidence of our Machine Learning model, custom description, etc.) on top of the streamed video.
font.OverlayText(img, width, height, "{:05.2f}% {:s}".format(confidence * 100, class_desc), 5, 5, font.White, font.Gray40)Original image is then rendered along with the prediction details on attached screen.
display.RenderOnce(img, width, height)Next step is to make our prediction details available in the cloud for a further analysis. First of all, let's import Azire IoT HUB client libraries.
from azure.iot.device import IoTHubDeviceClient, MessageYou should assign then Connection String details from your Azure IoT Hub to AZURE_IOTHUB variable.
AZURE_IOTHUB = "<IOTHUB_CONNECTION_STRING>"It will be used by the Python program to establish connectivity with IoT Hub's endpoint.
iot_client = IoTHubDeviceClient.create_from_connection_string(AZURE_IOTHUB)
iot_client.connect()
Once activated, you can send required telemetry details over to the cloud.
iot_client.send_message(msg)And if you will stop the streaming, then the last step in our program is to disconnect our client from the Azure IoT Hub.
iot_client.disconnect()Note: To start the solution, download GitHub repo's content to your Jetson Nano device and enter "python3 NANO_camera_v1.py" command.Analytics configuration:
To enable real-time data reporting, I installed Azure IoT Hub in my Azure subscription, so that Jetson Nano could strean telemetry details via IoT Hub's endpoint.
IoT Hub is then configured as a data source for another Azure resource, Stream Analytics (ASA), to process the data stream and send output to the PowerBI workspace. ASA uses SQL-like query language, and as shown on the screenshot below I simply redirect here all the content to the target table in PowerBI without any modifications.
Last part is to create analytics dashboard in PowerBI. You may configure it directly at https://powerbi.microsoft.com/en-us/ or use richer functionality with the PowerBI desktop client. This is an example of a PowerBI dashboard, which combines historical data from CosmosDB database with the live stream from Jetson Nano.
You can find short demo of the working solution here on YouTube.
Credits:- This solution is based on the original sample code from NVIDIA team, published here. I also used Feng Wang's function for RGBA-to-RGB conversion, and customised Microsoft's demo script to setup connectivity with Azure IoT Hub.


Comments