//Author Danny van den Brande. arduinosensors.nl, also check out my forum to find more info and example codes for most common sensors @ forum.arduinosensors.nl
//Do whatever you want with this. I wrote it so you got my OK, :)
//To keep the alarm running when triggered you need to do some modifications, but with this you got the basics to build from.
//its just an example on how to build a cheap quality multifunctional alarm system.
//Some ideas.
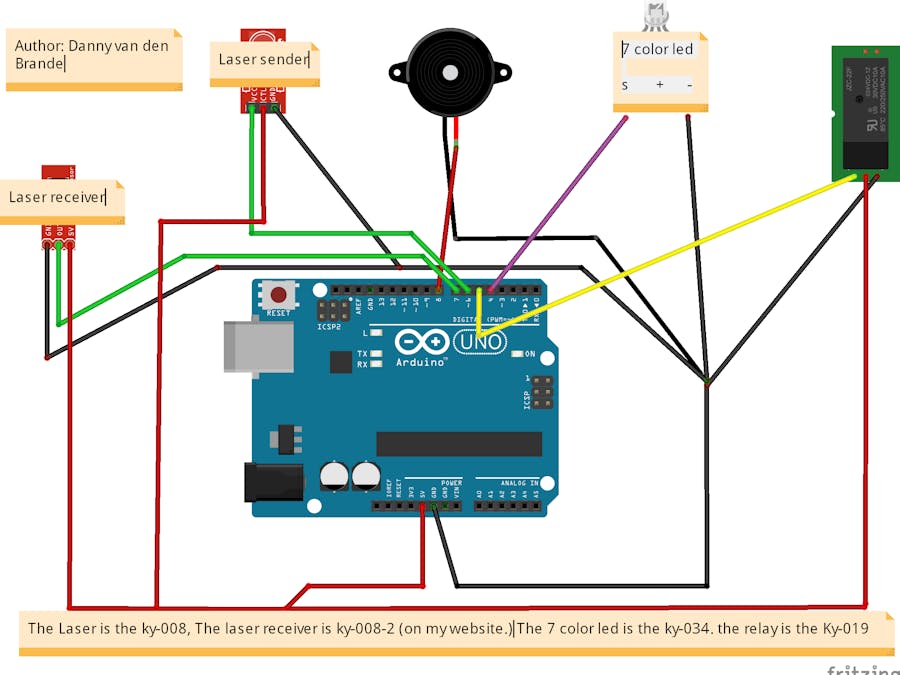
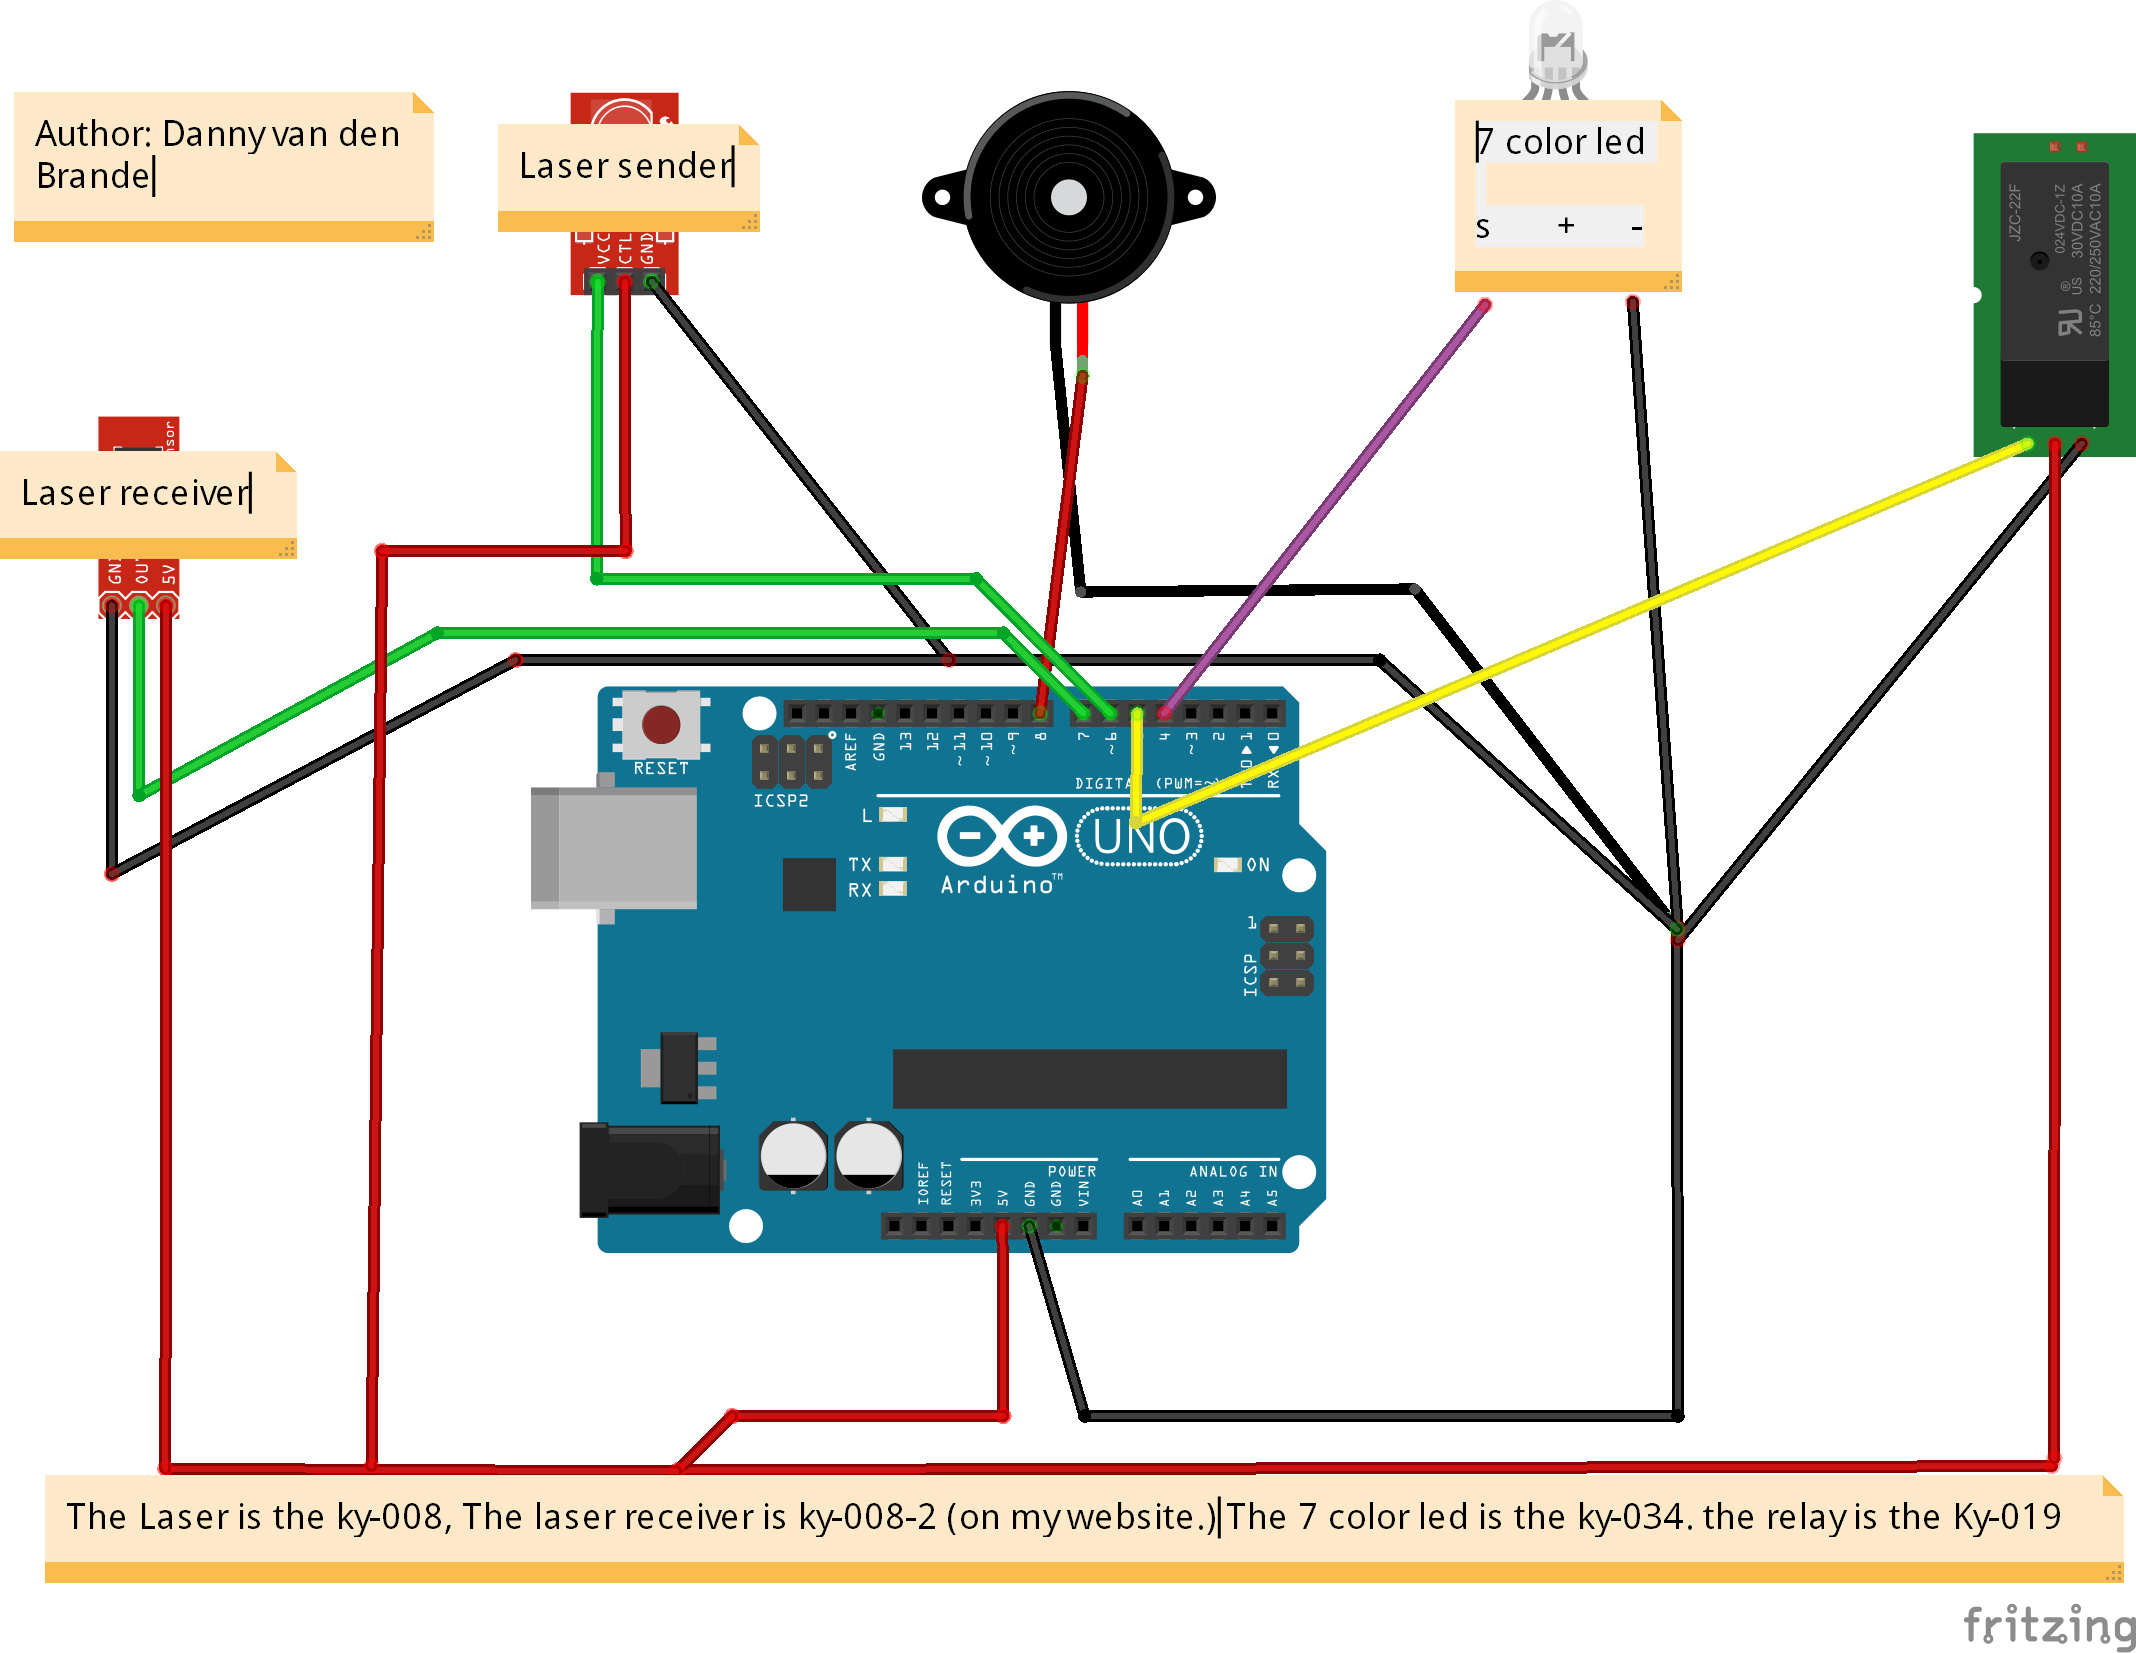
// " Laser tripwire/alarm with relay. multifunctional "
//* you can use it for an alarm, for burgelars, so a laser tripwire alarm as it is now.
// you can attach a big RED light with a sound siren to the alarm with the relay or just a lamp or any device you wanna attach.
//* you can build it inside a closet so when you open the door a lamp will go on, like a magnet lamp.
//* you can build it inside a door of a selfmade car to make a door beep.
//* You can build a SMOKE generator alarm with it. You your whole house will be filled with smoke using the relay + which turns on a attached smoke generator.
//* you can also make a cool tripwire bomb from it for airsoft, i would not use it outside cuz a bug like a ant or fly could trigger it.
//* You do not need to use the laser on the arduino you can use a external one, with external power.
//* Its a very cheap multifunctional device, You can save a lot of money with this code and my Schematic.
//* the laser sensors are for sale on my website, as well as the relay and 7 Color led.
//
// setup the pins here
int MulticolorLed = 4; // i used the 7 color led, just for the show. You can add any led or led module.
//you can also remove the led module to save power, if the source comes from a battery.
int Relay = 5;
int LaserEmitter = 6;
int LaserDetector = 7;
int Buzzer = 8;
// here i set up the tones, you can change them @ void loop.
int tones[] = {261, 277, 293, 311, 329, 349, 369, 392, 415, 440, 466, 493, 523 ,554};
// 1 2 3 4 5 6 7 8 9 10 11 12 13 14
// You can add more tones but i added 14. Just fill in what tone you would like to use, @ void loop you see " tone(Buzzer, tones[12]); " below, digitalWrite(Buzzer, HIGH);
// here you can change the tones by filling in a number between 1 and 14
void setup()
{
Serial.begin (9600);
pinMode(LaserEmitter, OUTPUT);
pinMode(LaserDetector, INPUT);
pinMode(MulticolorLed, OUTPUT);
pinMode(Buzzer, OUTPUT);
digitalWrite(Buzzer, LOW);
pinMode(Relay, OUTPUT);
digitalWrite(Relay, LOW);
//+++++++++++++++++++++++++++++++++++++++++++
//Part of buzzer tones
for (int i = 0; i < Buzzer; i++)
{
}
}
void loop()
{
digitalWrite(LaserEmitter, HIGH);
boolean val = digitalRead(LaserDetector);
Serial.println(val); // Open the Serial Monitor to see the values
if (val == 0) // Here we set value to 0 with a if statement, because the laser sensor reads a value of 1 or 0. Its reads value 1 when the laser is aimed at the receiver.
// so value 0 is what we set for this alarm right now. To change the alarm to a alarm that works the other way around you simply change this value to 1.
// How would it work the other way around? well like a alarm you see in the movies that protects a diamond.. when the diamond or any item is removed the alarm will go off.
{
digitalWrite(Buzzer, HIGH); // here the Buzzer is set high in order to make a sound.
tone(Buzzer, tones[6]); //here we set the tone by choosing from number 1 to 14
delay (50);
digitalWrite(Buzzer, LOW); // here we set the buzzer low and next we set noTone for the buzzer to make a break.
noTone(Buzzer);
delay (50); //this is the delay between each buzzer beep. You can play with the sounds by choosing from number 1 to 14
digitalWrite(Buzzer, HIGH);
tone(Buzzer, tones[9]);
delay (100);
digitalWrite(Buzzer, LOW);
noTone(Buzzer);
delay (100);
digitalWrite(Buzzer, HIGH);
tone(Buzzer, tones[14]);
delay (50);
digitalWrite(Buzzer, LOW);
noTone(Buzzer);
digitalWrite(MulticolorLed, HIGH); //Here we set the led to high, it will only flash when the alarm is triggered
delay(250);
digitalWrite(Relay, HIGH); //here we set the relay to high, it will also only turn on when the laser is not aimed at the laser receiver
delay(100);
}
else //here we use the else statement to turn everything off when the if statement is reading the laser receivers value of 1
{
digitalWrite(Relay, LOW);// here everything turns off, so is set to low. This happens when the laser aims at the Laser receiver.
digitalWrite(Buzzer, LOW);
noTone(Buzzer);
digitalWrite(MulticolorLed, LOW);
}
}


_ztBMuBhMHo.jpg?auto=compress%2Cformat&w=48&h=48&fit=fill&bg=ffffff)


Comments