I built a laser piano using LDRs and laser light diodes. I used an Arduino Leonardo Pro Micro connected to a speaker to generate sound. You can modify the tune of the piano by tweaking in the code and changing the frequency. I wanted to create something cool which can produce music and I ended up making this.
VideoMaking the base and structure of pianoThe base is made up of lot of cardboard ad glue gun. I have given the details along with the dimension in the image. Also make sure you are choosing the right kind of cardboard for making it.
First Step: Marking, Cutting and Gluing base
Second Step: Inserting and attaching LDR and Laser diode in the cardboard
Third Step: Soldering
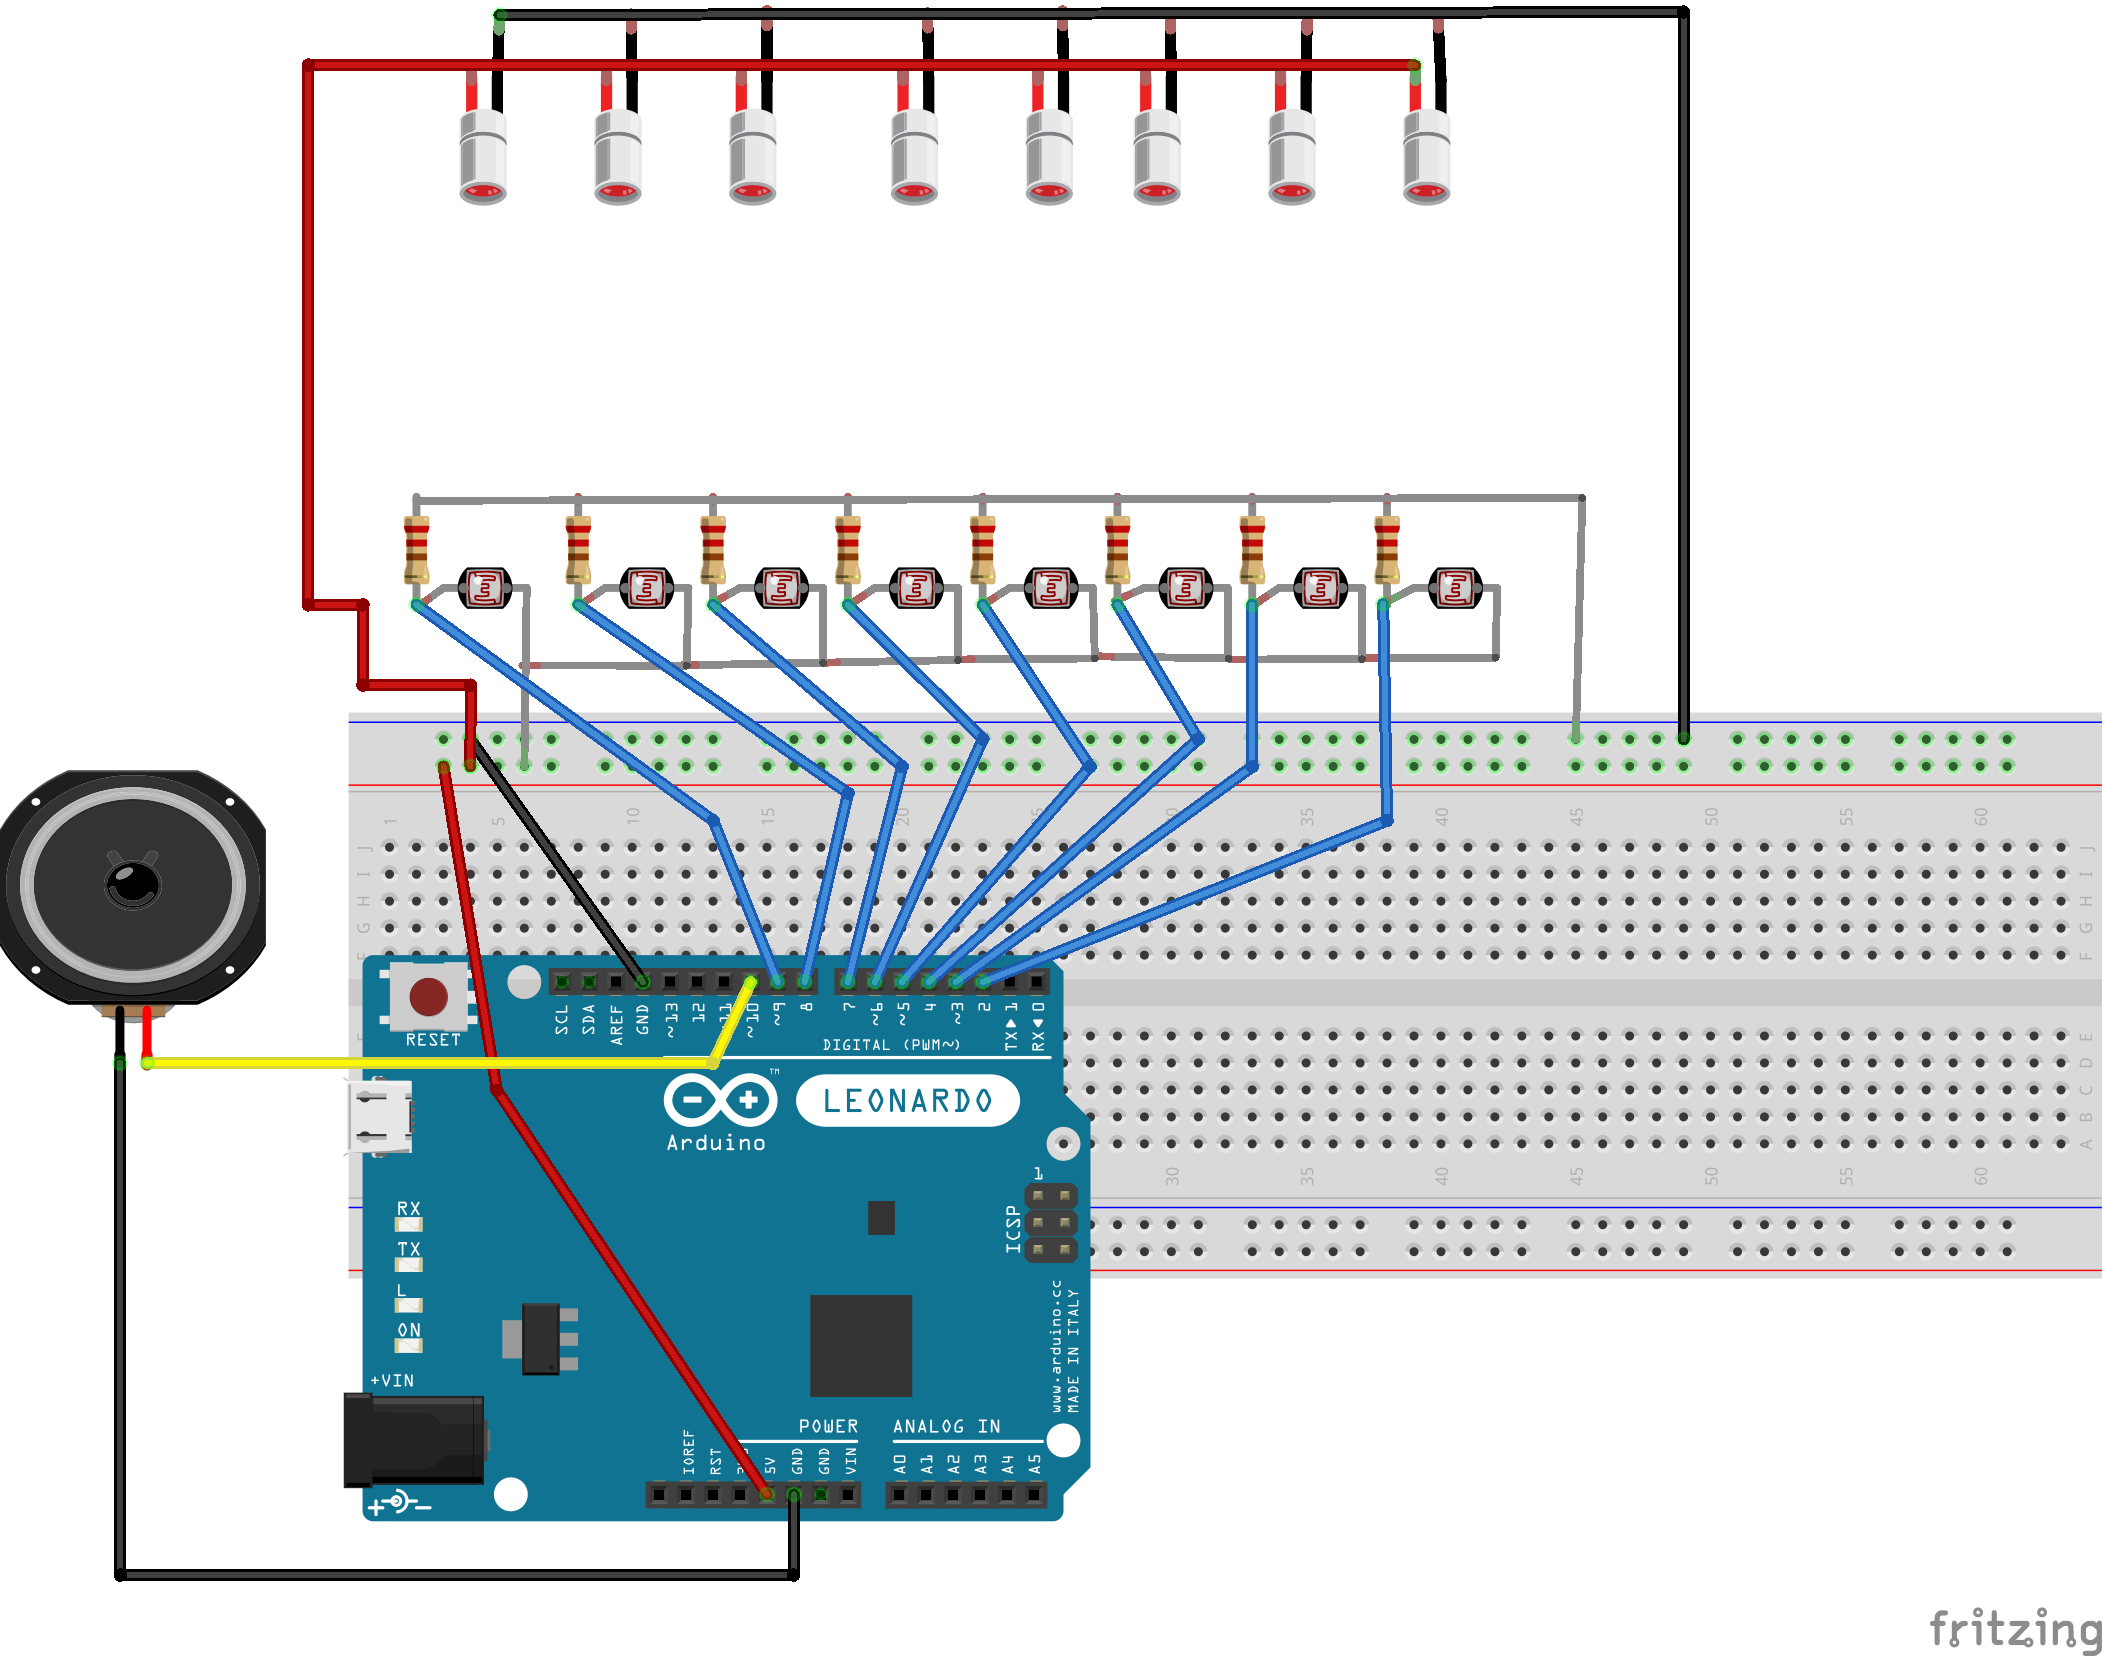
Finally make the circuit as per the given circuit diagram. Note that I have used a 10K resistor array instead of normal 10K resistor. If you don't have a resistor array, you can use normal resistors.
And this is how your setup should look.
Our code is simple and uses 'delay' function to generate different sounds. We are turning on speaker with frequency for certain time. We have declared the array for key tones:
int tones[] = { 1915, 1700, 1519, 1432, 1275, 1136, 1014, 956 }; //freq
And we've declared input pins for the input of Arduino. So if it gets high on a specific pin, it changes the frequency.
if (buttonstate_E == LOW)
   {
     toner = tones[2];
}
And the speaker plays the tone on that specific frequency.
digitalWrite(sound, LOW);
delayMicroseconds(toner);
digitalWrite(sound, HIGH);
delayMicroseconds(toner);
After uploading the sketch, the speaker will produce the tone when hand is placed between the LDR and laser diode. I have tried to make this tutorial funny and interesting.
I hope you like my tutorial on this laser piano. Subscribe to my YouTube channel for more tutorials like this.
My Social Profile Links:


Comments
Please log in or sign up to comment.