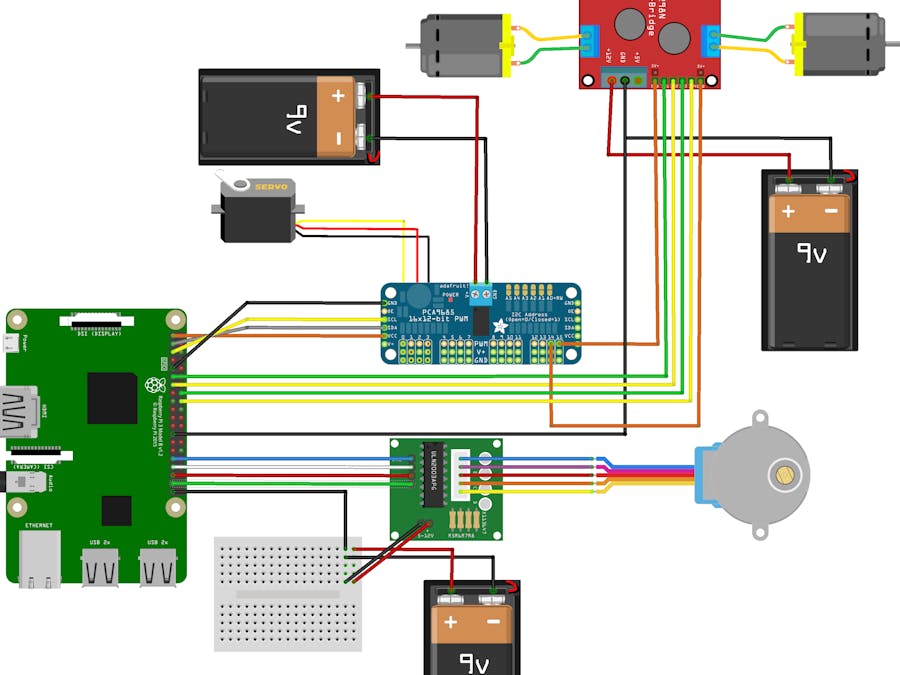
After working on numerous motors within various projects over the years, I decided it was time to create libraries for chip-sets, for ease of use. In the following post we will look into controlling Servo, Stepper and DC motors.
It is now available in Nuget
Install-Package IOTMotorDrivers -Version 1.0.0-Pre
Please note all these libraries will build under any platform but it requires the Platform to be in "ARM->Remote device" to Debug (I will make it work with all platforms eventually)
Servo MotorsThey are great for controlling robotic heads and in my case, 180 degree rotations. Under initial research I came across several methods in order to control the motor(s), including Microsoft IOT Lighting Providers. However, the main problem I faced was that PWM signals were inconsistent and the motor would often stutter (or what I like to call 'wiggle'). Fortunately, I stumbled across the PCA9685 driver, from Amazon, and it happens to be amazing with an awesome C# library by golaat based on the original c++ version.
Please note the Maximum and Minimum range for SG90 9g Micro Servos is 450 and 150, respectively. Anything higher or lower would cause it to make continuous rotations, which is definitely not recommended.
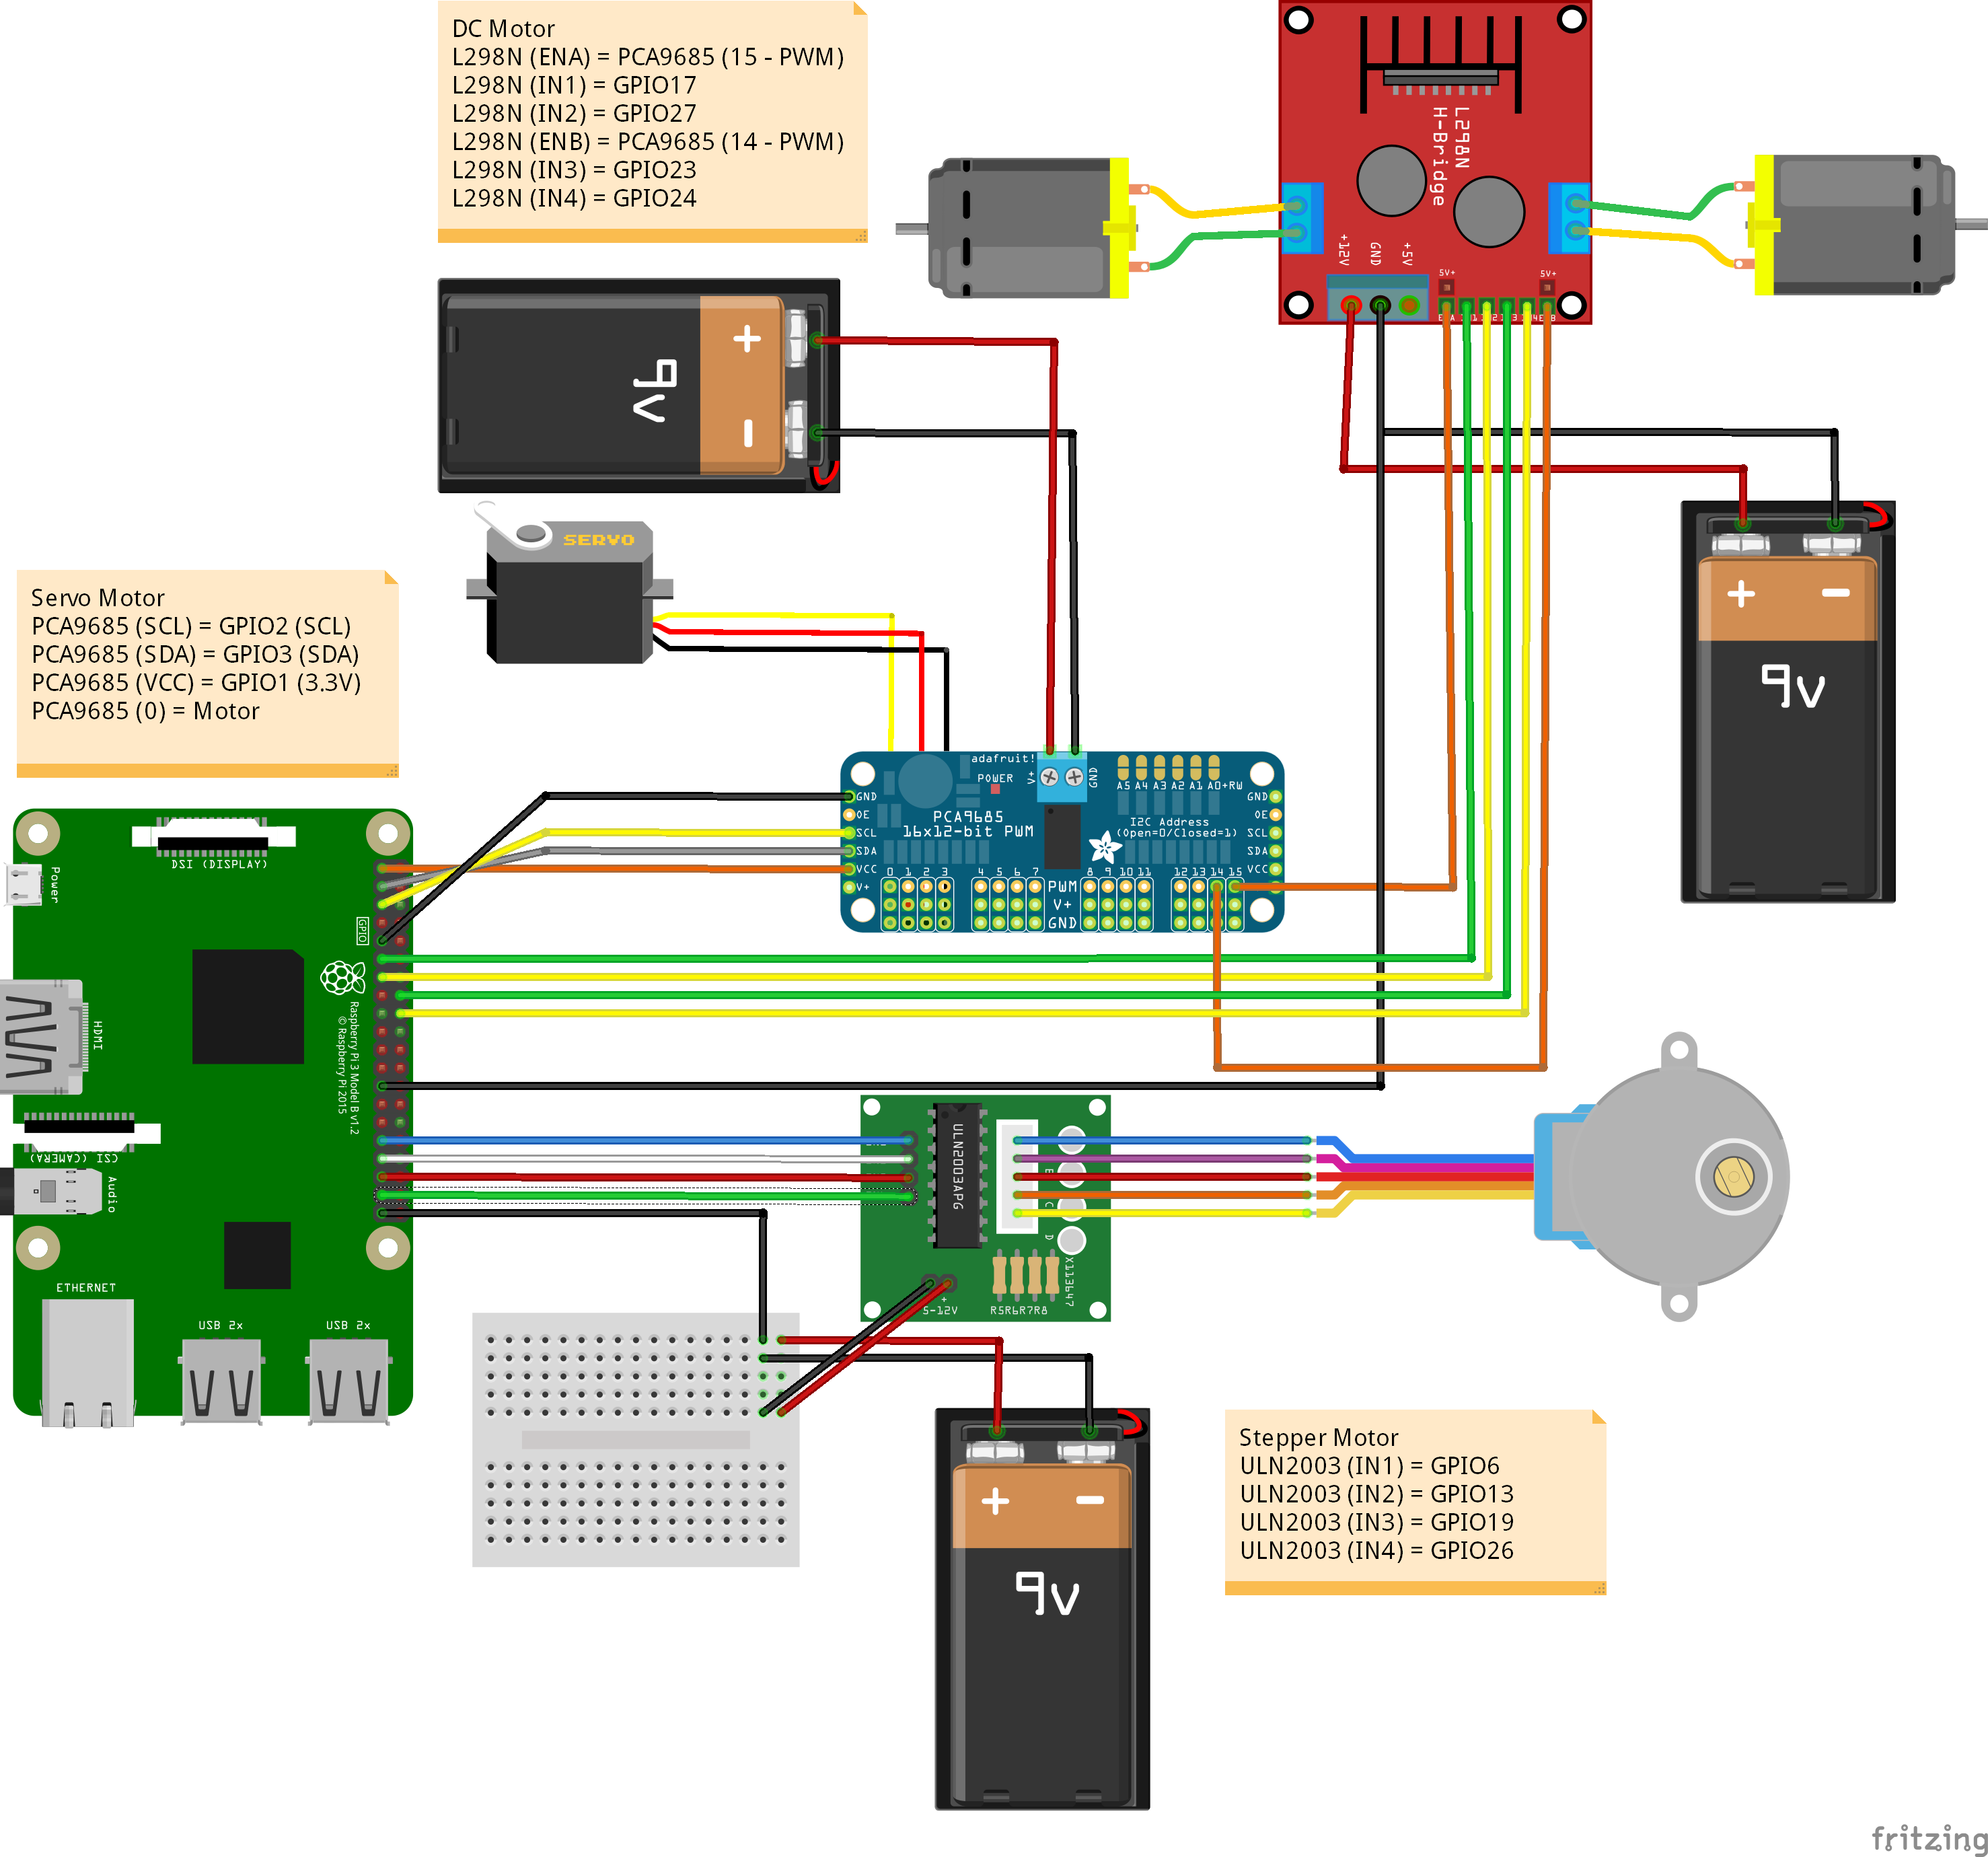
DC MotorsUpon research, L298N H Bridge happens to be the best driver for a DC motor and it is great for controlling wheels. Based on my experience with PCA9685 and its reliable PWM output, I decided to extend golaat's library to support the H Bridge as follows:
// DC Motor Pins
private const int PCA9685_DC1_Pin = 15, DCInputAPin = 17, DCInputBPin = 27;
private const int PCA9685_DC2_Pin = 14, DCInputCPin = 23, DCInputDPin = 24;
// Driver for PCA9685
pwmDriver = new PCA9685();
pwmDriver.SetDesiredFrequency(60);
// Driver for L298N
dcMotorDriver = new L298N(new L298NMotors
{
    ENPin = PCA9685_DC1_Pin,
    INAPin = DCInputAPin,
    INBPin = DCInputBPin
}, new L298NMotors
{
    ENPin = PCA9685_DC2_Pin,
    INAPin = DCInputCPin,
    INBPin = DCInputDPin
}, pwmDriver);
// Start and control Motor 1
dcMotorDriver.Start(motorSelection: L298NMotorSelection.Motor1, speedPercent1: 0.2, isClockwise1: true);
// Start both Motor 1 and 2 parallely
// dcMotorDriver.Start(motorSelection: L298NMotorSelection.All, speedPercent1: 0.2, isClockwise1: true, speedPercent2: 0.2, isClockwise2: true);
When I get more time, I will write another extension to include Wheel Encoders for synchronous speeds
Stepper MotorWhen you usually buy a 28BYJ-48 step motor, it comes with an ULN2003 driver containing loads of python libraries. Below is a simple library to control the motor, get real time updates and simulate LEDs on board for fun :D
// Step Motor Pins
private const int Step_IN1 = 6, Step_IN2 = 13, Step_IN3 = 19, Step_IN4 = 26;
// Driver for ULN2003
stepMotorDriver = new ULN2003(Step_IN1, Step_IN2, Step_IN3, Step_IN4);
// Its an async function so could await it until completes the task
await stepMotorDriver.Start(revolutions: 1, isClockwise: false, progress: null);
// To get real time updates pass the progress parameter with the following code
// var progressInfo = "";
// var progress = new Progress<IOTMotorDrivers.StartProgress>();
//            progress.ProgressChanged += (s, arg) =>
//            {
//                if(arg.IsActive)
//                    progressInfo = "Steps " + arg.CurrentStep + "/" + arg.StepsSize + " Seq " + arg.CurrentSequence;
//                else progressInfo = "";
//            };
Happy coding and enjoy the free libraries!!
Please note: Wrong wiring and/or pins could screw up the Pi. I burnt mine like an Idiot by connecting the V+ instead of Vcc from PCA9685 to the Raspberry Pi's 3 Volts.


Comments
Please log in or sign up to comment.