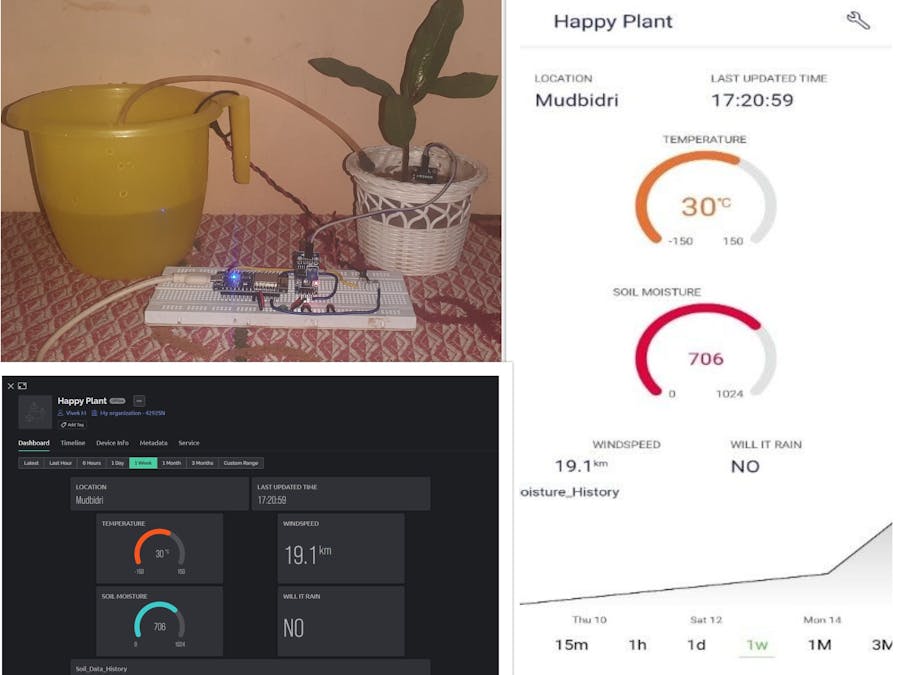
Many homeowners are concerned about the plants on their balconies or in their backyard gardens when they are out of town. To water such plants, they may buy smart watering pots from internet stores that monitor soil moisture levels and water them with a watering pump. Even yet, these systems fail to use weather forecasts to dynamically regulate the quantity of water to be delivered, resulting in water wastage and plant degradation due to excess water. This small project helps to postpone watering the plants in the event of expected rainfall using Application Programming Interface(API). It leads to lower water usage, increased plant life, and water conservation, as well as the elimination of human involvement in plant watering.
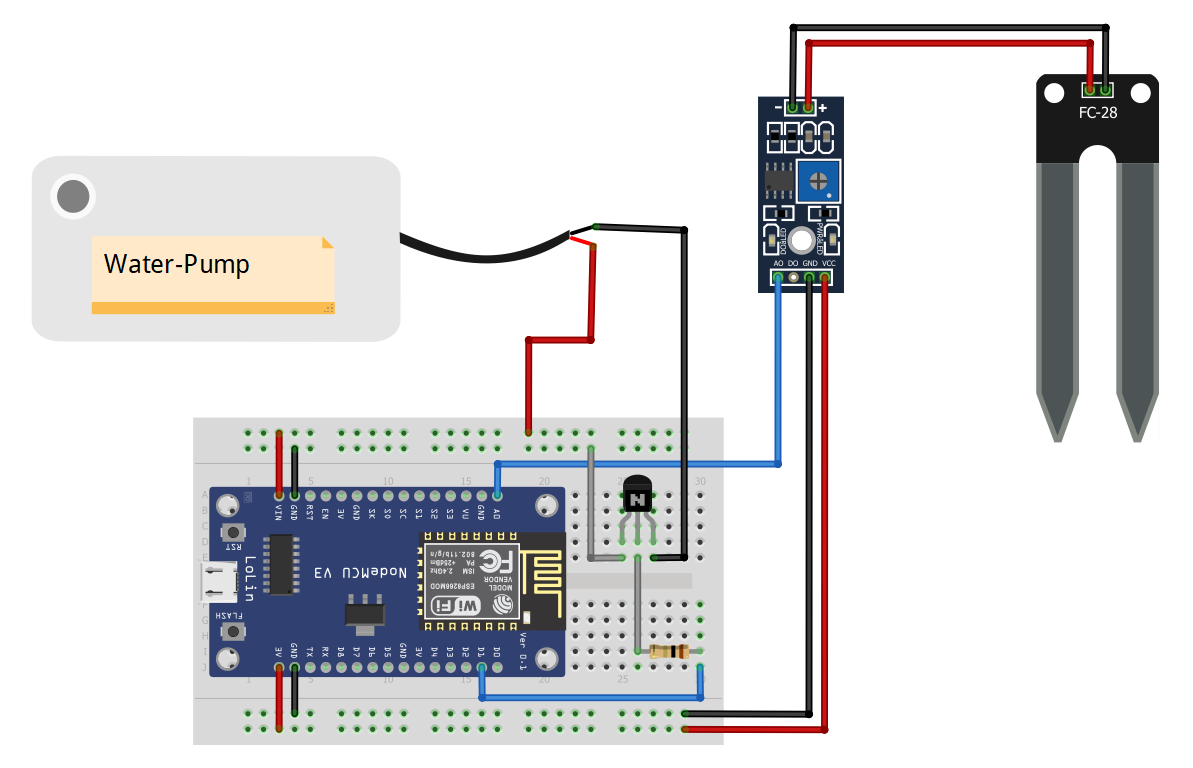
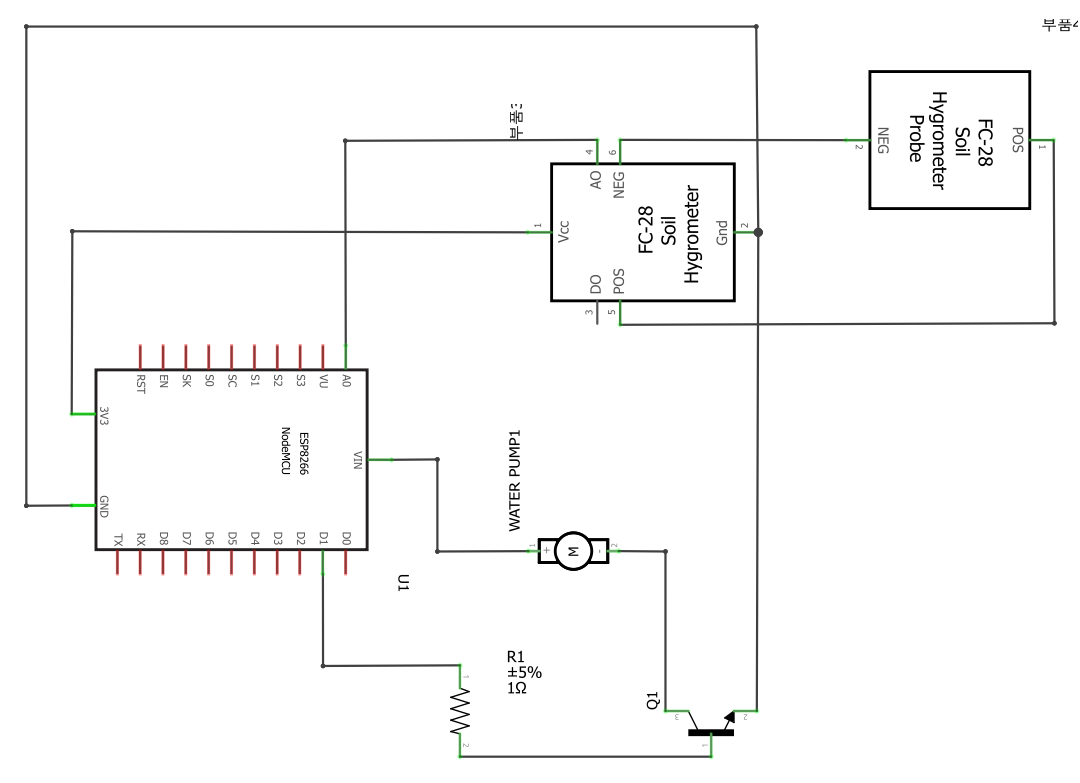
Let's take this project from start to finish in five easy steps.STEP-1:Connection
Connect all the components as shown in the bellow circuit diagram.
STEP-2:Testyoursensorandactuator
You do not need to change any circuits, but you must download the ESP8266 board into the Arduino IDE. Search for ESP8266 in Tools>Board>Boards Manager and get it. Before you begin testing code, change the board in tools to NodeMCU. Afterwards test your soil moisture using [Code-1] and determine your dryness and extreme dryness threshold values. you can refer the threshold scale but values changes with different soil moisture sensor.
Later test your water pump working using [Code-2] and adjust the amountToPump. it is the total time that pump will be in ON state and pumps the water.
STEP-3: Get Time data
Go to Sketch>Include Library> Manage libraries and download few bellow mentioned libraries in your IDE.
- NTPClient
- Arduino_JSON
- Blynk
We need to pass the current time as one of the arguments in our API URL link if we want to receive hourly weather forecasts to postpone watering while it is still raining. We can't access the current time since our microcontroller (NodeMCU) doesn't have an on-board clock. Using Network Transport Protocol (NTP), we receive the 24-hour time format from [code-3] and save only the hours in variable H.
STEP-4: Get weather forecast from https://www.weatherapi.com
To access weather data, first register and make an account on the weatherapi website so that you may get an API key, which will be another argument. and also specify the city name as a third argument for the URL. you can refer the documents in their website for clear understanding how API works.
Don't try to use the Same API key mentioned in code.
When [Code-4] is executed we can see the server response with a JSON format of weather data every 10 seconds.
STEP-5: Set up HAPPY PLANT application
Finally, we combined all of the previously described codes into a single code block, which would serve as the primary code for automating the watering procedure based on weather prediction. we also used Blynk IoT platform to provide a monitoring interface for the homeowner. in order to do so create an account and refer the documentation of how to get started with the blynk.


Comments
Please log in or sign up to comment.