


Hardware components | ||||||
 |
| × | 1 | |||
| × | 1 | ||||
Link to purchase:
1. Motor with encoder: https://amzn.to/2NwsNxH
2. H-bridge: https://amzn.to/2QS2FeI
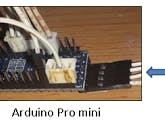
3. Arduino Pro Mini: https://amzn.to/2xy4yFn
Buy electronic component on utsource.net
IntroductionWith PID control, the speed of a motor can be archived exactly. This article mainly introduces making a program for the Arduino Pro Mini on your computer (using Visual Studio) to control motor speed by a PID algorithm.
The Arduino Pro Mini is used to store motor controls, PID algorithms, and to communicate with the PC (through COM Port). The computer should have HMI made by Visual Studio to communicate with Arduino. HMI will show motor speed graphs and change motor speed settings.
Let's go into detail.
Hardware needed:
1. Motor with Encoder
2. H-bridge PCB
3. Arduino Pro Mini
4. UART PCB
5. Computer (with Visual Studio)
Step 1. Hardware connectionThis article doesn't mention connection details; it is based on a previous article which can be found at this link.
Step 2. Code with the Arduinovoid loop() {
if (stringComplete) {
// clear the string when COM receiving is completed
mySt = ""; //note: in code below, mySt will not become blank, mySt is blank until '\n' is received
stringComplete = false;
}
//receive command from Visual Studio
if (mySt.substring(0,8) == "vs_start"){
digitalWrite(pin_fwd,1); //run motor run forward
digitalWrite(pin_bwd,0);
motor_start = true;
}
if (mySt.substring(0,7) == "vs_stop"){
digitalWrite(pin_fwd,0);
digitalWrite(pin_bwd,0); //stop motor
motor_start = false;
}
if (mySt.substring(0,12) == "vs_set_speed"){
set_speed = mySt.substring(12,mySt.length()).toFloat(); //get string after set_speed
}
if (mySt.substring(0,5) == "vs_kp"){
kp = mySt.substring(5,mySt.length()).toFloat(); //get string after vs_kp
}
if (mySt.substring(0,5) == "vs_ki"){
ki = mySt.substring(5,mySt.length()).toFloat(); //get string after vs_ki
}
if (mySt.substring(0,5) == "vs_kd"){
kd = mySt.substring(5,mySt.length()).toFloat(); //get string after vs_kd
}
}
void detect_a() {
encoder+=1; //increasing encoder at new pulse
m_direction = digitalRead(pin_b); //read direction of motor
}
ISR(TIMER1_OVF_vect) // interrupt service routine - tick every 0.1sec
{
TCNT1 = timer1_counter; // set timer
pv_speed = 60.0*(encoder/200.0)/0.1; //calculate motor speed, unit is rpm
encoder=0;
//print out speed
if (Serial.available() <= 0) {
Serial.print("speed");
Serial.println(pv_speed); //Print speed (rpm) value to Visual Studio
}
//PID program
if (motor_start){
e_speed = set_speed - pv_speed;
pwm_pulse = e_speed*kp + e_speed_sum*ki + (e_speed - e_speed_pre)*kd;
e_speed_pre = e_speed; //save last (previous) error
e_speed_sum += e_speed; //sum of error
if (e_speed_sum >4000) e_speed_sum = 4000;
if (e_speed_sum <-4000) e_speed_sum = -4000;
}
else{
e_speed = 0;
e_speed_pre = 0;
e_speed_sum = 0;
pwm_pulse = 0;
}
//update new speed
if (pwm_pulse <255 & pwm_pulse >0){
analogWrite(pin_pwm,pwm_pulse); //set motor speed
}
else{
if (pwm_pulse>255){
analogWrite(pin_pwm,255);
}
else{
analogWrite(pin_pwm,0);
}
}
}At the beginning of program, it will receive commands from the computer (start/stop motor; motor speed settings; kP, kI, kD gain of PID). Next is void detect_a(): which is an encoder for sum calculation used for speed calculation in the Timer interrupt routine. Timer interrupt routine ISR(TIMER1_OVF_vect): every 0.1 this program is called; content includes: (1) Calculate motor speed (2) Send motor speed to the computer (3) Calculate PWM pulse (base on PID algorithm) (4) Push result of PWM to H-brigde. The entire of code for Arduino Pro mini can be downloaded at this link.
Visual Studio 2012 is used to make HMI programs, in which: (1) Send speed settings to Arduino (2) Send PID gain (kP, kI, kD) to Arduino (3) Receive motor speed -> show on graph
The whole code for the Visual Studio program can be downloaded at this link. To make a Visual Studio program, see the detailed steps in this article. In general, the code will have:
#pragma endregion
 private: System::Void Form1_Load(System::Object^  sender, System::EventArgs^  e) {
 serialPort1->Open();
 timer1->Start();
 mStr = "0";
 i=300;
 }
 private: System::Void button1_Click(System::Object^  sender, System::EventArgs^  e) {
 serialPort1->WriteLine("vs_set_speed"+textBox1->Text); //send set_speed to Arduino
 serialPort1->WriteLine("vs_kp"+textBox2->Text); //send kP to Arduino
 serialPort1->WriteLine("vs_ki"+textBox3->Text); //send kI to Arduino
 serialPort1->WriteLine("vs_kd"+textBox4->Text); //send kD to Arduino
 }
 private: System::Void timer1_Tick(System::Object^  sender, System::EventArgs^  e) {
 String^ length;
 length=mStr->Length.ToString();
 if(mStr->Substring(0,5)=="speed"){
 speed=mStr->Substring(5,System::Convert::ToInt32(length)-6);
 label1->Text=speed;
 //print motor speed into Chart
 this->chart1->Series["Series1"]->Points->AddXY(i,System::Convert::ToDouble(speed));
 i++;
 this->chart1->ChartAreas["ChartArea1"]->AxisX->Minimum=i-300; //shift x-axis
 }
 }
 private: System::Void serialPort1_DataReceived(System::Object^  sender, System::IO::Ports::SerialDataReceivedEventArgs^  e) {
 mStr=serialPort1->ReadLine();
 }
 private: System::Void button2_Click(System::Object^  sender, System::EventArgs^  e) {
 serialPort1->WriteLine("vs_start"); //start motor
 }
 private: System::Void button3_Click(System::Object^  sender, System::EventArgs^  e) {
 serialPort1->WriteLine("vs_stop");  //stop motor
 }
_3u05Tpwasz.png?auto=compress%2Cformat&w=40&h=40&fit=fillmax&bg=fff&dpr=2)
Comments
Please log in or sign up to comment.