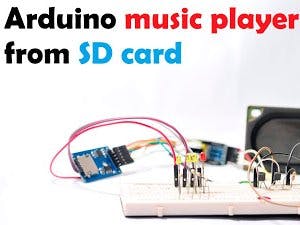
Arduino music player project can be easily implemented in 10 minutes!
The popular mp3 music file is converted to wav file, stored in SD card module, then it is read by arduino and output to speaker
Hardware need
1. Arduino Pro Mini (link to purchase)
2. SD card SPI module (link to purchase)3. SD card 8GB (link to purchase)
3. Speaker 3W 8Ohm
4. Some LEDs, resistor, transistor
Buy electronic component on utsource.net
Step 1. Make a circuit
Output from Arduino to speaker need through some transistor to magnify current through speaker, make it louder. Or this output can connect to commercial amplifier for better sound
Four LEDs is used to display music wave form. Quantity of displayed LEDs are detected by amplitude of sound, which is represented via TIMER1
Step 2. Code works
Before make the code, an library called TMRpcm for music need to be installed
Arduino code
#include <SD.h>               // need to include the SD library
#define SD_ChipSelectPin 10   //pin10 for Arduino Pro Mini
#include <TMRpcm.h>           //  Lib to play wav file
#include <SPI.h>
TMRpcm tmrpcm;   // create an object for use in this sketch
unsigned long time = 0;
int waveform = 0;
int qtyLED = 0;
int timeLED = 25;
void setup(){
tmrpcm.speakerPin = 9; //pin 9 for Aduino Pro Mini
Serial.begin(9600);
pinMode(17,OUTPUT);
pinMode(16,OUTPUT);
pinMode(15,OUTPUT);
pinMode(14,OUTPUT);
if (!SD.begin(SD_ChipSelectPin)) {  // see if the card is present and can be initialized:
Serial.println("SD fail");
return;   // don't do anything more if not
}
else{
Serial.println("SD ok");
}
tmrpcm.play("music.wav"); //the sound file "music" will play each time the arduino powers up, or is reset
tmrpcm.volume(2);
}
void loop(){
waveform = OCR1A; //read TIMER1 value, represent for wave form music
waveform = waveform - 256;  // middle point of volume(2) is 256
qtyLED = waveform/16;  //q'ty LED need to be ON
if (qtyLED <= 0){
qtyLED0();
delay(timeLED);
}
if (qtyLED == 1){
qtyLED0();
delay(timeLED);
qtyLED1();
delay(timeLED);
}
if (qtyLED == 2){
qtyLED0();
delay(timeLED);
qtyLED1();
delay(timeLED);
qtyLED2();
delay(timeLED);
}
if (qtyLED == 3){
qtyLED0();
delay(timeLED);
qtyLED1();
delay(timeLED);
qtyLED2();
delay(timeLED);
qtyLED3();
delay(timeLED);
}
if (qtyLED == 4){
qtyLED0();
delay(timeLED);
qtyLED1();
delay(timeLED);
qtyLED2();
delay(timeLED);
qtyLED3();
delay(timeLED);
qtyLED4();
delay(timeLED);
}
if(Serial.available()){
switch(Serial.read()){
case 'd': tmrpcm.play("music.wav"); break;
case 'b': tmrpcm.play("BeatIt.wav"); break;
case 'r': tmrpcm.play("Race_Car.wav"); break;
case 'p': tmrpcm.pause(); break;
case '?': if(tmrpcm.isPlaying()){ Serial.println("A wav file is being played");} break;
case 'S': tmrpcm.stopPlayback(); break;
case '=': tmrpcm.volume(1); break;
case '-': tmrpcm.volume(0); break;
case '0': tmrpcm.quality(0); break;
case '1': tmrpcm.quality(1); break;
default: break;
}
}
}
void qtyLED1(){
digitalWrite(17,0);
digitalWrite(16,0);
digitalWrite(15,0);
digitalWrite(14,1);
}
void qtyLED2(){
digitalWrite(17,0);
digitalWrite(16,0);
digitalWrite(15,1);
digitalWrite(14,1);
}
void qtyLED3(){
digitalWrite(17,0);
digitalWrite(16,1);
digitalWrite(15,1);
digitalWrite(14,1);
}
void qtyLED4(){
digitalWrite(17,1);
digitalWrite(16,1);
digitalWrite(15,1);
digitalWrite(14,1);
}
void qtyLED0(){
digitalWrite(17,0);
digitalWrite(16,0);
digitalWrite(15,0);
digitalWrite(14,0);
}
The main code is taken from example of library TMRpcm, then we add a section to display LEDs depend on amplitude of sound, called music wave form.
The variable name "waveform" in the code, if it is printed out, it will looks like this:
This waveform is used to detect quantity of LEDs should be displayed.
One more thing is the music file mp3 need to change to wav format. There are many web base to convert music online. In this project, we use following page to convert music (link here)
The converted music should be in 8bit, 16000Hz, mono
Then, the music file is save to SD card with same name in Arduino code
Hola, music can be run now! In order to change music, do it by monitor screen.


Comments
Please log in or sign up to comment.