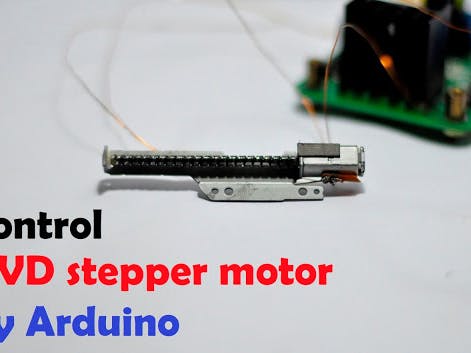
DVD stepper motor is bipolar type. Using H-bridge L298N to be as drive.
This project will make stepper motor run -> this is a basic step to make CNC machine.
This project will need:
1. Arduino Pro Mini https://amzn.to/2xy4yFn
2. H-brige L298N https://amzn.to/2QS2FeI
3. Stepper motor
Buy electronic component on utsource.net
H-bridge L298N
Arduino Pro Mini
Bipolar stepper motor
1. Bipolar stepper motorThere are many document over Internet about stepper motor, you can search yourself.
It has 2 coils, which is ON and change direction synchronized to make rotor run forward/ backward by pulse of controller, this case is Arduino.
Each pulse will rotate rotor each moving, called step -> by this way, rotor can be controlled it's position by pulse -> main application of stepper motor: can control position!
H -bridge will control pulse of each coil.
Basically, there are many pulse pattern for stepper motor, we can see some here:
I copy those pattern on Internet, it said:
1. One phase mode, draws the least current, and provides less torque than the two phase mode
2. Half stepping mode, gives more steps per revolution, but provides less torque.
In this project, i choose "one phase" mode
Stepper motor has 4 pin, which is for A and B coil. Using volt-meter to find coil. Direction of coil (A+, B+), i just choose it by chance!
Make connection as above picture, where pin is connected to H-bridge PCB
const byte pin_A1 = 4;
const byte pin_A2 = 5;
const byte pin_ENA = 2;
const byte pin_B1 = 7;
const byte pin_B2 = 8;
const byte pin_ENB = 3;
const byte speed_motor = 10;
void setup() {
pinMode(pin_A1,OUTPUT);
pinMode(pin_A2,OUTPUT);
pinMode(pin_ENA,OUTPUT);
pinMode(pin_B1,OUTPUT);
pinMode(pin_B2,OUTPUT);
pinMode(pin_ENB,OUTPUT);
// start serial port at 9600 bps:
Serial.begin(9600);

while (!Serial) {
; // wait for serial port to connect. Needed for native USB port only
}
}
void loop() {
run_forward();
}
void run_forward()
{
digitalWrite(pin_ENA,1);
digitalWrite(pin_A1,1);
digitalWrite(pin_A2,0);
digitalWrite(pin_ENB,0);
digitalWrite(pin_B1,0);
digitalWrite(pin_B2,0);
delay(speed_motor);
digitalWrite(pin_ENA,0);
digitalWrite(pin_A1,0);
digitalWrite(pin_A2,0);
digitalWrite(pin_ENB,1);
digitalWrite(pin_B1,1);
digitalWrite(pin_B2,0);
delay(speed_motor);
digitalWrite(pin_ENA,1);
digitalWrite(pin_A1,0);
digitalWrite(pin_A2,1);
digitalWrite(pin_ENB,0);
digitalWrite(pin_B1,0);
digitalWrite(pin_B2,0);
delay(speed_motor);
digitalWrite(pin_ENA,0);
digitalWrite(pin_A1,0);
digitalWrite(pin_A2,0);
digitalWrite(pin_ENB,1);
digitalWrite(pin_B1,0);
digitalWrite(pin_B2,1);
delay(speed_motor);
}
void run_backward()
{
digitalWrite(pin_ENA,0);
digitalWrite(pin_A1,0);
digitalWrite(pin_A2,0);
digitalWrite(pin_ENB,1);
digitalWrite(pin_B1,1);
digitalWrite(pin_B2,0);
delay(speed_motor);
digitalWrite(pin_ENA,1);
digitalWrite(pin_A1,1);
digitalWrite(pin_A2,0);
digitalWrite(pin_ENB,0);
digitalWrite(pin_B1,0);
digitalWrite(pin_B2,0);
delay(speed_motor);
digitalWrite(pin_ENA,0);
digitalWrite(pin_A1,0);
digitalWrite(pin_A2,0);
digitalWrite(pin_ENB,1);
digitalWrite(pin_B1,0);
digitalWrite(pin_B2,1);
delay(speed_motor);
digitalWrite(pin_ENA,1);
digitalWrite(pin_A1,0);
digitalWrite(pin_A2,1);
digitalWrite(pin_ENB,0);
digitalWrite(pin_B1,0);
digitalWrite(pin_B2,0);
delay(speed_motor);
}
Above code has sub-function run forward and backward. But only "forward run" is used.
Basically, code will make pulse as "one phase mode":


Comments
Please log in or sign up to comment.