The purpose of this project was intended to allow users to monitor the status of their cooler. This application is good for college students who do not want to have the contents of their cooler stolen at a party or parents who want to monitor the “adult cooler” at their backyard barbecue. Additionally, the cooler becomes festive. The idea is simple, whenever the cooler is opened, lights are turned on inside the cooler and a notification is sent to your personal device(s).
The system works by connecting two photons (pictured in Figure 1) together using particle.publish and particle.subscribe. The first photon is connected to the magnetic reed switch, which is placed on the seam of the cooler and lid. The second photon is connected to a waterproof LED strip light. When the lid of the cooler is opened, the loop is broken, the lights will turn on, and the first photon will send a notification to your device(s)via IFTTT.
A brief overview of the components is below.
Magnetic Reed Switch
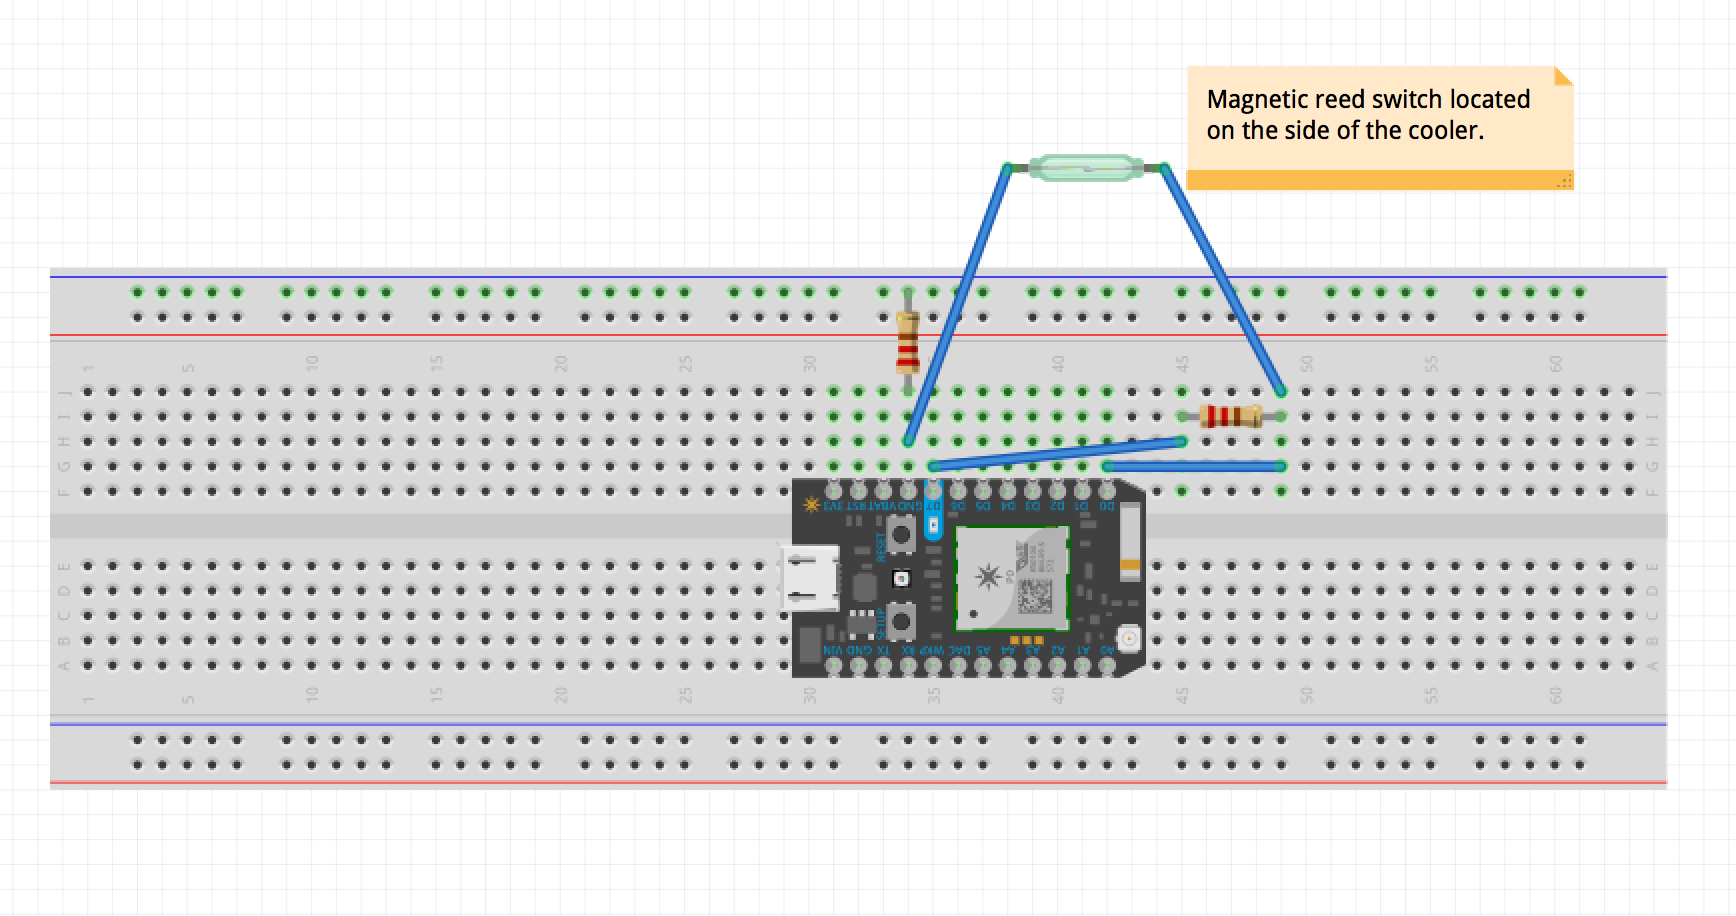
The magnetic reed switch (Figure 2) is connected to the first photon, which reads signal status of the cooler lid (opened or closed). The first photon will then signal the second photon whenever the state of the switch is changed.
LED Strip Light
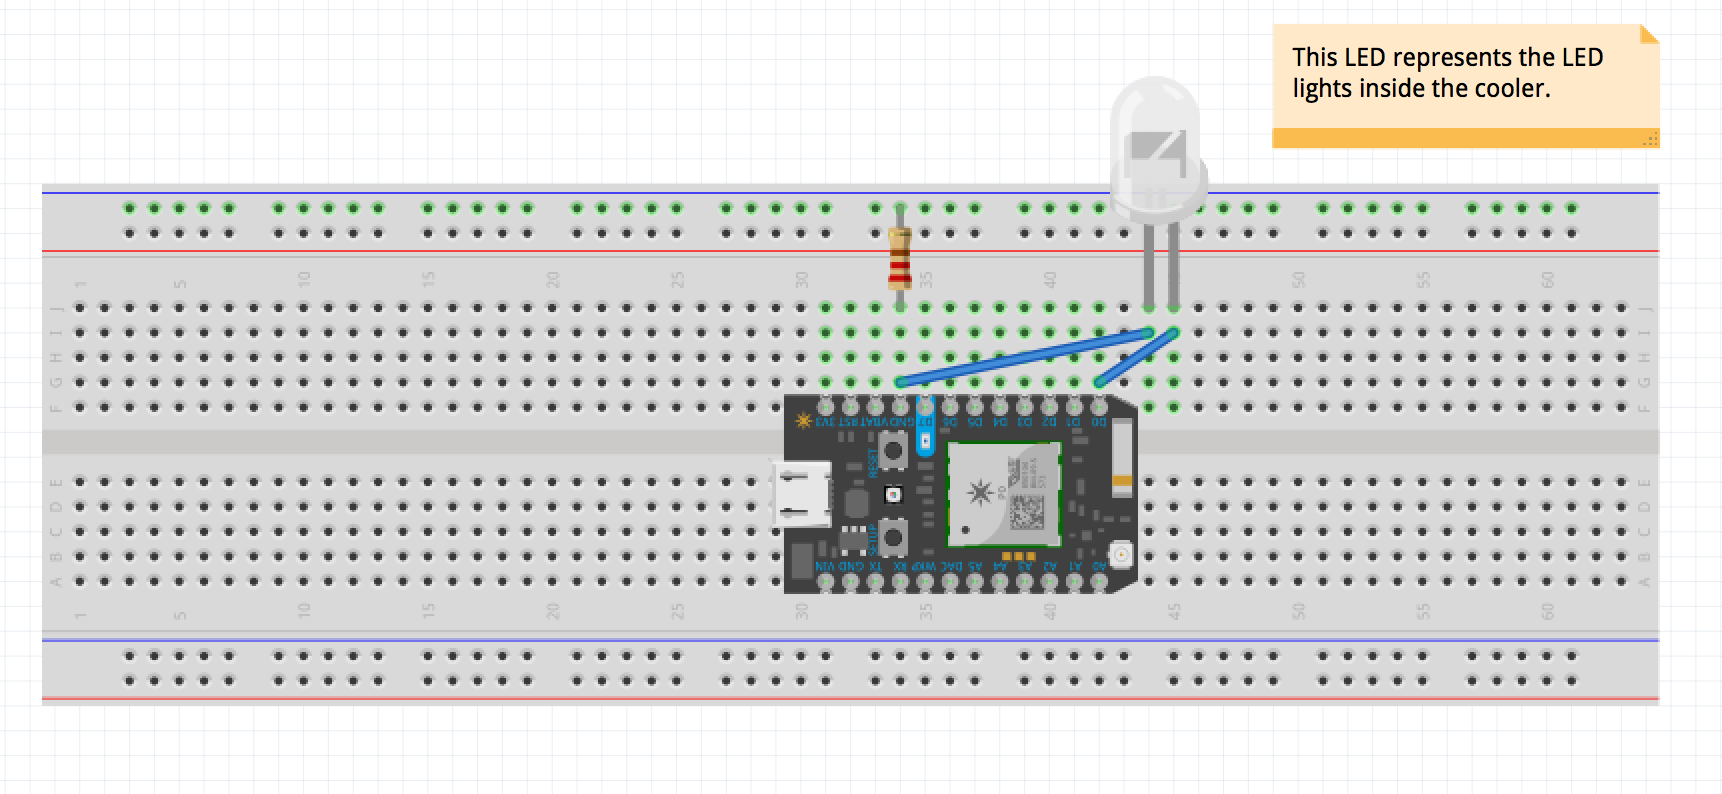
When the lid is opened, the second photon will receive the signal from the first photon indicating the state of the cooler lid. When it is opened, the second photon will output high, therefore turning on the lights (Figure 3).
SignalReceiving Methods
The devices that are receiving information from the first photon and the second photon are IFTTT, and Thingspeak. Thingspeak is used to monitor the time/frequency that the cooler is opened, when the lid is closed it will read a value of “0” and when the lid is opened it will read a value of“1”. Test results can be seen below in Figure 4.
The IFTTT contains two applets, one for when the cooler is opened, and one when the cooler is closed. The notifications sent to your device(s) can be seen in Figure 5.
Initially, both photons need to be connected to the internet (reference https://www.youtube.com/watch?v=kUuDxjZRUag&t=10s).
With both photons connected to the internet, both circuits need to be constructed (view schematics below). Place the magnetic reed switch on the seam of the cooler and lid, and place the light strip inside the cooler.
Next, create a Thingspeak account, create a new channel, give it an arbitrary name, and leave the rest of the settings to default. Once it is saved, acquire the API Key under the tab labeled “API Keys”. Copy the API Key, it is needed for the next step. Additionally, a webhook must be added through particle console. Once at the console, select “Integrations”, and create a new custom template. Copy the webhook code below and paste in to the custom template, and click “create webhook”.
Now, download the IFTTT app on your mobile device or on your computer. Create a new applet, search “Particle”, choose the “New Event Published” trigger, select and event name and its contents (ex: If “cooler_status” is “opened”), and select the device that reads the input signal of the magnetic reed switch (first photon in this project). Now create another applet with the same process, but change the event contents to the opposite of the first applet made. This process will allow the cooler to send notifications to your device(s).
Lastly, flash the code below to the two photons. The code will have to be varied slightly. For the first photon code, the event name(“cooler_status” for this project) must be changed to the event name defined by the user. Additionally, the API Key will need to be placed on the lines of code which publish to Thingspeak. For the second photon code, change the event name, and ensure place your device ID on the particle.subscribe code to enable the devices to communicate. Once the code is flashed, your cooler is ready to party.


Comments
Please log in or sign up to comment.