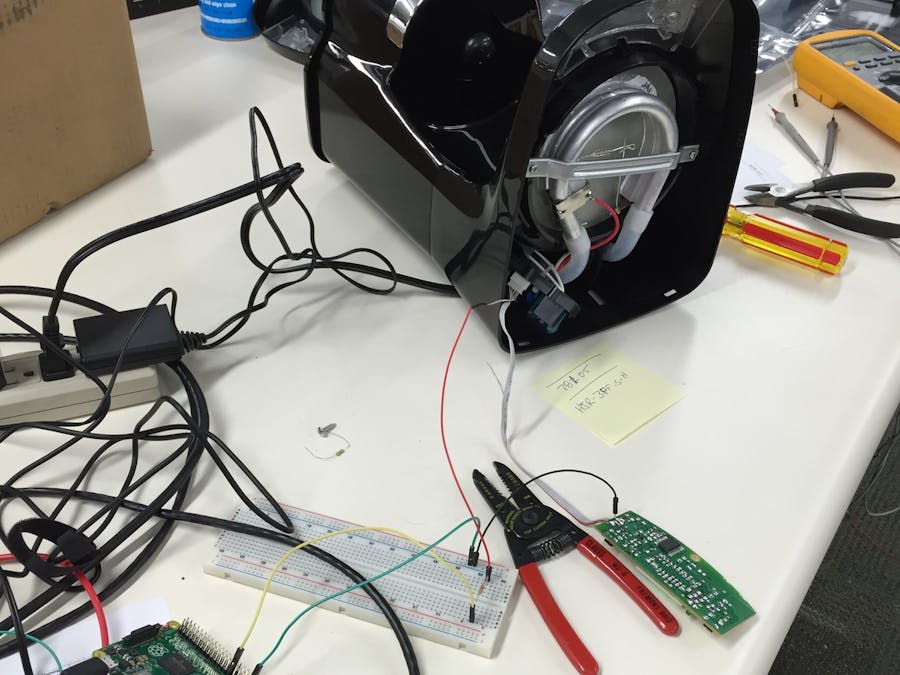
I myself am not a coffee drinker but my girlfriend is. I can recall on numerous occasions being asked
"can you start my coffee when you go into the kitchen"
and as any good boyfriend would do, I obliged. Shortly after starting on the IoT team at Microsoft my mind began to flood with scenarios of everyday connected things and while one day standing in the breakroom watching someone get coffee my mind flashed back to me being asked to could I start the coffee. A light bulb went off,
"why couldn't she command this appliance using her phone"
I wanted to build a coffee maker that could be controlled using your phone's built in virtual assistant. I dubbed it the Cortona (although this project uses only the Windows 10 speech APIs and not Cortona) enabled coffee maker. I went out the next day and bought a Black and Decker coffee maker and began to investigate what made the hot plate work. With some help from others around the organization we figured out how to control the relay, did some soldering, and got the coffee maker connected to my Raspberry Pi 2.
In its current iteration, the coffee maker is able to be switched on and off using the following commands:
- "make coffee"
- "start coffee"
- "stop"
- "disable"
- "turn off"
It can also be controlled by calling the following endpoints:
- http://<device address>:8000/api/CFMakerRelay/enable
- http://<device address>:8000/api/CFMakerRelay/disable
The next steps for the project include a phone application using UWP and integrations with Cortona.
Reference MaterialsPreparing the Coffee Maker
- Use a Philips screw driver to remove the center screw and use a security bit to remove the two remaining screws.
- Remove the bottom cover to access the interior of the coffee machine
- Use a Philips screw driver to remove the keypad controller from the casing
- Separate the wire marked "RLY" from the 4-strand bundle
- Cut the "RLY" wire in half (this will be spliced to the Pi GPIO later) The RLY wire is what the wire that connects to the relay switch. When the current is pulled low across the wire the relay switches allowing current to flow to the hot plate therefore "turning on" the coffee machine
- emove the bottom cover to access the interior of the coffee machine
- On the under-side(green side) of the controller solder a strand of wire to the "GND" (this will be attached to the Pi GPIO later)
- Reattach the keypad controller to the casing (the "ON/OFF" button will no longer function)
Connecting to the Raspberry Pi 2
- Take the end of the "RLY" wire you cut that is not connected to the keypad controller and extend it
- Connect the extended "RLY" wire to the Raspberry Pi 2 GPIO 5 (PIN 29) and connect the ground wire you soldered earlier to the Raspberry Pi 2 GND (PIN 39)
Deploying the App
- Visit Windows 10 IoT Core samples on GitHub at https://github.com/ms-iot/samples
- Find the sample named "Raspberry Coffee" and download
- Open the project in Visual Studio 2015 and set the Remote Machine in the debugger settings to the hostname or IP address of your device
- Run the application


Comments
Please log in or sign up to comment.