


Hardware components | ||||||
_ztBMuBhMHo.jpg?auto=compress%2Cformat&w=48&h=48&fit=fill&bg=ffffff) |
| × | 1 | |||
| × | 4 | ||||
| × | 1 | ||||
| × | 1 | ||||
Software apps and online services | ||||||
 |
| |||||
 |
| |||||
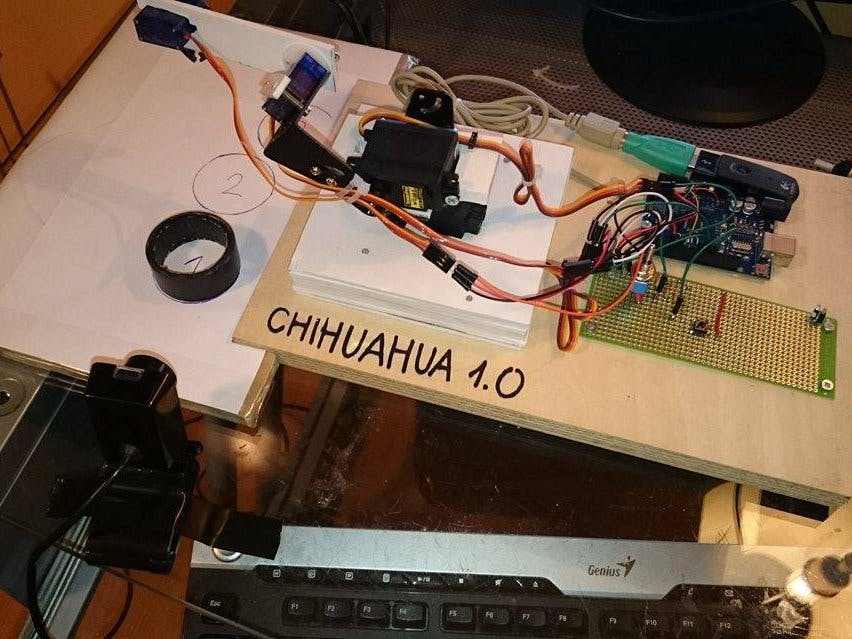
It was an obligatory task during my studies to develop an Arduino based project. I am really interested in robotics so I decided to make a robot of my own. The idea was to build a desktop robotic arm possible to control with computer mouse. After I achieved that, I came to a conclusion that the project was too simple - that's just controlling 4 servos with a computer mouse - not funny at all, so I started my work on image processing program. I am familiar with Matlab software so I decided to use it for this purpose.
VideoIn the video you can see the final effect. This video was made for Matlab's contest and it also includes some explanations which I may duplicate in further description:
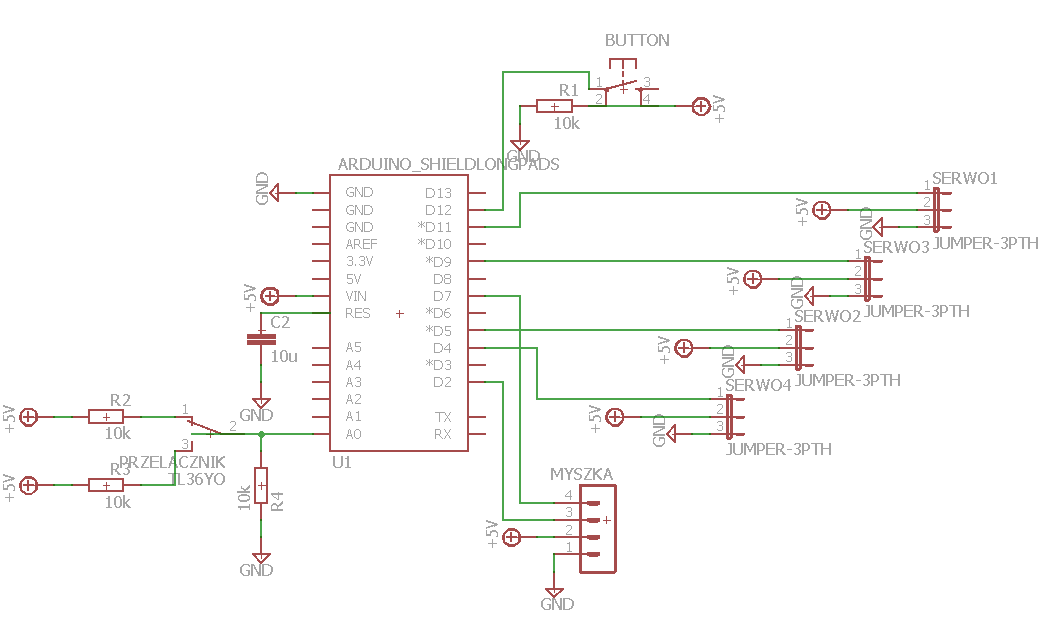
How it works?The robot can work in 2 modes. Manual - with the mouse controlling it and automatic with vision system. Connecting computer mouse with Arduino is pretty easy - I used this schematic and this library.
When it comes to communication between Arduino and Matlab, there are 2 ways to deal with it. First is by using Matlab support package for Arduino, it's quite handy when you want to access some Arduino's variables from Matlab to show them on graphs or do math calculations on them. The second way (the one I used) is using serial comunication.
Automatic mode - image processingIf you haven't watched the video above - please do now. Below i will explain some of the most important functions that I used in Matlab. However to truly understand how this image processing works, you have to see what the robot sees.
The functions worth mentioning are:
- snapshot - to acquire images from webcam
- rgb2gray - to convert image to greyscale
- bwareaopen - to remove noise from binary picture
- regionprops - to measure white spot and find its location
From the last function, Matlab is able to find centerpoint of the tape (its position). It then calculates on which out of 3 possible locations the tape is. What is left to do is to send the location number to Arduino with fprintf function. Then Arduino (depending on what value it recieved) decides which location to approach.
As you may have noticed - this vision system is not able to recognize any location but only one out of three predefined.
Serial communication trickWhen we open serial communication on our Arduino, the controller will reset. You can notice that it even resets when you open the Serial Monitor in IDE. To deal with it, I soldered a 10uF capacitor between RESET and GND pins of Arduoino (+ goes to RESET). Details here.
Using Matlab Support Package for ArduinoI haven't used it in this project but I did in another one and I think it's worth mentioning. To install the package, go to: Add-Ons -> Get Hardware Support Packages -> Install from Internet -> Arduino.
There are many many functions to use with this packege, you can find the list here.
You can write whole program on Arduino using Matlab thanks to this package, but it doesn't seem conveninet to me. What I used it for is when I had to watch and analyze some voltage signals and had no osciloscope to do it. Instead, I used this package and a simple code which you can find in Code section. The results were great:


Comments
Please log in or sign up to comment.