v1.1.x: Depends on TimeAlarms.h (hence TimeLib.h) library for Timer purpose (intead of TimerOne.h lib). And on LcdProgressBarDouble.h (hence LiquidCrystal.h) library for progress bar display
v1.2.x: Depends on (+ v1.1.x deps) AnalogMultiButton.h to provide values jump, a single input for 2 buttons and code easier to readWhat is CameraShutter?
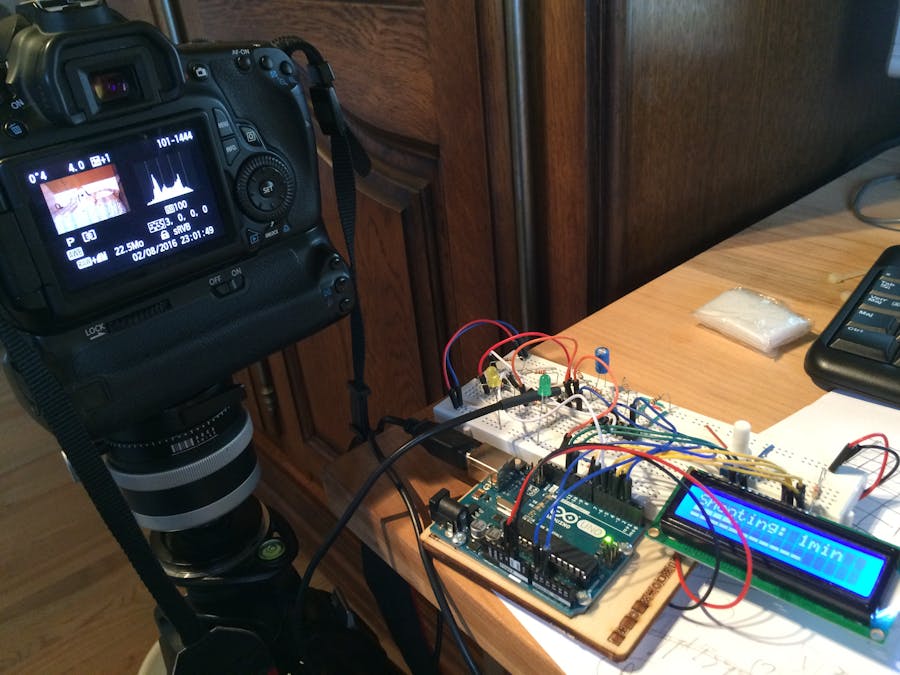
Yet another Remote Shutter for a DSLR? Yes but... you no longer need any program compilation to change the duration and interval... happy?!
Genesis- First step, a big wish to get a cheap remote for my DSLR... and a bit of fun as well! So I started mine, based on a website. Could be this excellent DIY remote trigger shutter page.
- Second step: the optocoupleur 4N35 CI found in the Arduino Starter Kit, and a google search on it showed me... so many remotes for my DSLR!
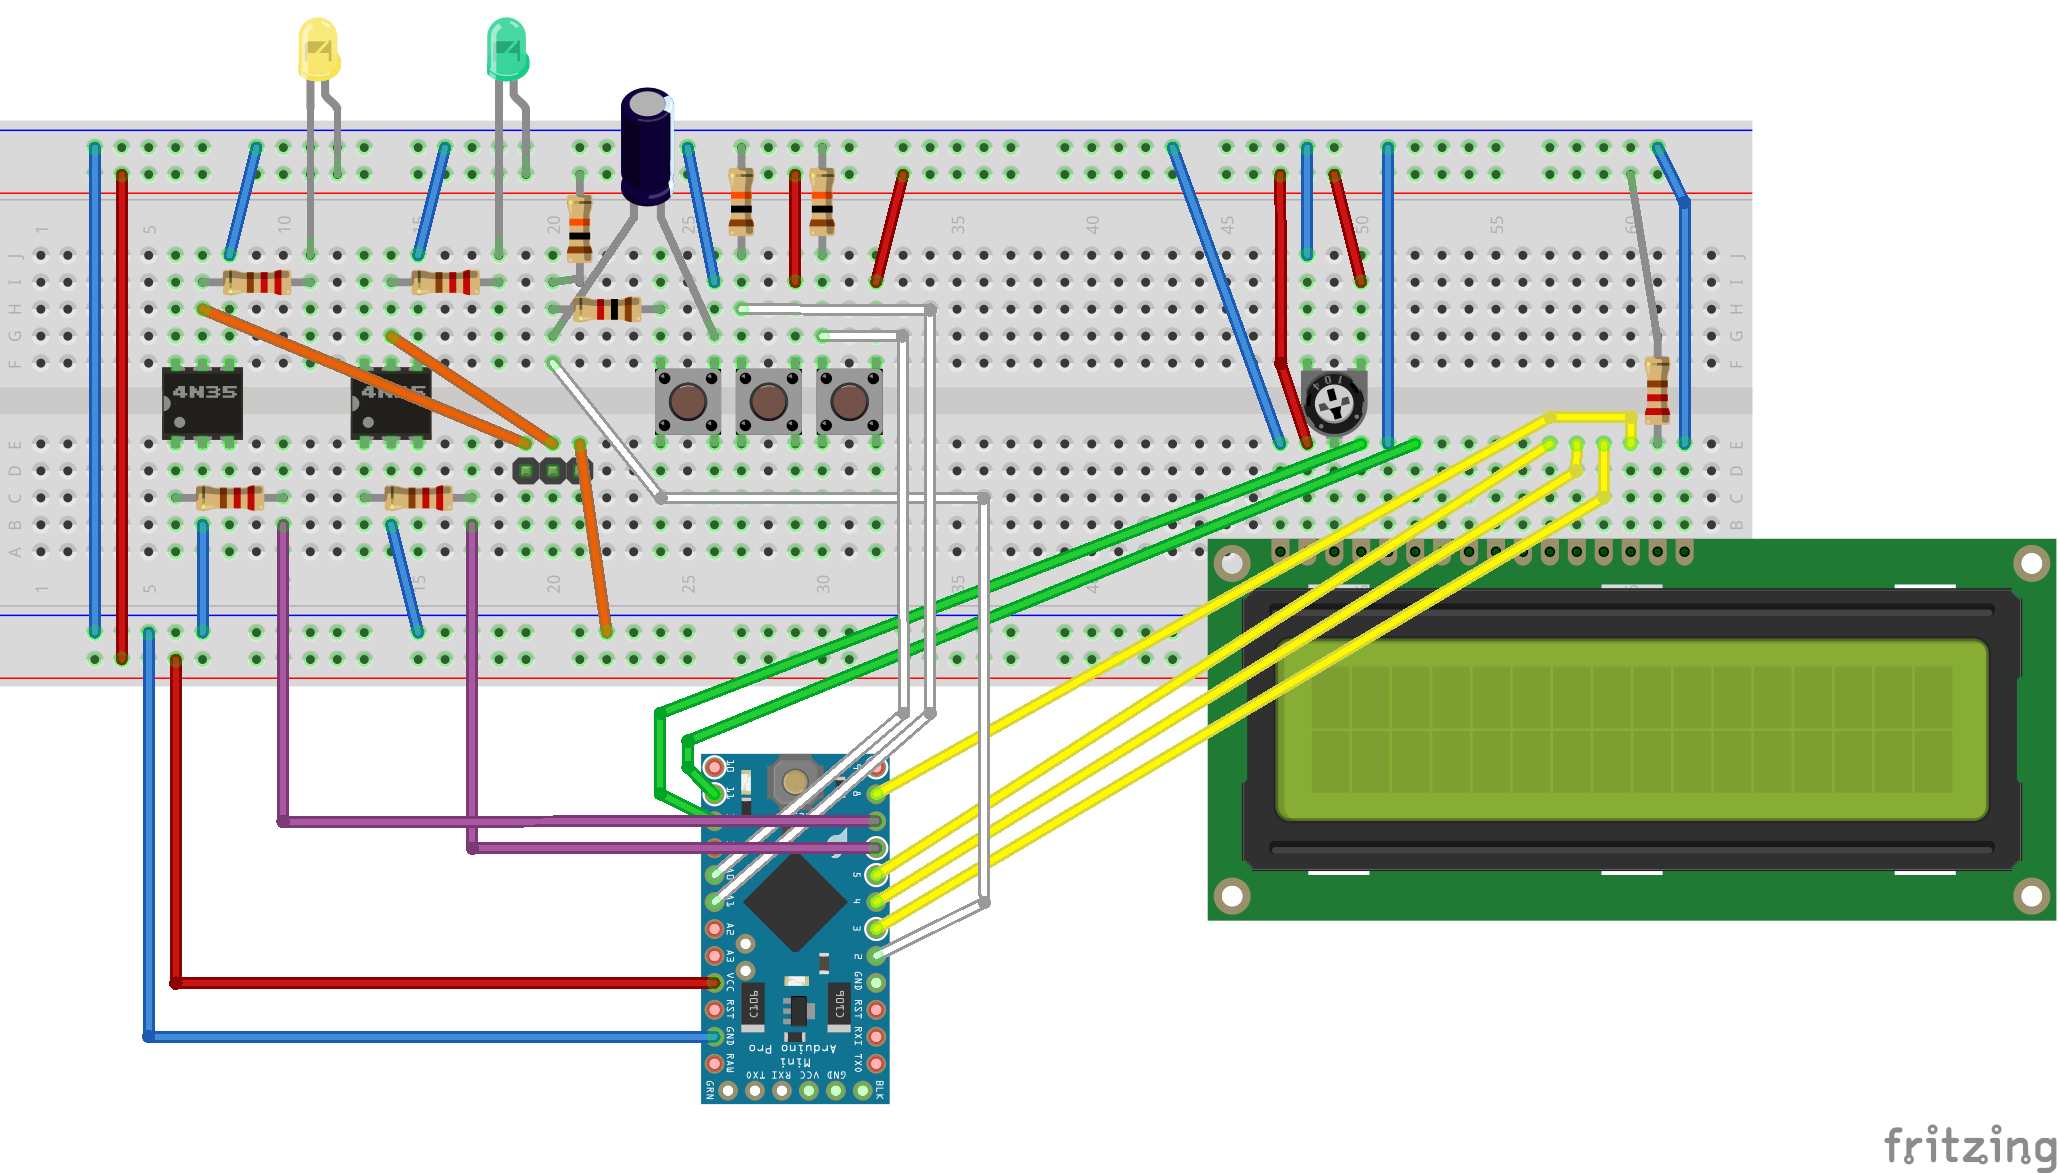
Buttons
* SwitchMenu/Stop. Goes through the menus such as:
- Status: Press Minus or Plus switched to start.
- Delay (seconds): delay before starting the shutter.
- Duration (minutes): how long to take pics?
- Interval (seconds): how long between 2 pics?
- Autofocus (yes/no): if yes, engage the focus before shooting (only once).
- Reset (yes/no): when pressed, reset the default values.
* SwitchMinus: decr the value. Hold 1/2s to decrement by 5. Hold 2s to decrement by 20.
* SwitchPlus: incr the value. Hold 1/2s to increment by 5. Hold 2s to increment by 20.
* LCD trimmer: adjust the LCD contrast
Indicators
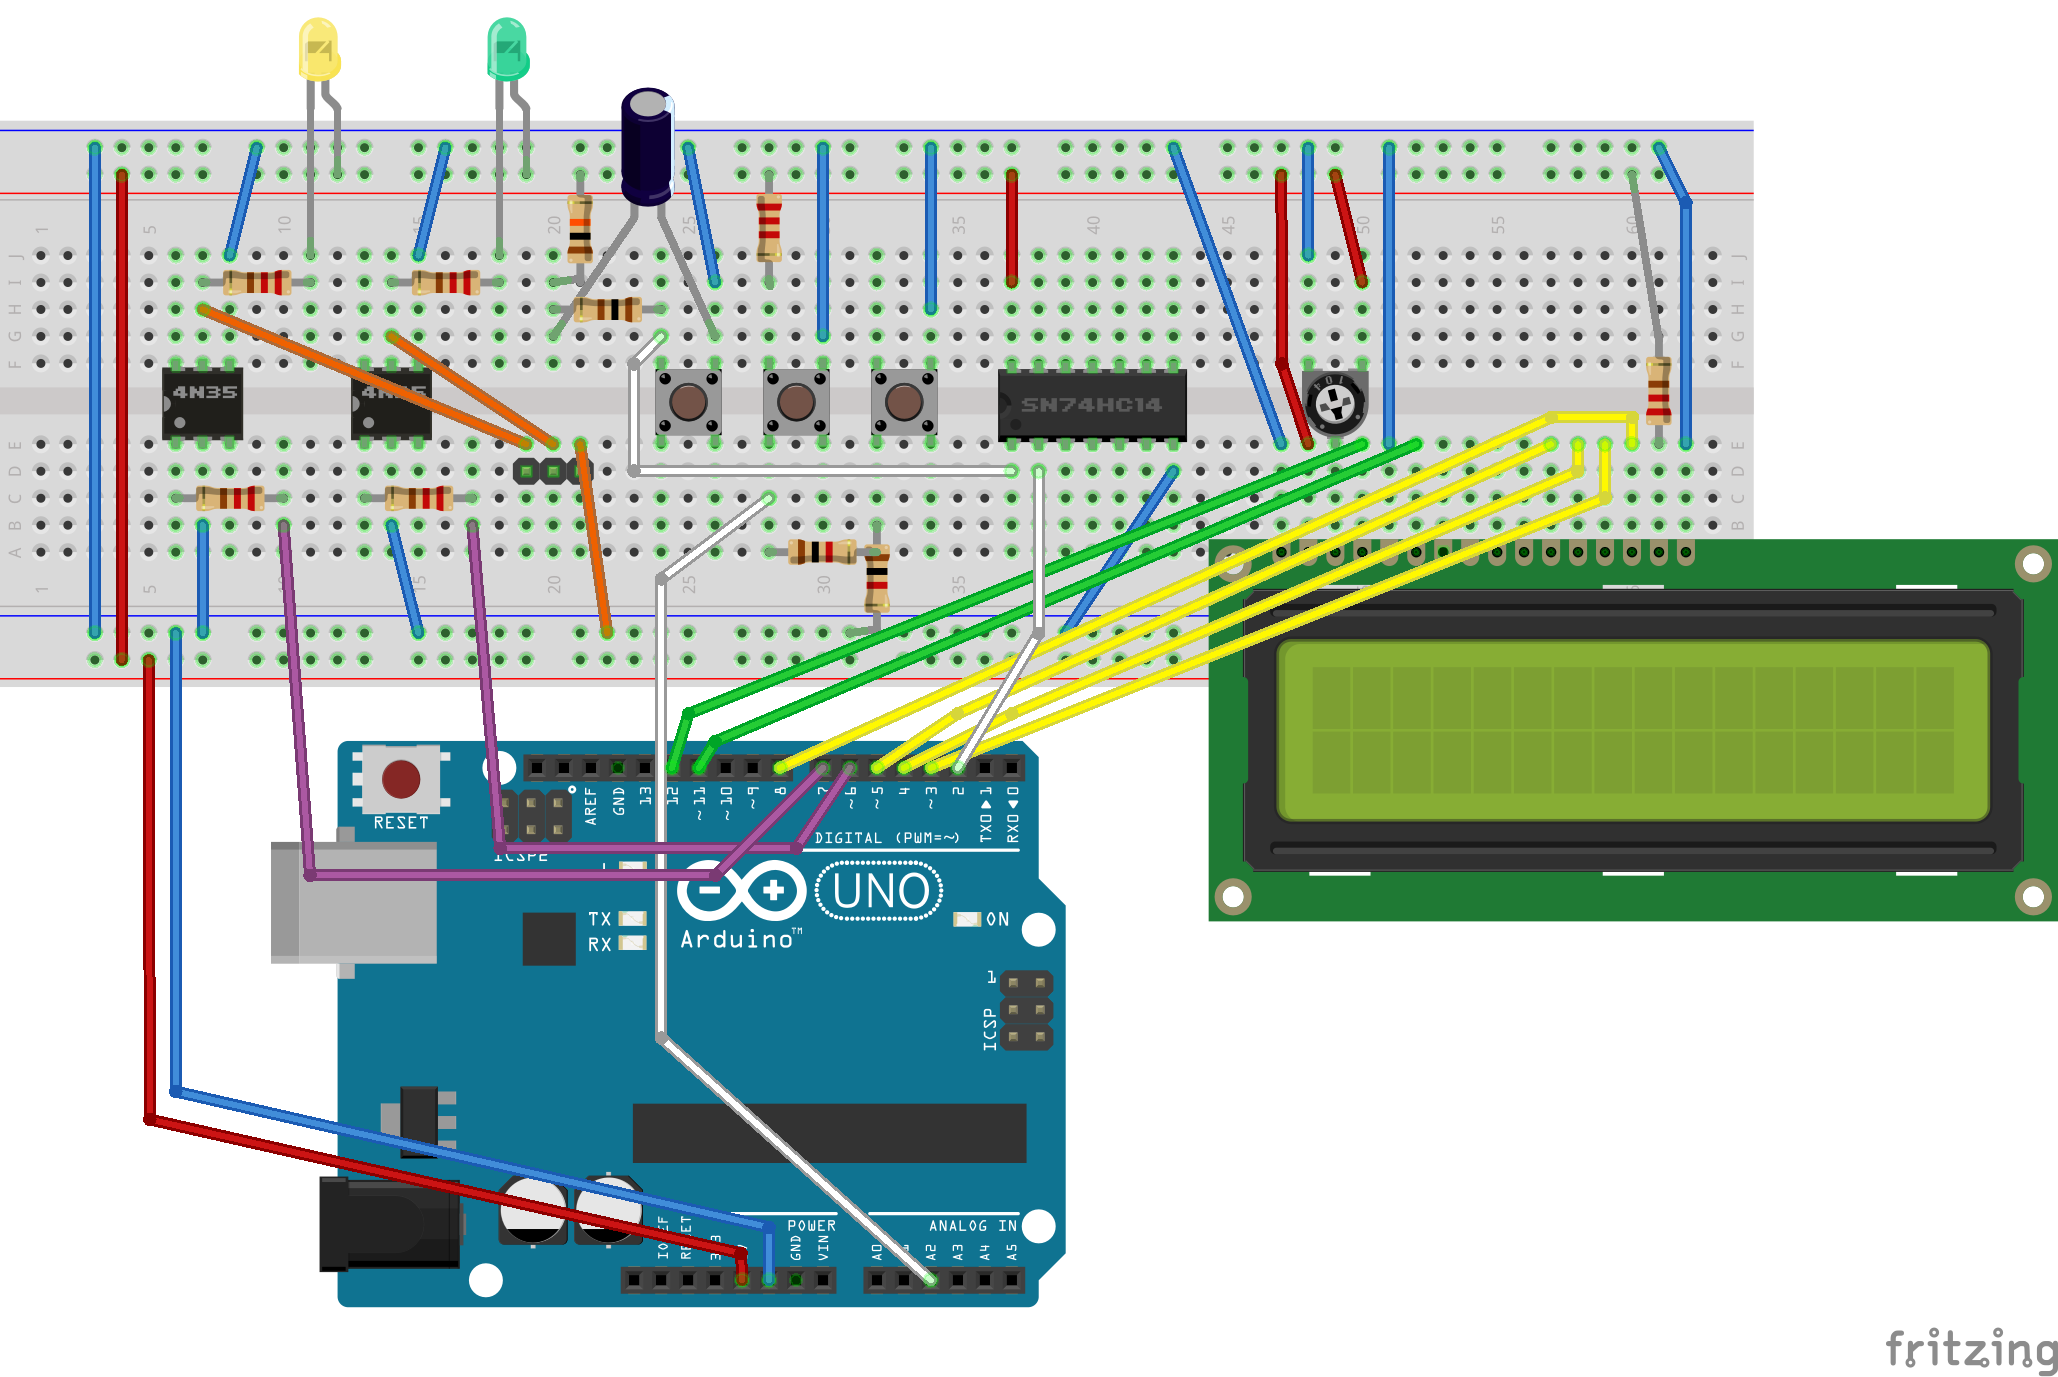
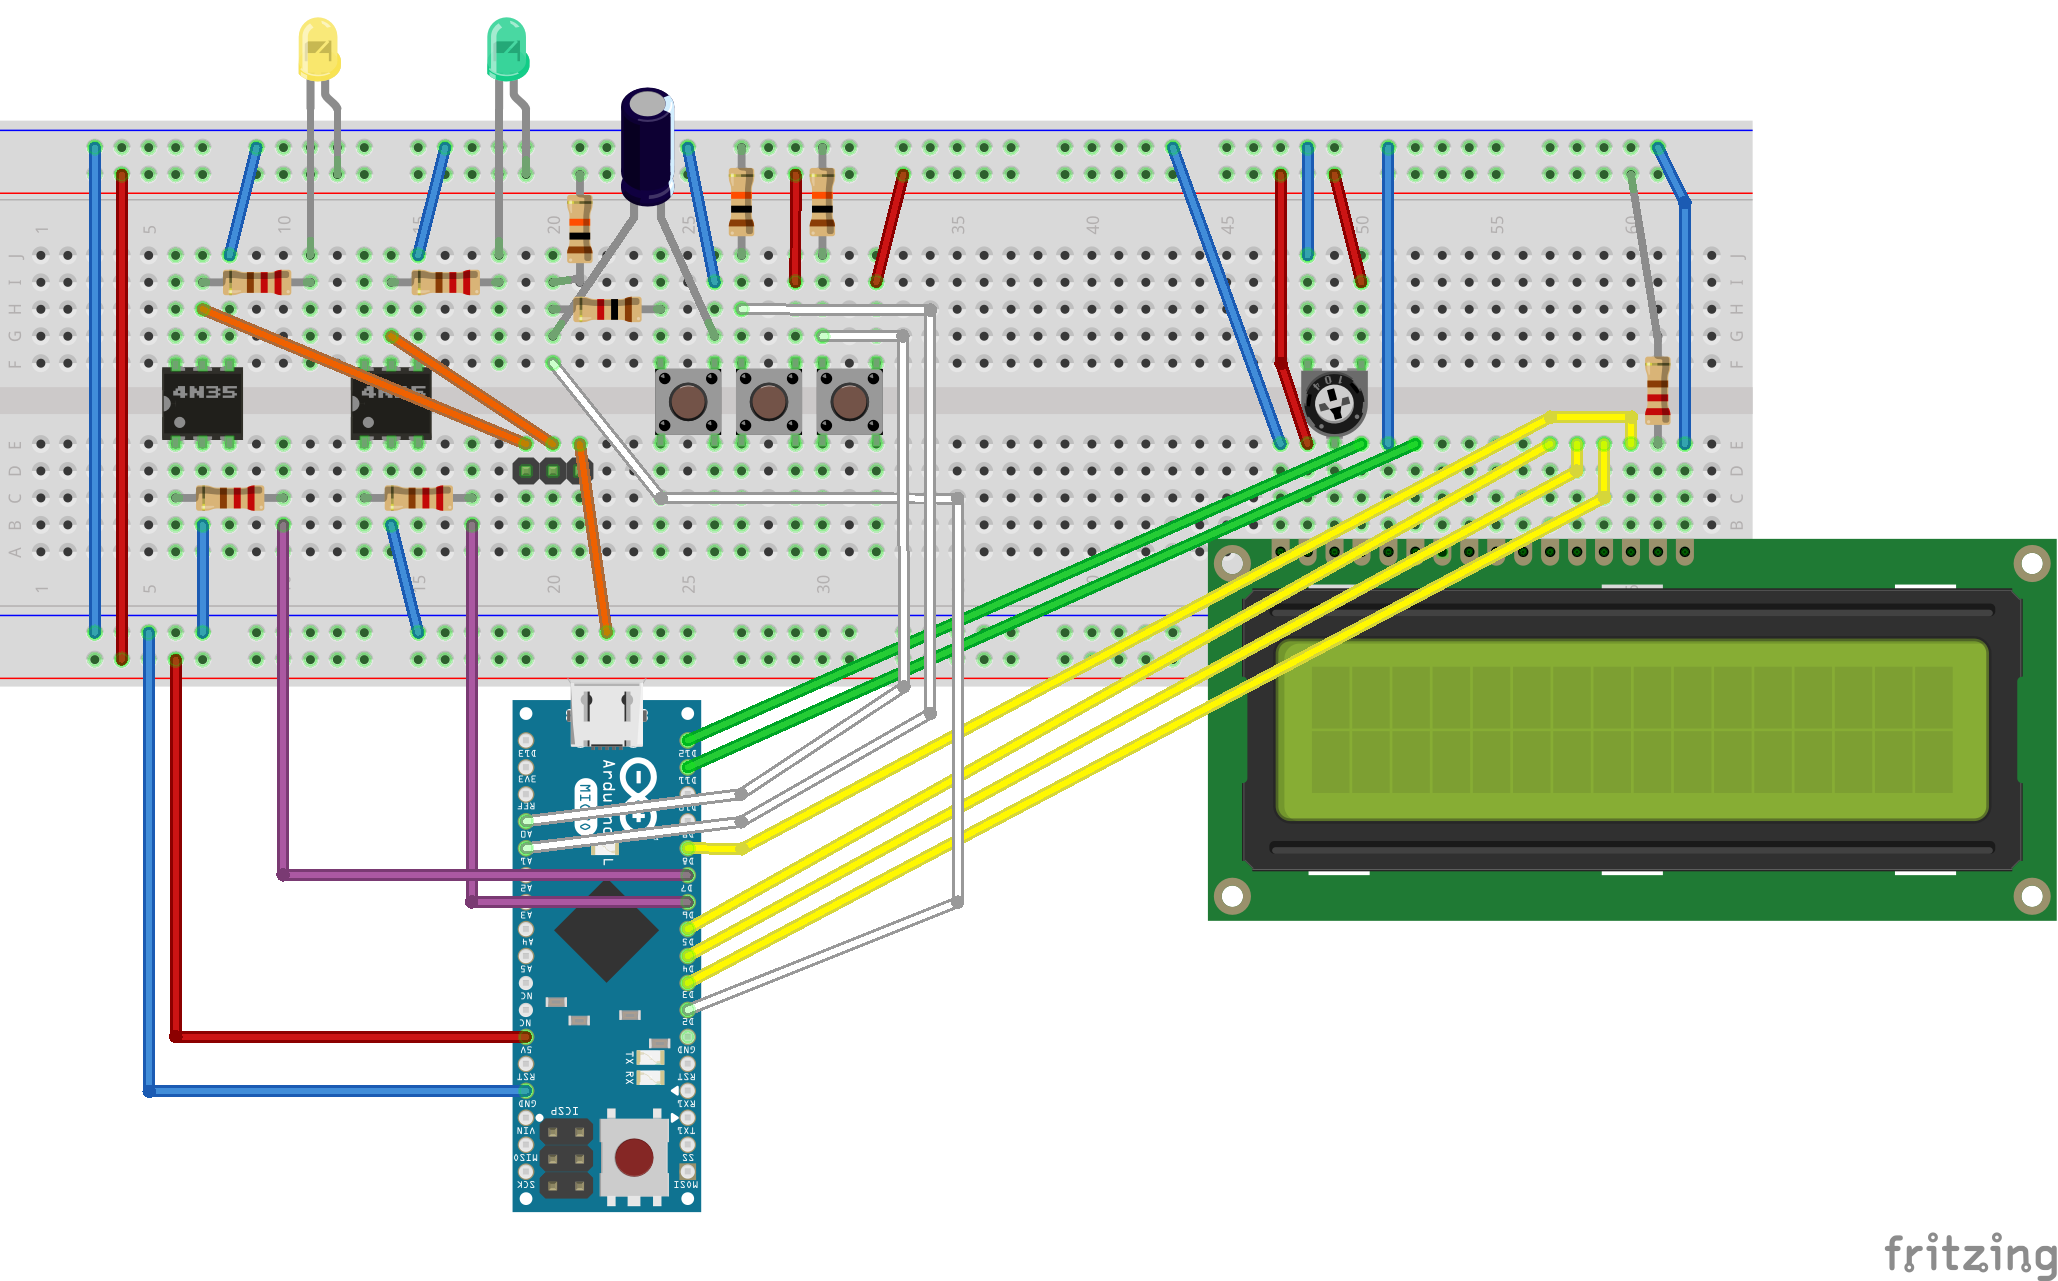
- Yellow LED: focus indicator
- Green LED: shutter indicator
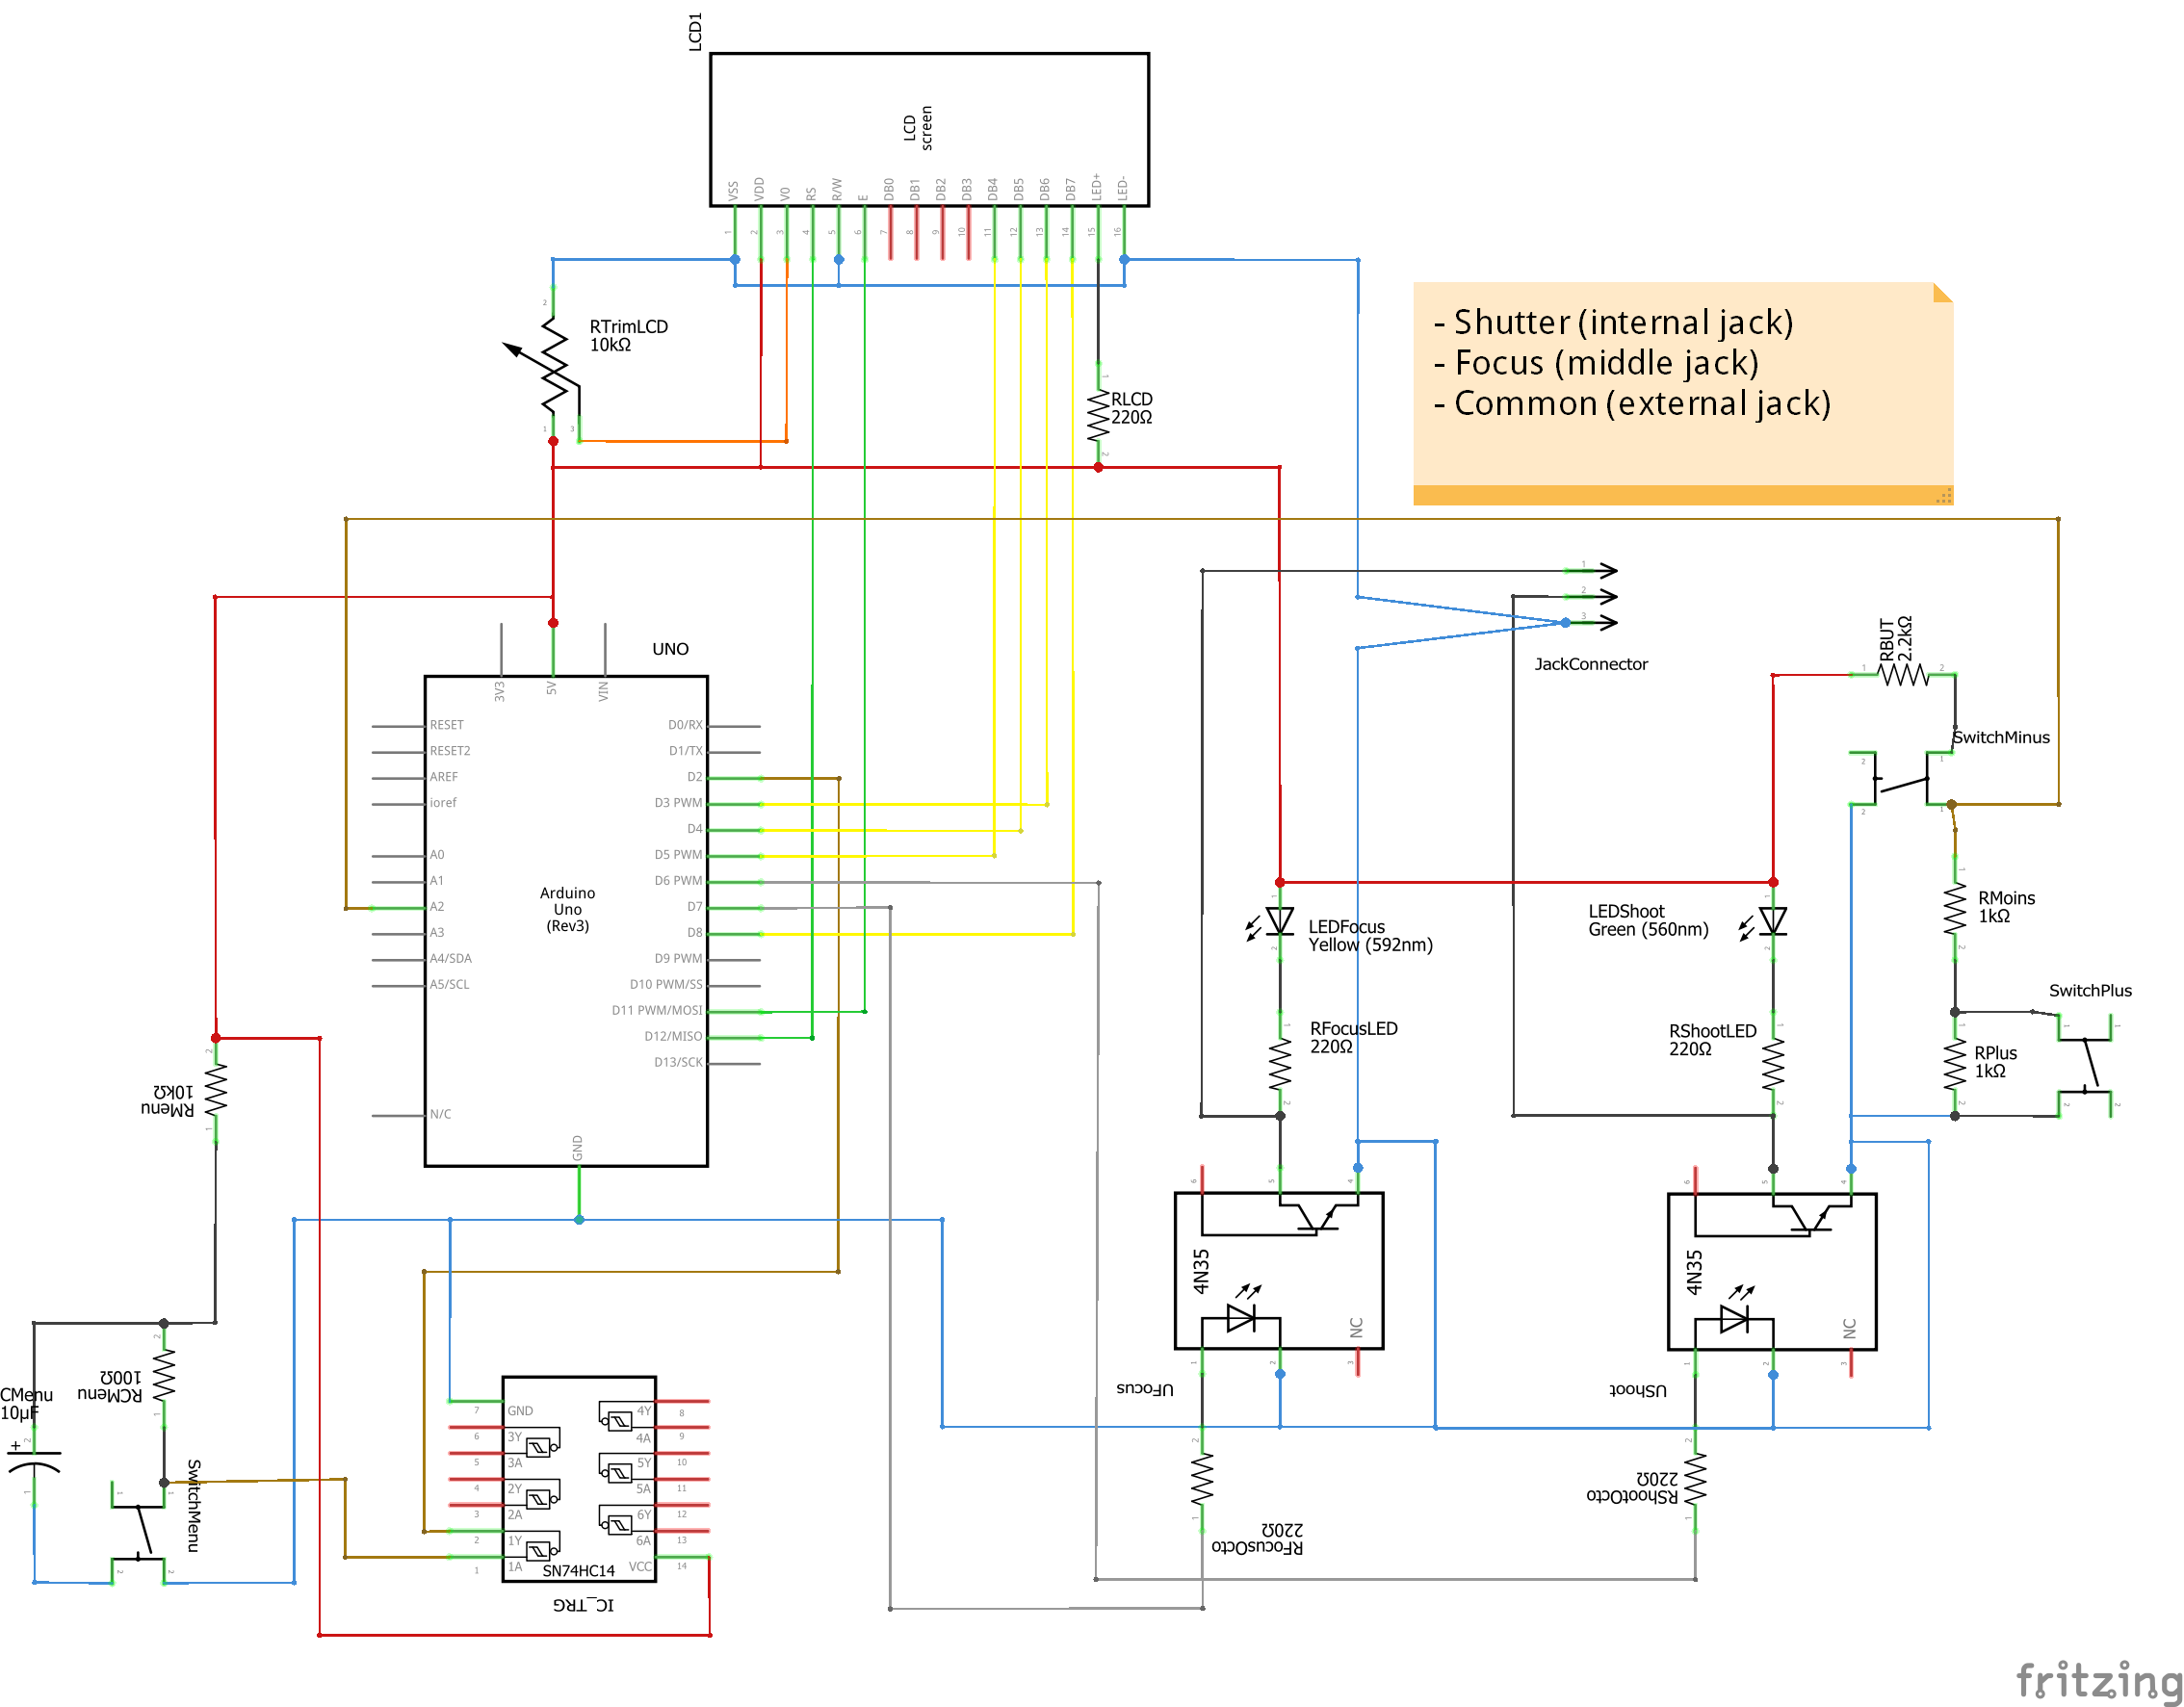
millis()function is not that accurate so I used the TimerOne library.- How to ensure the DSLR to be electrically independent with mine? 4N35 CI is the solution!
- Sequential programs with long delays (for the camera to shoot) made tricky to handle the stop via the buttons. Event based program based on hardware interruptions was the clue.
- The software debounce was no longer available (the
delay()function is voided during an event is triggered... took me hours to figure it out!) so I use a RC circuit to provide a hardware debounce (got the clue in Exploring Arduino book). - Nice indicators with progress bars of duration spent and intervals representation... I wrote LCDProgressBarDouble library!
- How to easily provide some value jumps when holding the button for 1/2 seconds or 2 seconds: AnalogMultiButton is a right and easy solution :).
Depends on:
- TimeAlarms.h, and hence Time.h
- LcdProgressBarDouble.h, and hence LiquidCrystal.h
- AnalogMultiButton.h
Warnings
- Arduino UNO only supports Pin2 and Pin3 for hardware interruptions. Check your model!
- TimerOne requires Pin9 and Pin10 (PWM~) to be unconnected.
- 1x Electrolytic Capacitortension 6.3V; 10µF
- 1x LCD screenbroches 16; type Character
- 1x Yellow LED
- 1x Green LEDboîtier
- 2x 1kΩ Resistor
- 5x 220Ω Resistor
- 1x 100Ω Resistor
- 1x 10kΩ Resistor
- 1x Trimmer Potentiometer 10kΩ
- 3x Push button
- 2x Optocoupler 4N35
- 1x Arduino Uno
- 1x Jack male 2.5mm
- 1x MC14584B (Hex Schmitt Trigger)
Use a tiny board (e.g. Adafruit Pro Trinket), redesign the PCB around it and 3D print a beautiful box... would need a 3D printer for that... will ask my wife whether it could be part of a Christmas wishlist!
Of course, one day or one another I'll get a new camera body with embedded WiFi... in the meanwhile, I'm enjoying my toy!
And of course... test it on Chicago sunsets :).


_ztBMuBhMHo.jpg?auto=compress%2Cformat&w=48&h=48&fit=fill&bg=ffffff)



Comments
Please log in or sign up to comment.