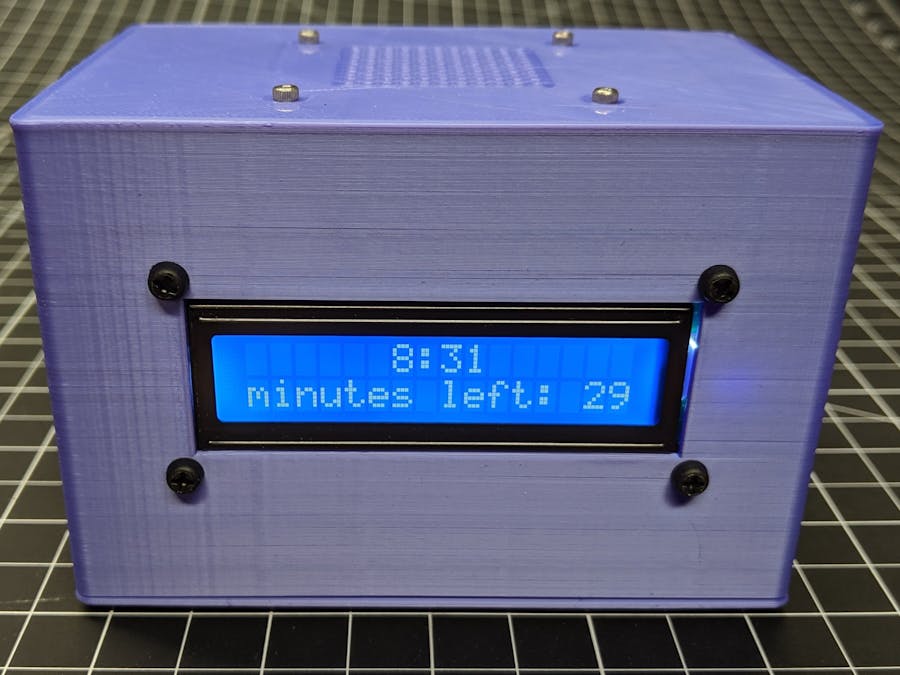
A friend is starting a small business that rents a resource for 30 minute time slots.She looked for a timer that could alarm every 30 minutes (on the hour and half hour) with a pleasant gong sound, but couldn't find anything.
I offered to create a simple Arduino-based alarm clock.This design uses a Pro Micro microcontroller, DFPlayer Mini MP3 player, and a DS3231 real-time clock (RTC.)I used Fusion 360 to design the case, based on the Fusion 360 Tutorial – Easy Snap Fit Cases!
Supplies:
- Arduino Pro Micro, 5 volt, 16 MHz
- DFPlayer Mini MP3 player
- MicroSD card
- DS3231RTC
- 1602 16x2 LCD with I2C Interface
- small speaker
- 2 small SPST pushbuttons
- 5 volt DC power supply
- Barrel jack for power input
- various screws/standoff/nuts, etc.
- perf board
- female and male 2.54mm headers
- 3D-printed case
Step 1: Prototype and Arduino Code Development
I prototyped the design with a SparkFun Inventor's Kit which includes an Arduino Uno board, breadboard, jumper wires, etc. This is good platform for prototyping Arduino projects, along with many other similar platforms.
I first used the "Tiny RTC" DS1307 real-time clock. It includes a CR2032 backup battery to keep time when the the overall project isn't powered.However, I learned that the DS3231 RTC is a better choice because it includes a temperature-compensated oscillator for more accurate time-keeping.Note that the DS3231M is not temperature compensated, so check carefully before purchasing.
The DFPlayer Mini MP3 Player documentation includes a connection diagram and sample code. This worked fine for me.For an alarm sound, I liked this "Singing bowl struck with a felt-tipped mallet" recording on Freesound.With Audacity, I converted the recording to mono, trimmed it to a shorter length, added a fadeout, and saved it to a .mp3 file. Then, I copied the .mp3 file to the SD card and inserted it in the DFPlayer Mini.(Of course, this design allows you to use any sound for the alarm.)
Two push buttons increase/decrease the time by one minute. I connected these to 2 pins that are enabled for interrupts and used attachInterrupt()
Code is in the "shoni_clock.ino" attachment.Resources for the Arduino code and connections:
- #include "DFRobotDFPlayerMini.h"
- Adafruit RTClib
- #include
- LiquidCrystal_I2C
- #include
Step 2: Circuit Diagram
I used Fritzing to design the circuit.
- schematic Fritzing source: shoni_clock.fzz
- schematic .pdf: shoni_clock_schem.pdf
Step 3: Case Design
This project was a fine opportunity to improve my 3D CAD design skills.I use Fusion 360.The Fusion 360 Tutorial – Easy Snap Fit Cases! demonstrates a useful technique for designing parameter-driven (length, width, height, shell thickness) cases with snap together features for a no-screws/glue enclosure.
I added holes and cutouts for the power jack, LCD display, time setting push buttons, and speaker.I designed a simple ring to mount the speaker to the inside top of the case.I used the Fusion 360 pattern tool to create the rectangular array of holes for the speaker.It would have been nicer to create a circular speaker grill pattern, but I couldn't find a simple way to do this.Someone had created a script for an older version of Fusion, but it doesn't install on the latest version.Have an idea on how to make a circular speaker pattern? Let us know with a comment.
I printed this in PLA on a Ender 3 printer.
3D printing design files:
Speaker mount:
- Fusion 360 source: speaker_mount v1.f3d
- STL: speaker_mount.stl
Case:
- Fusion 360 source: ShoniClockCase v20.f3d
- Enclosure STL: shoni_clock_case.stl
- Bottom cover STL: shoni_clock_case_bottom_cover.stl


_PnKPri8a6q.jpg?auto=compress%2Cformat&w=48&h=48&fit=fill&bg=ffffff)


_3u05Tpwasz.png?auto=compress%2Cformat&w=40&h=40&fit=fillmax&bg=fff&dpr=2)
Comments
Please log in or sign up to comment.