I always liked to create my own toys. Since I remember my self I used to destroy all my toys and tried to create new ones. Not always successfully. As I grew up I forgot about them.
These days I wanted to start a new hobby so I thought let's give a try again. So here I am presenting to you my first try in Robotics. I will not go into details.
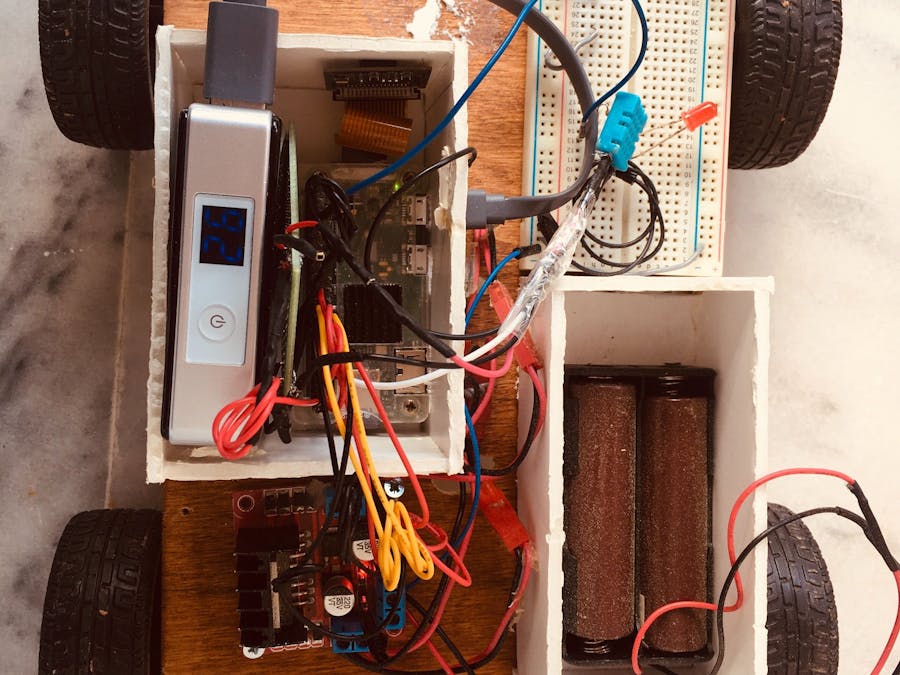
I created a raspberry pi controlled car. I use Blync https://blynk.io/ to control it remotely.
WHY Raspberrypi?I do not know. It is just the first board I tried. Maybe going forward I will try more of them. I bought zero, for about 15$ (~14€) since I am an amateur in case of things going wrong to be able to try again. And this decision was proven wise since till now I burned 2 of them. If you don't break it you will never learn,
For the tech stack, I used Python language to create the brain.
WHAT I BUILDI started with the easy stuff. A car. Cars are easy since they only have 4 wheels and can go forward, backward, left and right. I then needed a chassis. I thought let's buy one. Hm, nope, since it is more fun if you do it by yourself. Anyway, I just used a simple square wood :).
MATERIALS USEDMove around
I bought 4 wheels and 4 dc motors from Bangood But these cannot be attached to the board. They need something to "control" them, hence I bought also an L298N controller which has protection compared to a simple H-bridge. Believe me, I burned 2 boards.
Power
To power up the motors, I used 2 3, 7v 18650 batteries I had from an old laptop.
To power up pi, I used a simple power bank.
Other tools
To connect all of them together I used some jumper wires and a prototyping board
HOW I BUILT ITHardware part
The first thing I did was to attach the motors to the wooden chassis. Ok, it is a woold plate but please let's call it chassis :) Then I attached the motor driver and the batteries in series. This was the easiest part.
I then did the connections. Check the fritzing diagram and here https://pinout.xyz/ for pin numbers.
- Connect motors to the controller. I added 2 motors in each part which makes the car move like a tank basically.
- Battery positive to controller positive and battery ground to ground.
- Connect controller ground to pi ground pin 6
- Controller Enable Pin 1 to Pi's pin 22 (BCM 25)
- Controller Enable Pin 2 to Pi's pin 15 (BCM 22)
- Controller In1 to Pi's pin 16 (BCM 16)
- Controller In2 to Pi's pin 18 (BCM 24)
- Controller In3 to Pi's pin 11 (BCM 17)
- Controller In4 to Pi's pin 13 (BCM 27)
Remote Part
I used Blynk to control the car remotely. I installed Blunk in my mobile and added 4 controls to drive the car. I added to the code the relevant event listeners.
Read in blynk.io how to add buttons
Run it
Download the code upload on raspberry pi and run it from the terminal using sudo python3 remotecar.py.
Preview
Here is a preview of the car


Comments
Please log in or sign up to comment.