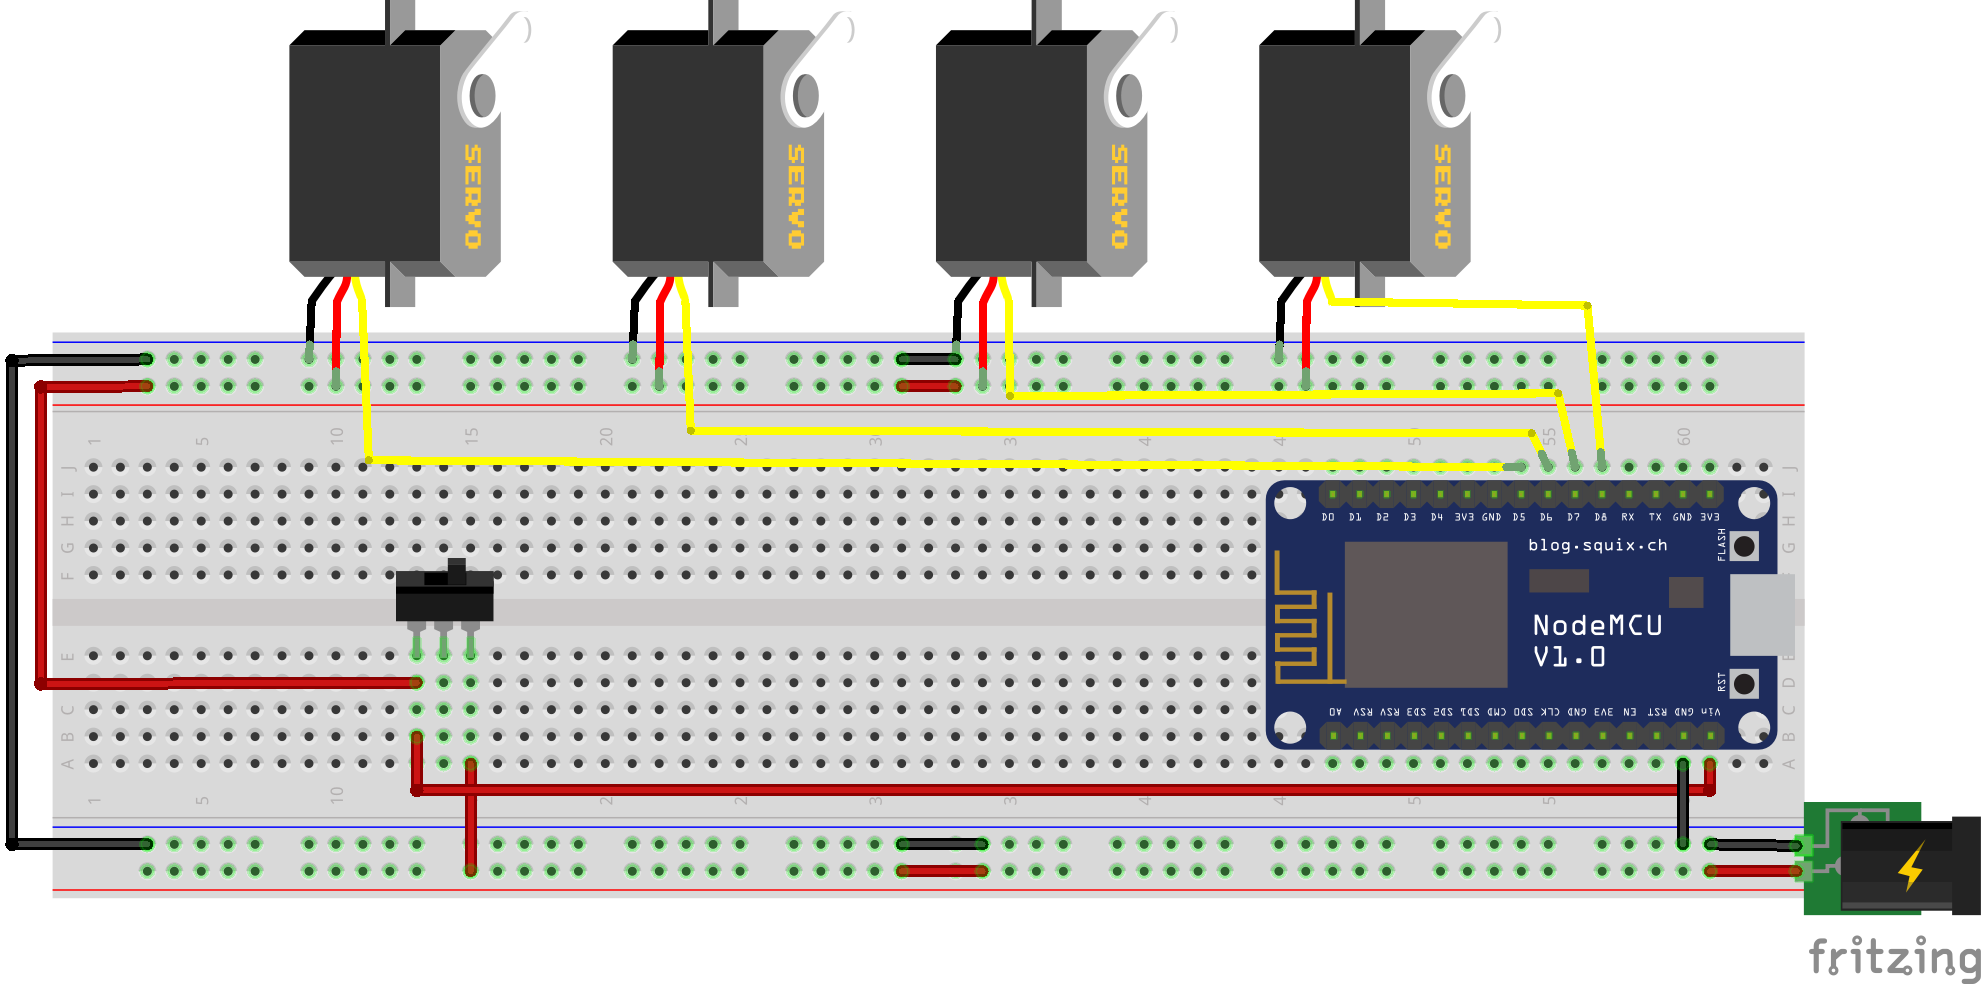
#define REMOTEXY_MODE__ESP8266WIFI_LIB_POINT
#include <ESP8266WiFi.h>

#include <RemoteXY.h>

// RemoteXY connection settings
#define REMOTEXY_WIFI_SSID "yobots"
#define REMOTEXY_WIFI_PASSWORD "12345678"
#define REMOTEXY_SERVER_PORT 6377


// RemoteXY configurate
#pragma pack(push, 1)
uint8_t RemoteXY_CONF[] =
  { 255,4,0,0,0,28,0,8,13,0,
  5,0,28,9,40,40,2,26,31,4,
  0,82,3,8,48,2,26,4,128,1,
  51,96,9,2,26 };

// this structure defines all the variables of your control interface
struct {

    // input variable
  int8_t joystick_1_x; // =-100..100 x-coordinate joystick position
  int8_t joystick_1_y; // =-100..100 y-coordinate joystick position
  int8_t slider_1; // =0..100 slider position
  int8_t slider_2; // =0..100 slider position

    // other variable
  uint8_t connect_flag;  // =1 if wire connected, else =0

} RemoteXY;
#pragma pack(pop)
#include <Servo.h>
Servo servo1;
Servo servo2;
Servo servo3;
Servo servo4;

/////////////////////////////////////////////
//           END RemoteXY include          //
/////////////////////////////////////////////


void setup()
{
  RemoteXY_Init ();
  servo1.attach(D5);
  servo2.attach(D6);
  servo3.attach(D7);
  servo4.attach(D8);

  // TODO you setup code

}

void loop()
{
  RemoteXY_Handler ();
  int val1;
  int val2;
  int val3;
  int val4;
  val1=map(RemoteXY.joystick_1_x,-100,100,0,180);
  val2=map(RemoteXY.joystick_1_y,-100,100,0,180);
  val3=map(RemoteXY.slider_1,0,100,0,180);
  val4=map(RemoteXY.slider_2,0,100,0,180);

  servo1.write(val1);
  servo2.write(val2);
  servo3.write(val3);
  servo4.write(val4);
  //delay();// TODO you loop code
  // use the RemoteXY structure for data transfer


}


Comments
Please log in or sign up to comment.