


Hardware components | ||||||
 |
| × | 1 | |||
_ztBMuBhMHo.jpg?auto=compress%2Cformat&w=48&h=48&fit=fill&bg=ffffff) |
| × | 1 | |||
 |
| × | 1 | |||
 |
| × | 1 | |||
 |
| × | 1 | |||
Software apps and online services | ||||||
 |
| |||||
 |
| |||||
| ||||||
If you have been living in Bangalore for a few years, then you are no stranger to floods. Every year during the monsoon, the underground parking of my apartment fills up with water to a point where it is impossible to even start my bike's engine. Whats worse is that when the water dries out, I have to take my bike to a mechanic for repairs due to water damage. This year I wouldn't take any of it. So I decided to build a water level monitoring system which would alert me if the parking got flooded.
Here is how you can get the same system up and running.
Install the Required LibrariesClick here and here to download the BoltIoT-Arduino-Helper library by BoltIoT and the Ultrasonic library by Erick Simoes.
To install these libraries go to the Arduino IDE, in the 'sketch' drop down menu select Include Library > Add.ZIP Library..
Then navigate to the folder where the libraries were downloaded, and select them.
Upload the Arduino Code1. Open the Arduino IDE.
2. Copy the Arduino Code at the end of the blog, and replace all the code inside the sketch with the copied code.
3. Save the Arduino sketch by pressing 'ctrl + s' on widows and ubuntu, and 'cmd + s' on Mac.
4. After saving the code, go to the tools menu, and under the boards section select Arduino/Genuino Uno.
5. Connect the Arduino or Boltduino to your PC using a USB cable.
6. Under the tools menu, in the port submenu select the port which has Arduino/Genuino uno at the end.
7. Click on upload.
The code will be uploaded to your Arduino or Boltduino.
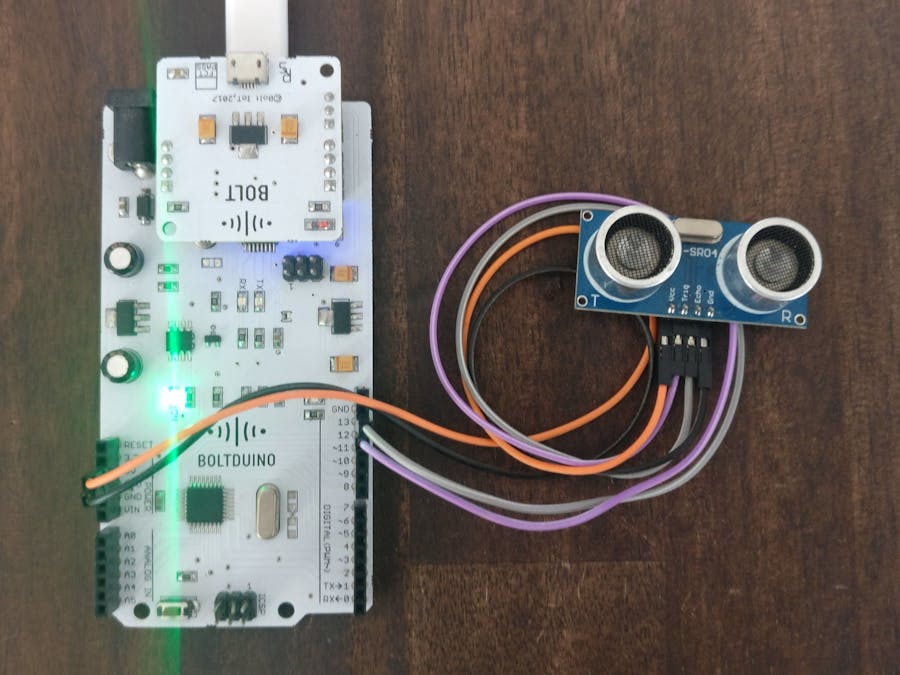
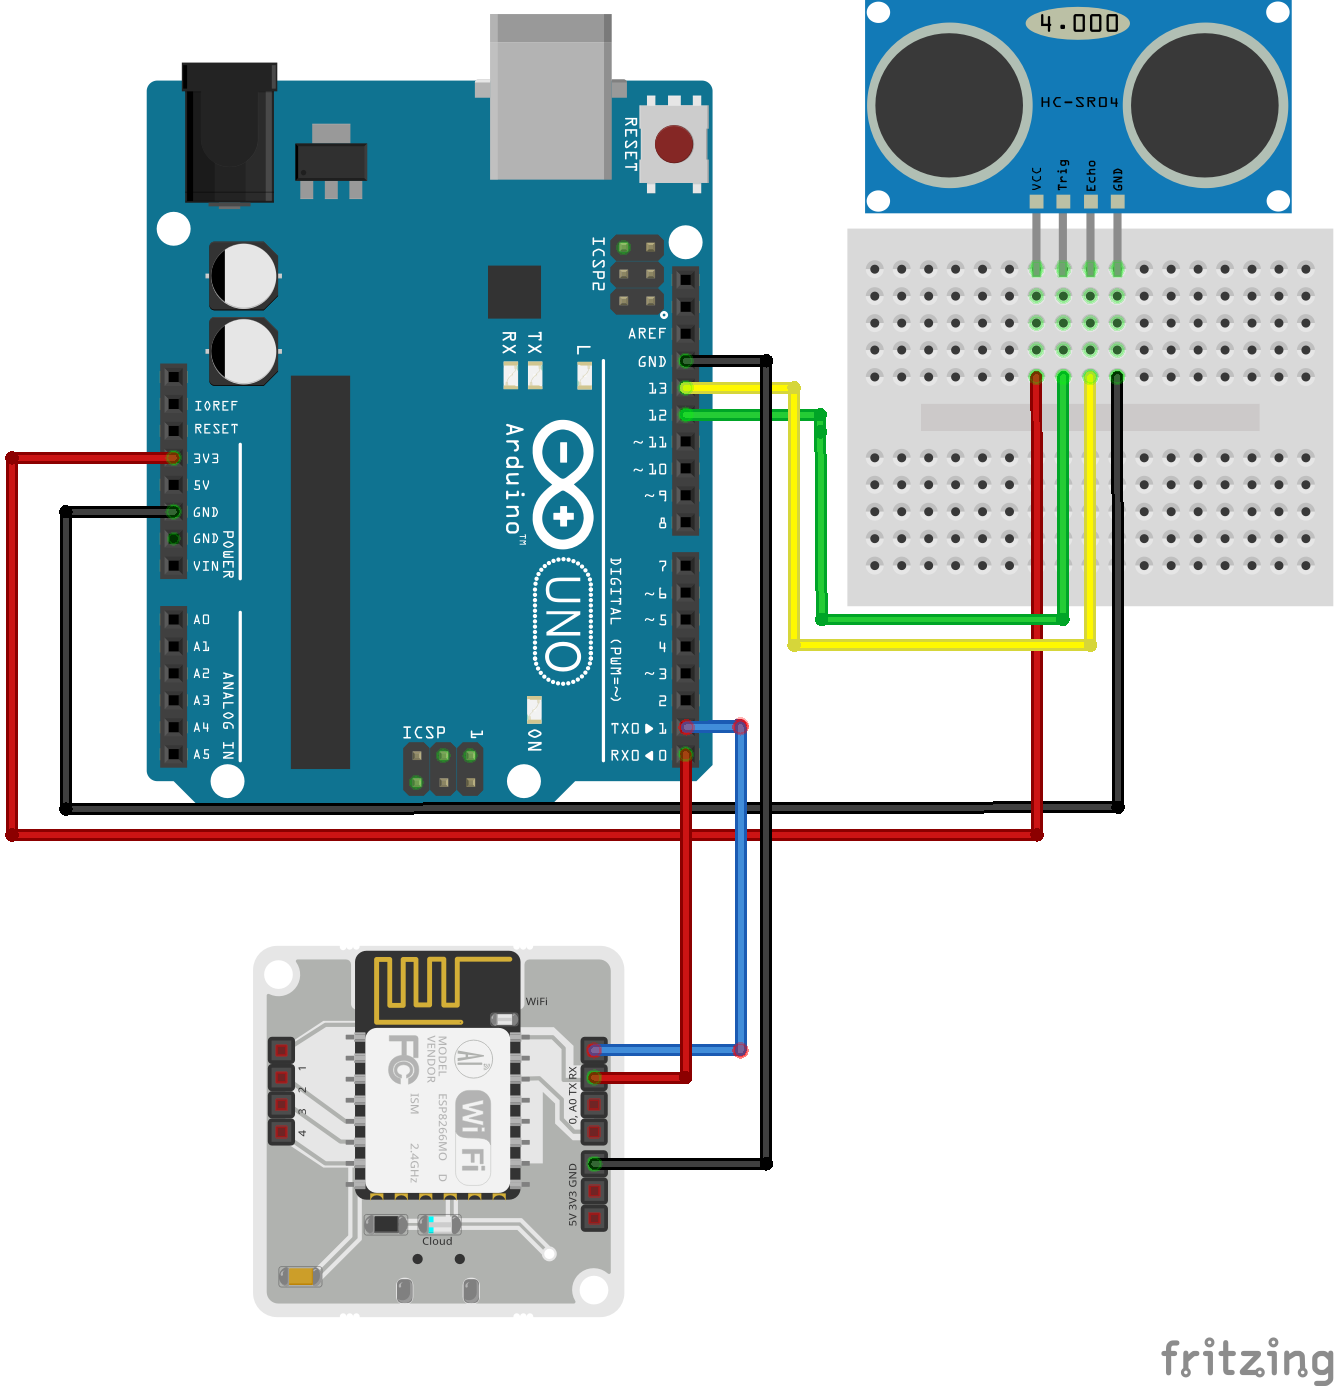
Hardware SetupMake the connection as per the Fritzing diagrams below.
NOTE: Click on the '>' to see the Fritzing diagram for using Boltduino instead of an Arduino.
If you are using a Boltduino instead of an Arduino, you will have to do a few less connections, as the Bolt WiFi module fits directly onto the Boltduino.
Mount the system such that the sensor is facing down to the floor where water will stagnate over time.
Remember that the detection threshold will always be smaller then the sensor height.
Power up the system using a 9v or 12v DC adapter.
Note: If you have not setup you have not yet setup your Bolt then follow the steps given here: Setting up your Bolt.
Setup Integromat Scenario to Send Email AlertsIf you have not already done so, create an account on Integromat, click here to go to their signup page. If you already have an Integormat account, sign in to Integromat.
Using the following step to clone the 'Water Level Detection' scenario, that I created.
1. Download the blueprint of the Water Level Detection scenario attached in the code section of this project. Remember to save the file with the filename 'WaterLevelDetection.json'.
2. Create a scenario, by clicking the blue 'Create a new scenario' button at the top right corner, and click on continue.
3. Click on the 'more' button at the bottom of the screen.
4. Select 'Import Blueprint' and click on 'Choose file'.
5. Navigate to the folder to which you download the 'WaterLevelDetection.json' file, select the file and click open. Once done click save. The Water Level Detection scenario will be loaded.
6. Click on the name of the scenario and change it to Water Level Detection.
Use the following steps to configure the Water Level Detection scenario.
1. Get your Bolt Cloud API key clicking here. The images below show how to enable and copy the API key.
2. Go back to the Integromat scenario, and click on the first BoltIoT bubble, and then click the 'add' button.
3. Paste the API key you had copied earlier, and click on 'continue' button.
3. Add the device name of your device. You can find out your Bolt WiFi module's device name by clicking here. Then click on ok.
4. For the second and third BoltIoT bubble, you can click on the drop down menu and select 'My Bolt Connection'. Remember to add the correct device name to each of them.
5. Click on the math bubble, and change the value 100 to the height at which you have kept your sensor, in cms. Then click on ok.
6. Click on the red dot between the math and gmail bubble, replace 60 with the height of the water at which you want to be alerted, and click on ok.
6. Click on the gmail bubble, and click on the edit button.
7. Add your email id and click ok.
8. Click on the Add button, then continue button and allow Integromat access to your gmail account.
9. You can add more recipients by click on 'Add a recipient' button, and then click ok.
10. Make sure that your circuit is powered up, and there is no obstruction in front of the sensor, and click the Run button. The scenario will run and wait before the filter, indicated by the '1' in a thought bubble. If you place your hand in front of the sensor, and run the scenario, then the scenario will run all the way to the gmail bubble and you will get an email.
11. Click on the button next to the text 'off' to turn on the scenario. The scenario will now run automatically every 15 minutes. and you will receive and alert, if the water level rises above the height you set for alerts.
Once this is done, all you have to do is mount the system such that the sensor points to the floor, power up the system and ensure that the Bolt has continuous access to the internet via your WiFi.
ApplicationsThe system can be used in the following applications.
- Detecting that your parking is flooded.
- Getting an alert when your water tank is full or empty.
- Detecting high tide, if you have a house near the sea.
Want to build another project with Bolt? Here are a few suggestions:


Comments
Please log in or sign up to comment.