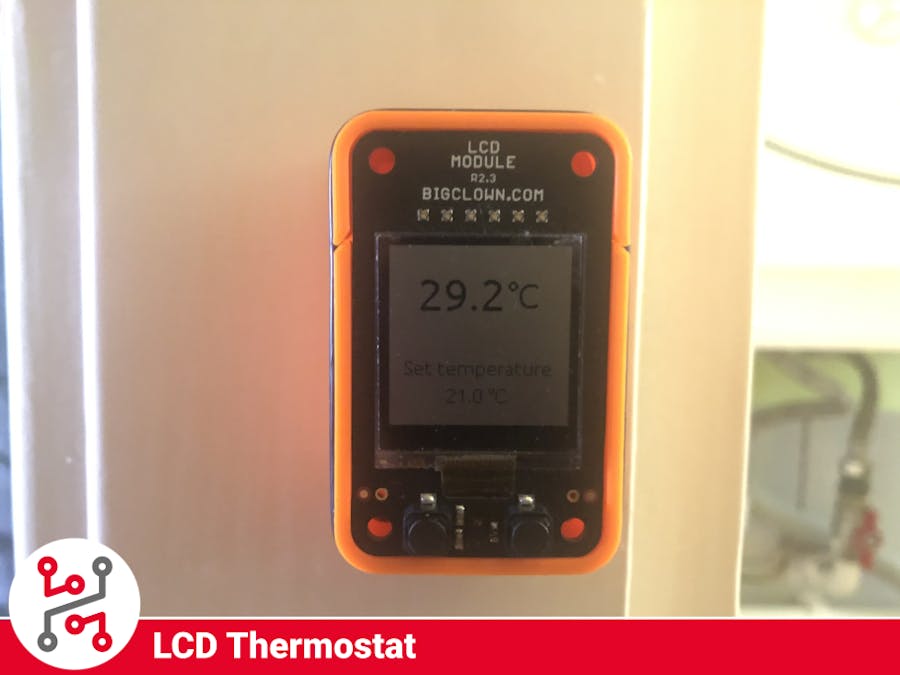
You can have this thermostat anywhere in your house or office. It is easy to make and manage. You can connect your smart devices to it or use another kit from HARDWARIO IoT Kit to control the boiler.
Everyone will be able to operate it thanks to simple controls with just two buttons. It has a colorful and minimalistic design so it will fit almost any office space or room.
Thanks to the low-power solution you can run this device for up to 2 years on standard AAA alkaline batteries.
You can also use the Power Controller kit for controlling the heating system. More on that later in the Optional part
1. Build hardwareFor the project you will need an LCD Thermostat kit that contains some HARDWARIO IoT Kit modules, to be specific the modules that are included are the Core Module, Mini-battery Module, and LCD Module. You can actually make more projects with these modules, so you can experiment some more.
The assembly is simple, but if you are having some difficulties you can watch the video below, where you see the full guide.
After you have the hardware assembled you can move on to the next step.
2. Flash firmware- Download HARDWARIO Playground.
- For this project, you will need a firmware that is already included in the -Playground to be specific: bcf-radio-lcd-thermostat.
- You can see documentation page on how to flash the firmware with HARDWARIO Playground.
You need to pair the Core module with the Radio dongle that you are using, follow the instructions below to see how it is done.
The same thing will go if you are using a Raspberry Pi as a server, just access the Raspberry through the IP address instead of the Playground
- Connect your USB Radio Dongle to your computer.
- Open HARDWARIO Playground
- Click Start Pairing the LED on the dongle should start blinking
- Connect the device that you want to pair into your computer or insert the batteries.
- Wait for the device to appear in the table
- It should add the device with the Alias: lcd-thermostat:0
- Click Stop Pairing
Open Node-RED in the Playground or Raspberry Pi and import the flow from here. In the Menu -> Import -> Clipboard. Do not forget to hit "Deploy" in the top right corner to apply the changes.
This flow will show you the values that you need to know. The temperature at the spot where you placed the device, the point temperature where the heating should start and if the heating is on/off.
The deadband node is there so your heating will not start immediately as it drops below the temperature, but it will wait for half of the degree to start the heating. This is there for some efficiency and for saving power.
You can see all the values in the Dashboard or you can use the blynk integration, but more on that later.
5. Use Power Controller Kit (optional)You can use this kit to control your heating system. Thanks to the relay that is on board you can turn on/off some circuits that can turn on/off your heating system.
Also it has a LED control on it so you can use the LED thermometer instead of your ordinary one, you will see the temperature in the even in the dark, it looks great.
For this to work just repeat step 1. 2. and 3. only with the Power Controller Kit.
You can watch the video below for the assembly guide.
In step 2 you will have to flash the firmware named: bcf-radio-power-controller-rgbXX
The Node-RED flow is ready for this expansion. The relay is turn on/off according to the thermostat settings. You just have to make the circuit and set the thermostat as you want it.
6. Blynk integrationThis project is ready for Blynk integration. How to set up Blynk with your HARDWARIO Playground is described in this guide.
Follow the guide if you want to make your own blynk app. If you want to use the one specified for this project in the Blynk app click this Icon and scan the QR code bellow.
In this blynk application you can see the same things as in the Dashboard, you can of course add some notifications or have more sensors in one application. It is up to you.
SummaryPlace more of these modules inside your home so you can monitor the temperature in every room and maybe have some smart heating system where you can heat the rooms according to the temperature in them.
This project can save you a lot of money by regulating the heat in the house. You can expand it as you like, the only thing you will do is just add more things into the Node-RED flow.
Feel free to ask any questions about this project.
- Visit HARDWARIO page on hackster.io for more interesting projects or go directly to their website
- Go to HARDWARIO documentation to learn more about their modules and other possibilities of the platform.
- Try more firmware from HARDWARIO Playground or write your own, it is easy to start.
- Because everything is Open source you can get all firmware on GitHub, get some inspiration and try to make your own applications.
- Get your own HARDWARIO Hub to replace your computer in this project so you have always access to your applications.
- Check out more applications that can be used with HARDWARIO IoT Kit in Integrations section.


Comments
Please log in or sign up to comment.