


Hardware components | ||||||
 |
| × | 2 | |||
 |
| × | 1 | |||
 |
| × | 2 | |||
 |
| × | 1 | |||
 |
| × | 1 | |||
 |
| × | 1 | |||
 |
| × | 1 | |||
 |
| × | 2 | |||
Software apps and online services | ||||||
 |
| |||||
Do you like to wake up with the sun and a cup of joe? This project might be for you.
The idea behind the project was to have one photon collect data for light levels with a photoresistor. Once the light levels for sunrise were detected, that photon would publish an event. The other photon would receive the event and fulfill its function of turning on the Sunrise Coffee Maker.
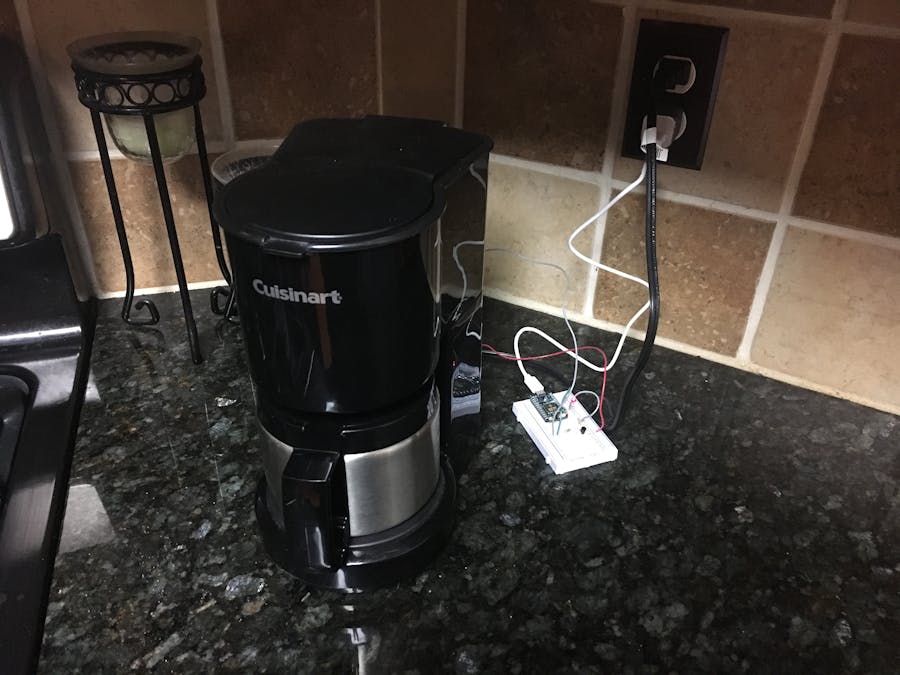
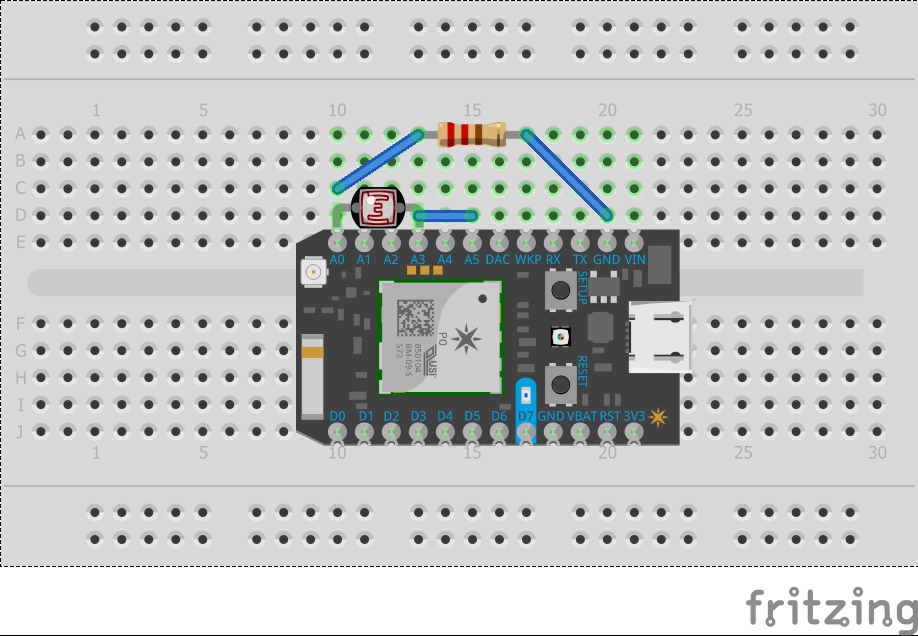
How it works:The Photon with the photoresistor is set up with the photoresistor pointed towards a window, in an otherwise dark room.
At sunrise, the photoresistor reads an analog value of around 150 (this was later found to only be accurate in an urban area with streetlights - for somewhere rural where it gets REALLY dark, the value is around 75). Once it reads 150, the Photon publishes an event to the cloud, which is picked up by the other photon that is connected to the coffee maker. This turns on the coffee maker for 40 minutes, which then turns off on its own. The video below shows the coffee maker in action.
Build it!The Sunrise Coffee Maker makes use of the photoresistor that comes with the particle photon in the photon kit, and an old coffee maker. We used Thingspeak to graph the photoresistor values throughout the day, and put the particle in sleep mode when it didn't need to be used.
The sleep mode function served two purposes. First, the photoresistor would read the same value at sunrise and sunset and putting the photon with the photoresistor to sleep during that time prevented it from turning on the coffee maker when the sun was going down (the code can of course be modified for those who want their coffee at sundown!). Secondly, the Photon runs under 4 mA when it is in sleep mode, so by putting it to sleep, we save power.
The Photon with the photoresistor was powered using the USB power port on the side of a lamp, and the photon with the coffee maker was powered using a simple phone charger block.
To do this without the use of a relay, we tore apart the coffee maker to get at it's internal wiring, which only ran at 5V instead of 120V (typical wall socket voltage). If you wanted to do this without cutting into your coffee maker, then you would want to use a relay. They run for under $10 on Amazon, so it wouldn't be a big deal. However, we didn't need to preserve the coffee maker in any way and saved money by just using it's internal wiring.
Upon investigation of the circuit, the button which turned on the coffee maker was seen to work by connecting a 5V node to the ground of the coffee maker. The coffee maker also turned off when the 5V node was connected to ground again. Wires were connected to these nodes and run outside the coffee maker for connection to an external circuit with the photon.
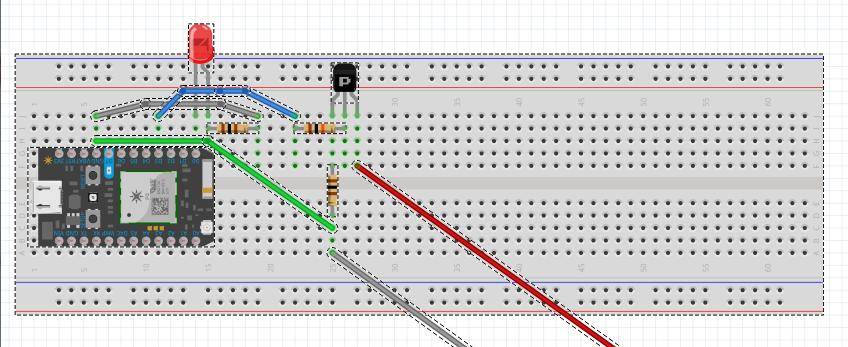
A transistor was used as an electronic switch to activate the coffee maker. The 5V wire was connected to the collector leg, and the ground was connected to the emitter. The ground of the photon was connected to the ground of the coffee maker so that they had a common logic ground. Pin D3 of the photon was connected to the base of the transistor. A digital output of HIGH would activate the transistor and connect the 5V node to the ground. As a test to see if the event was received from the other photon, and LED was connected to D0 and would blink after the event was received.
As a test to see if the code would run the coffee maker, and extra piece of code was added to control a function through mobicle.io. Sending "on" through mobicle would turn the coffee maker on.
The particle that was connected to the photoresistor was programmed to read the photoresistor and only send out the value if it read between 150 and 155 -- which were the analog values we determined occurred at sunrise. Once that was sent out, the other particle subscribed to that event, and turned the coffee maker on.
The code may need to be further altered in the summer, when the days are longer.
For the Thingspeak integration, the Webhook code is listed below, and this Hackster project explains the integration better than we can. Follow all of his steps exactly and you won't have any problems creating your graphs!
Problems with this project:1. We had to understand how to code the Photon. The Particle documentation was extremely helpful in this endeavor, as well as studying the codes of other projects on Hackster.
2. The analog photoresistor value at sunrise and sunset are the same - so we had to figure out a way to not have the coffee maker turn on again as the sun goes down. To do this, we put the Photon with the photoresistor to sleep for 12 hours, thus missing sundown, and also saving power.
3. After the Photon went to sleep, it wouldn't turn back on, so I simply added a Particle.connect(); after the disconnect command. This was not necessary when we tested putting it to sleep for a period of a half hour, but for 12 hours, it didn't want to come back on.


Comments