As part of our studies at Polytech Sorbonne, this is a project of embedded system. We designed a system for measuring various parameters of plants on a roof and then apply it to the study of the relationship between solar panel efficiency and plants for the agri-food section of our engineer school.
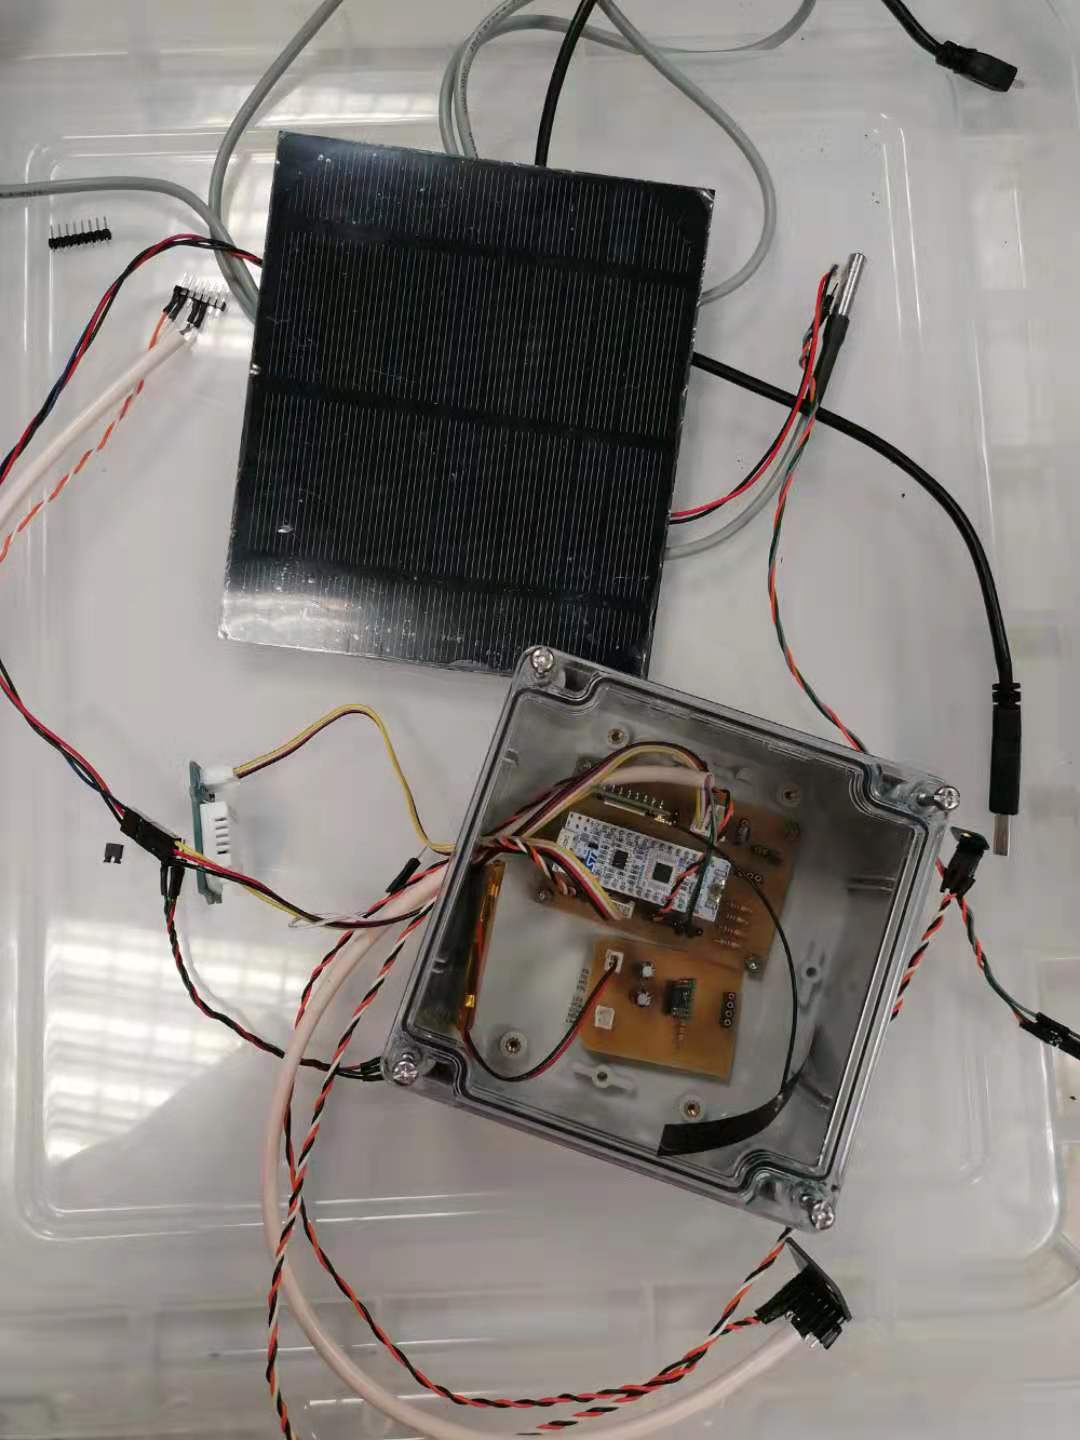
Our device is placed above the solar panel. The function of the project is not complicated. It uses sensors to measure the temperature and humidity of soil and air, as well as the intensity and spectrum of sunlight. The results will be visualized on the Ubidot platform.
It took us almost three months (8h of work per week) to achieve it, including stages of sensor programming, Sigfox communication module programming, PCB board design, power supply module design, PCB board welding and testing, power consumption optimization.
Detailed features
The monitoring consists in managing:
- Air/soil moisture
- Air/soil temperature
- Brightness (and even RGB rays)
using the microcontroller and the sensors
Additional features:
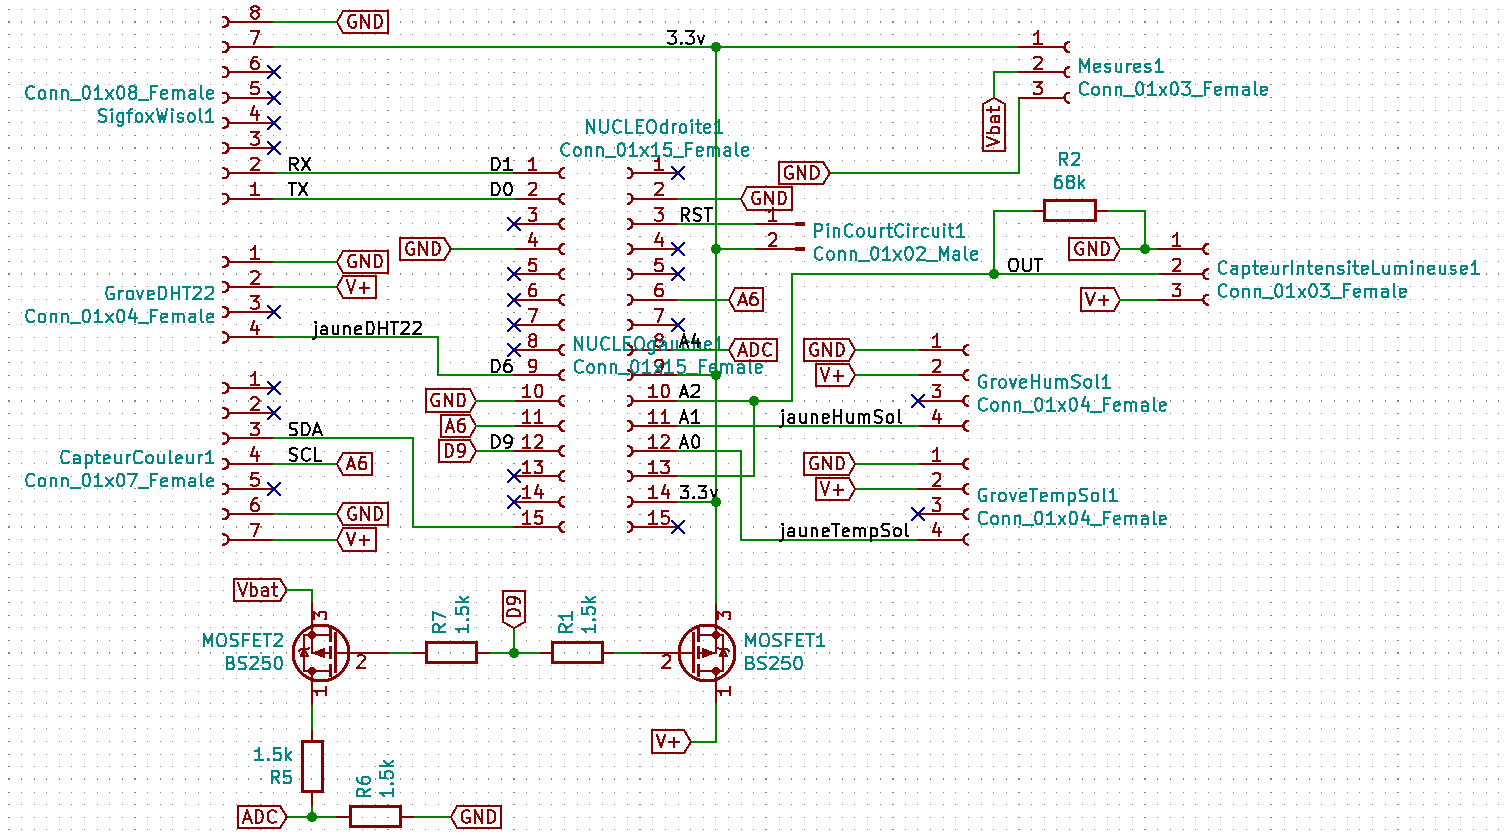
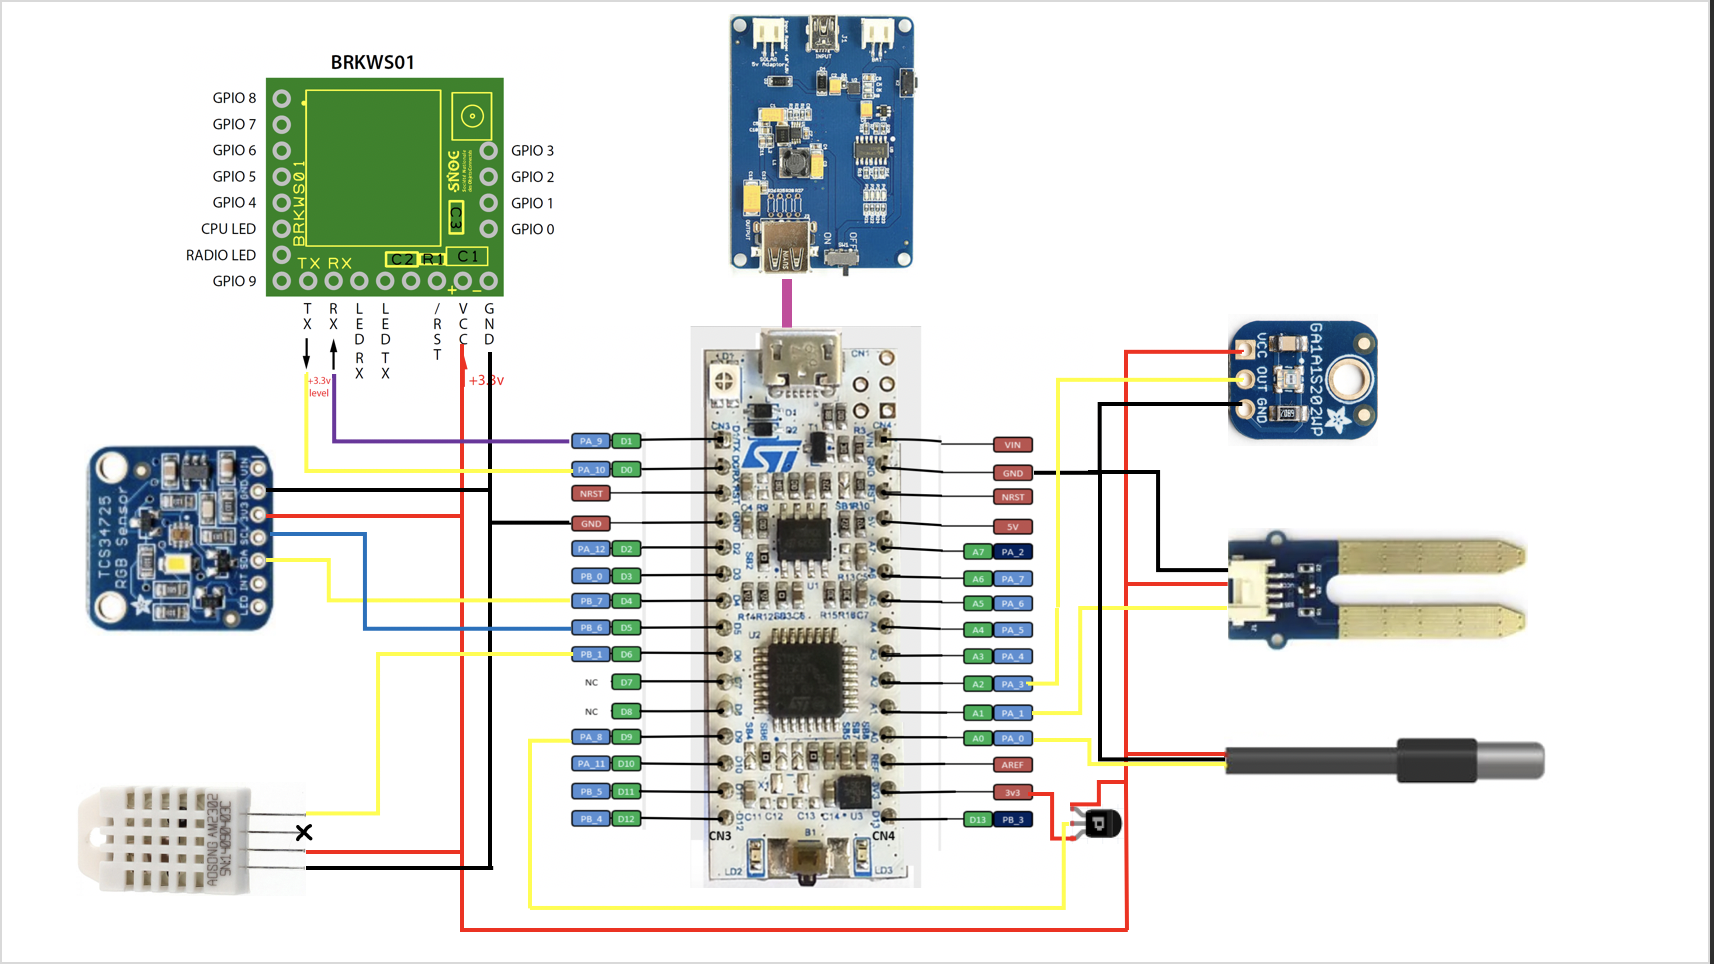
1. Prepare all the materials you are going to use, check the pins and make a map according to which you are going to connect the wires after. The choices depend on which fonctions you want to realize and where you want to place your sensors. Or you can just follow the map we purposed.
Prerequisites
Have knowledge in
- Microcontroller programming (Language C++)
- How to read a datasheet and extract the most important data
- I2C, UART Protocols
How to send data using Sigfox:
- AT Command
- How many message can be sent per day?
Project info
- Status: Completed
- Difficulty: Intermediate (prerequisites in computer sciences)
- Estimated time: 3 months(one team of 4 person)
1. Prepare all the materials you are going to use, check the pins and make a map according to which you are going to connect the wires after. The choices depend on which fonctions you want to realize and where you want to place your sensors. Or you can just follow the map we purposed.(Find it in the attachments)
2. Program the development board STM32 NUCLEO-L432KC in terms of
- Retrieving data from the sensors
- Converting the data to send using Sigfox
- Creating a class in order to control the Sigfox model
- Configuring the deep-sleep mode of the development board when the Sigfox module does not send message in order to reduce power consumption.
3. Data visualization
- Activate your Sigfox account (You can follow the steps in the official documentation: Sigfox Activate | Sigfox Resources )
- Create an account on a platform you like (We used Ubidots for this step)
- Save data in database
- Create a dashboard and display the data
- If you have several Sigfox modules, create a dropdown list to allow the end-user to filter data to display
We have some detailed explanations about how to link Sigfox and Ubidots here if you have any questions.
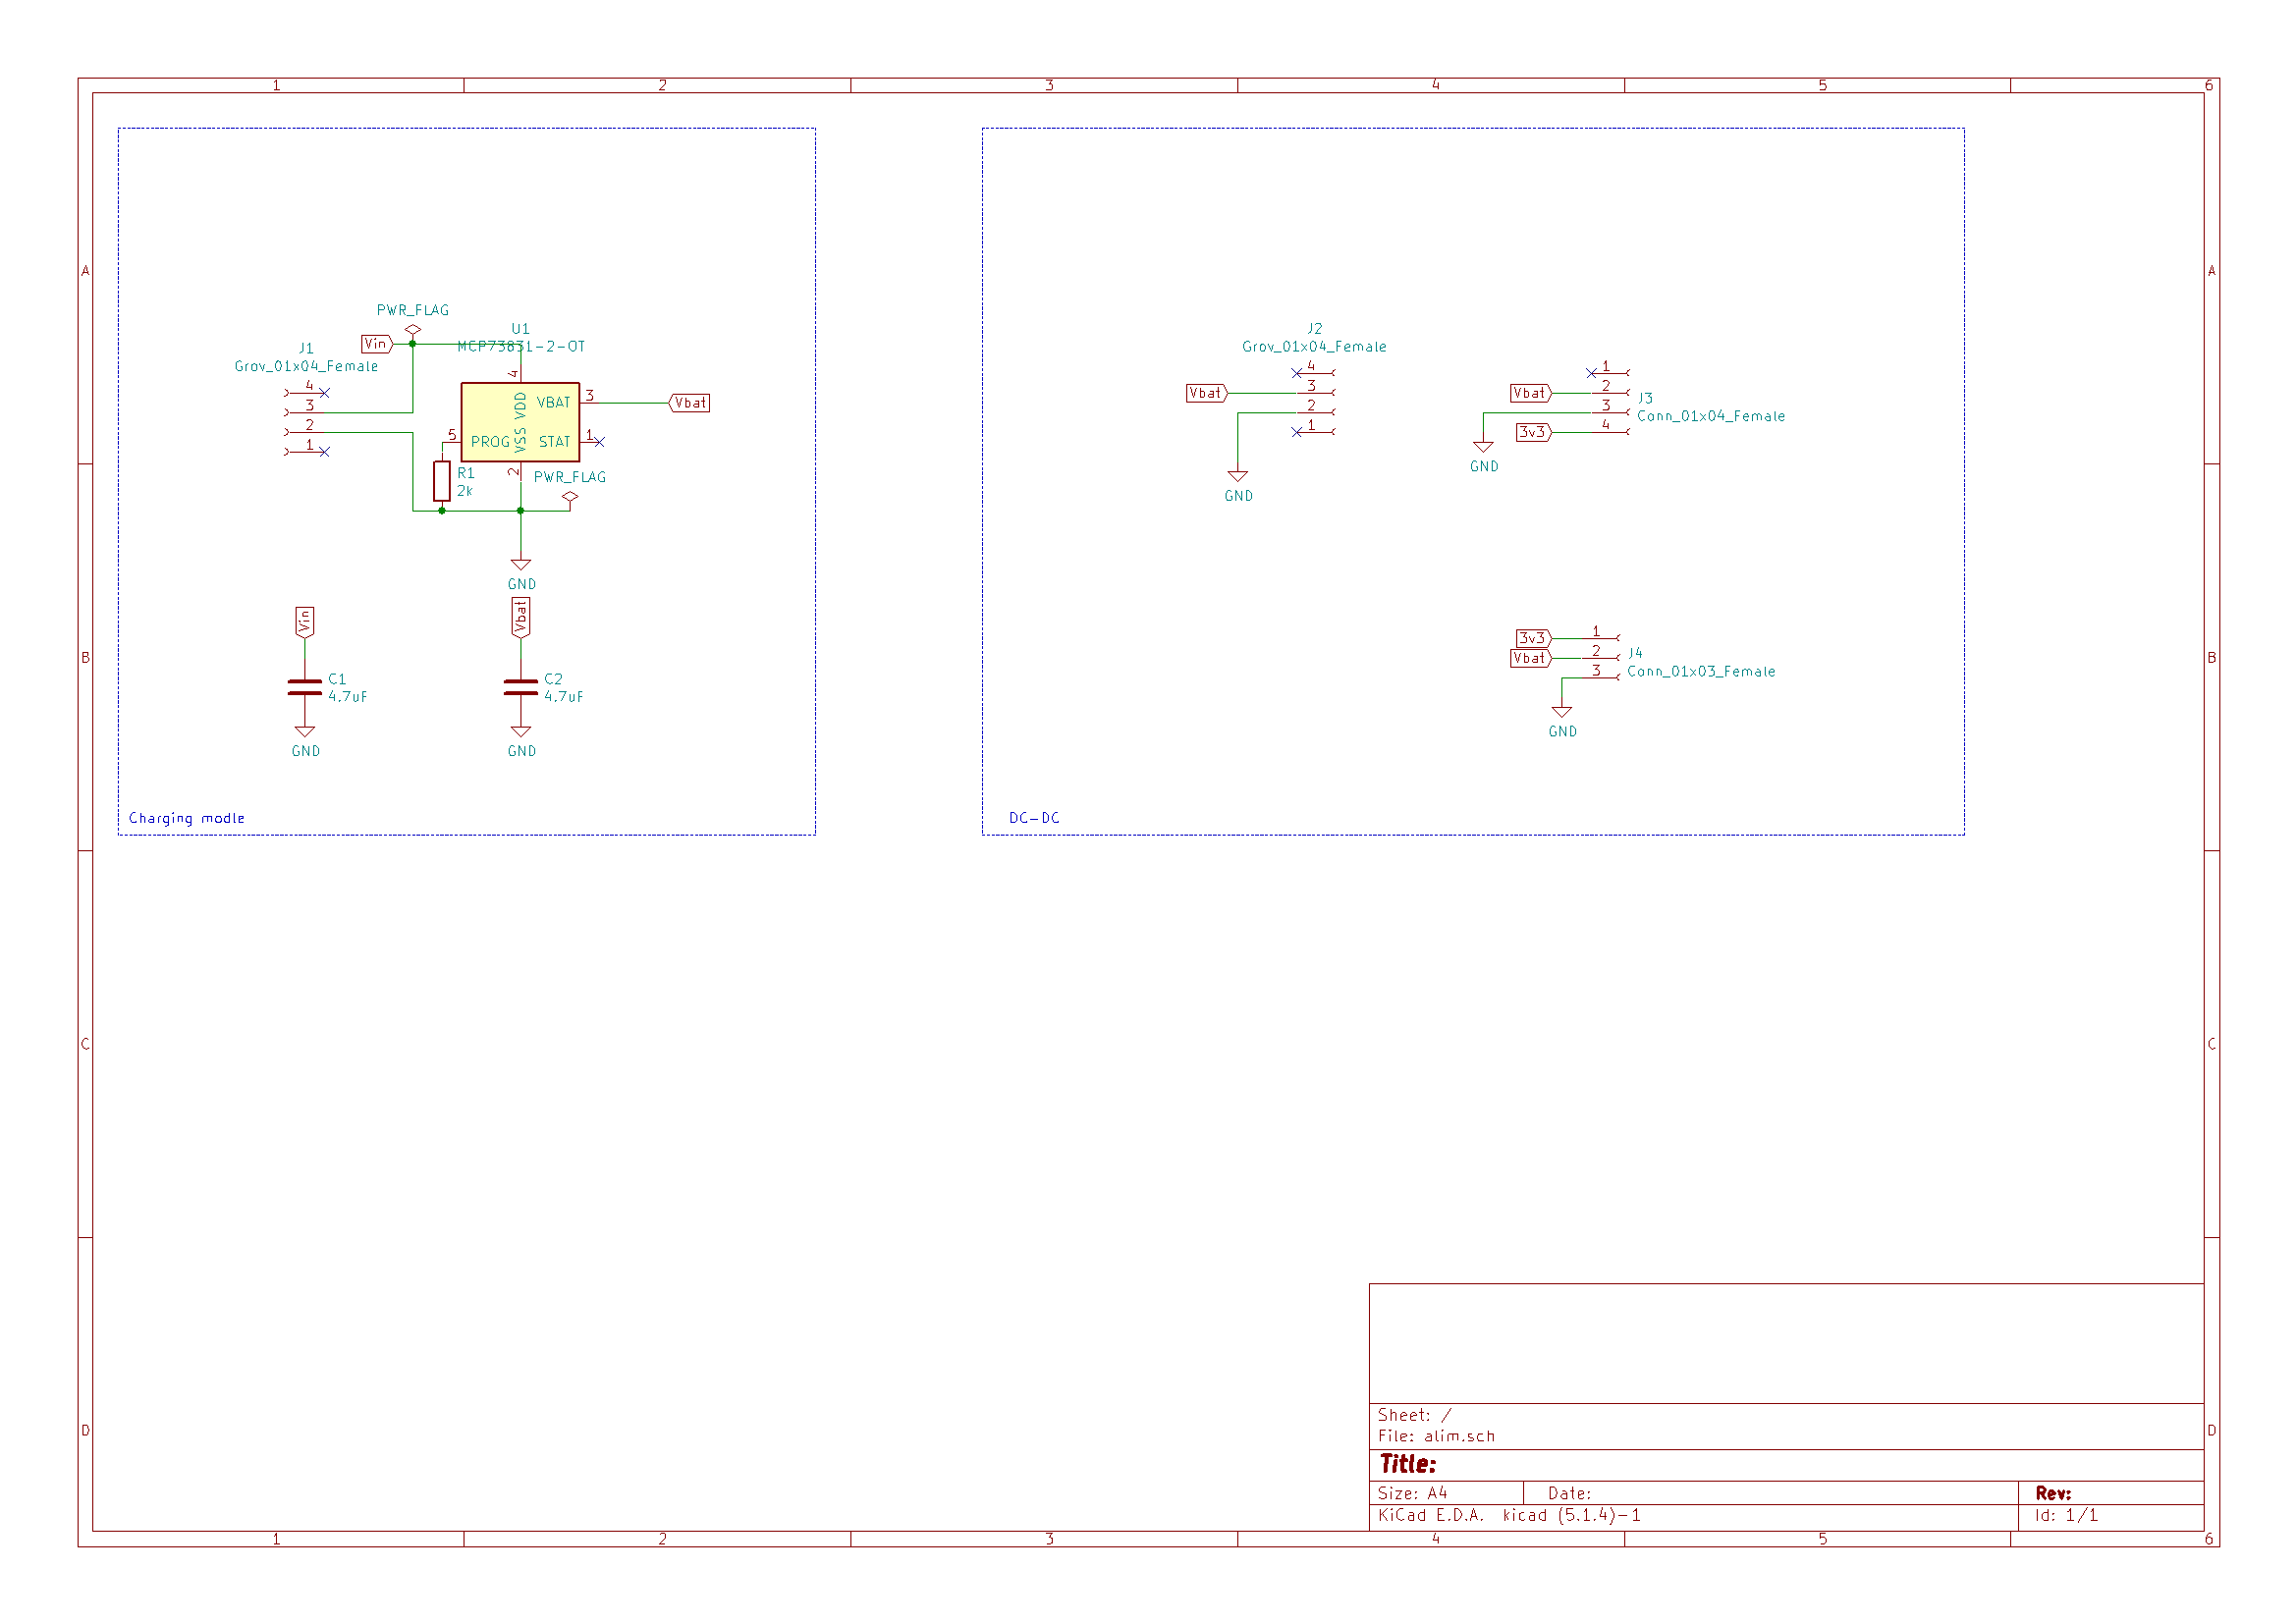
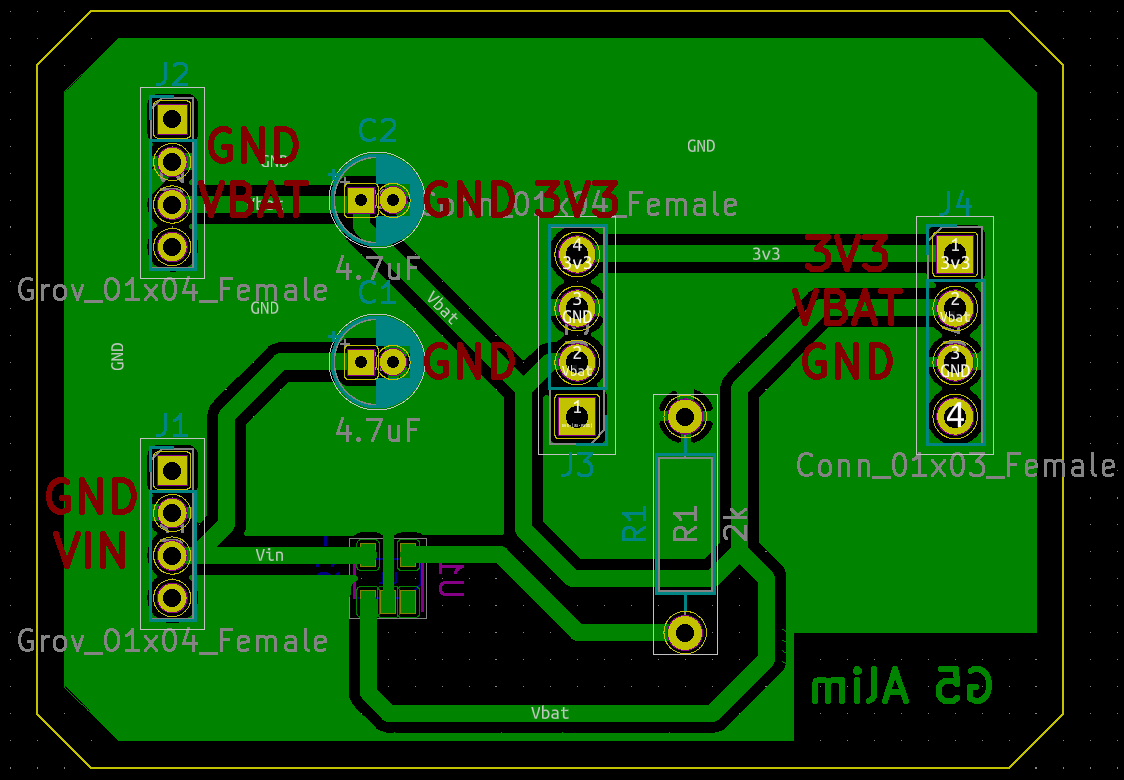
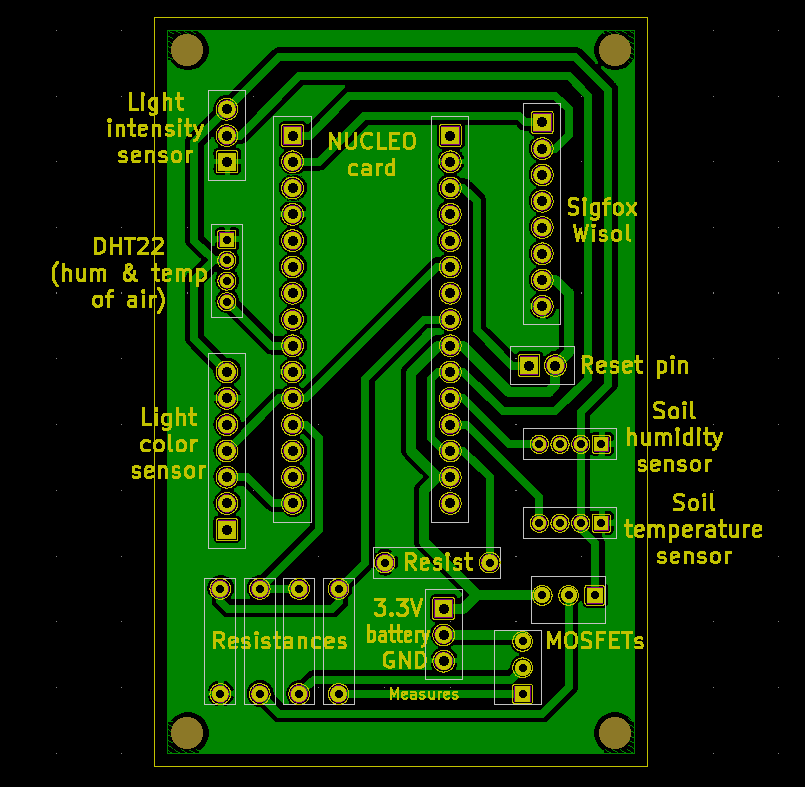
4. If you would like to create a PCB of this project, we’ve supplied an example in the attachment. There are two PCB in our example, one is for power supply and the other is for main components.
5.Improvement of power consumption.
In addition to add deepsleep mode to STM32 NUCLEO-L432KC, you can add a triode to cut off the tension supply of all sensors when the sensors don’t work. We connected the Base pin of the triode to Pin D9 of NUCLEO, which controls the voltage supply of all sensors.
In termes of the consumption of our system:
Mesure and send data: 70mA
Sensors and Sigfox in sleep mode:10mA
ProgrammingOur code is based on language C++, in a concise way.
We use the library functions of the sensors shared on mbed,using these libraries, we wrote the file <main.cpp>. To send message by Sigfox, we also wrote a library Sigfox including methods of connecting, sending data and sleep. Our codes are in the attachment.
The libraries we used can be found in Mbed. The library <Sigfox.h> can be found in the attachment.
#include"DS1820.h"
#include"DHT.h"
#include "TCS34725.h"
#include "WakeUp.h"

#include "Sigfox.h"
These following functions in the file <main.cpp> are used to read different types of data. You don't need to rewrite these functions, they can also be found in the libraries.
u8 readBat(){} //read the battery power
void ReadTempHumiAir(){} //read the temperature and humidity of air then save them in Temp_Air and Humi_Air
void ReadTempSol(){} //read the temperature of the soil then save it in Temp_Sol
void ReadHumiSol(){} //read the Humidity of the soil then save it in Humi_Sol
void ReadRGBC(){} //read RGB of the light and save it in r,g,b
void ReadLumi(){} //read the illumination intensity then save it in Lumierevoid ReadRGBC(){} //read RGB of the light and save it in r,g,b
void ReadRGBC(){} //read RGB of the light and save it in r,g,b
There is also a file called "Sigfox.h" whose structure is super simple. The following block explain the how the class Sigfox works.
Sigfox(PinName, PinName); //The constructor of the class
bool ready();             //Check if the module Sigfox is ready for work
void send(s16 ...);       //Send all the data measured by our sensors to the cloud
void sleep();             //Enable the power save mode
void wake();              //Enable the normal mode
Demonstration of the result
After finishing all these steps, now we can observe the data through the Ubidots platform.https://industrial.ubidots.com/accounts/signout/
This is an example of the data.
We continue to work on this project and we hope it can prove to be useful to the wider community. Feel free to message us here if you have questions.
Enjoy!


_4YUDWziWQ8.png?auto=compress%2Cformat&w=48&h=48&fit=fill&bg=ffffff)



_Ujn5WoVOOu.png?auto=compress%2Cformat&w=40&h=40&fit=fillmax&bg=fff&dpr=2)
_1x_bGT19vVAby.png?auto=compress%2Cformat&w=40&h=40&fit=fillmax&bg=fff&dpr=2)


Comments
Please log in or sign up to comment.