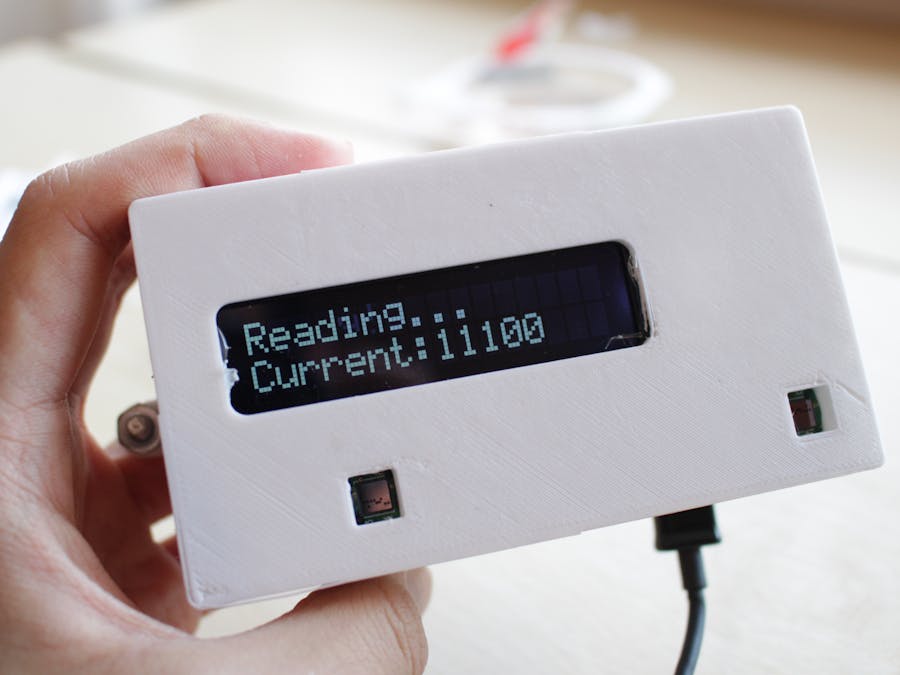
The Hand Gesture Door Opener allows users to open a garage door using only hand signals without physically touching anything. It is like a keypad lock that replaces pressing buttons with touch-less gestures. This is especially important now during the COVID-19 Coronavirus pandemic when touching objects is discouraged.
In addition to being a touch-less alternative to keypad locks, it has other of applications. For example, it works well in situations where the user locks themselves out without a key or phone, needs to let many people in, and, in general, is a reliable and simple way to get into a home.
It is also extremely easy to install. The user just needs to stick it behind a window near the garage and plug it in. Since the device is completely indoors, the user also does not have to worry about the device being tampered with or failing due to the weather, such as extreme heat, cold, or humidity. This is made possible with the Pyroelectric Infrared Sensor's ability to see through glass.
We chose to use a garage door opener here because it does not require any major home modifications. However, it can easily be retrofitted into other door locks.
How to UseThe hand gestures are quite simple. The first thing the user needs to do is to wake up the device by waving their hand in front of the right sensor. After this, they can give the hand signals to open the garage door. A swipe is a "1" while a single hand over the left sensor is a "0." If the entered binary code matches the code saved in the device, the device will open the door.
If the device is not used for a certain period of time, it will enter sleep mode. In sleep mode, it will turn off the LCD, reset the entered values, and will allow the user to change the code to open the door using Bluetooth.
Changing this code to open the door is simple and the procedure can be found on step 10 of the instructions. This door code is saved to the Arduino's EEPROM, so the device will maintain the same door code even in the event of a power outage.
VideosShortDemo:
FullVideo:
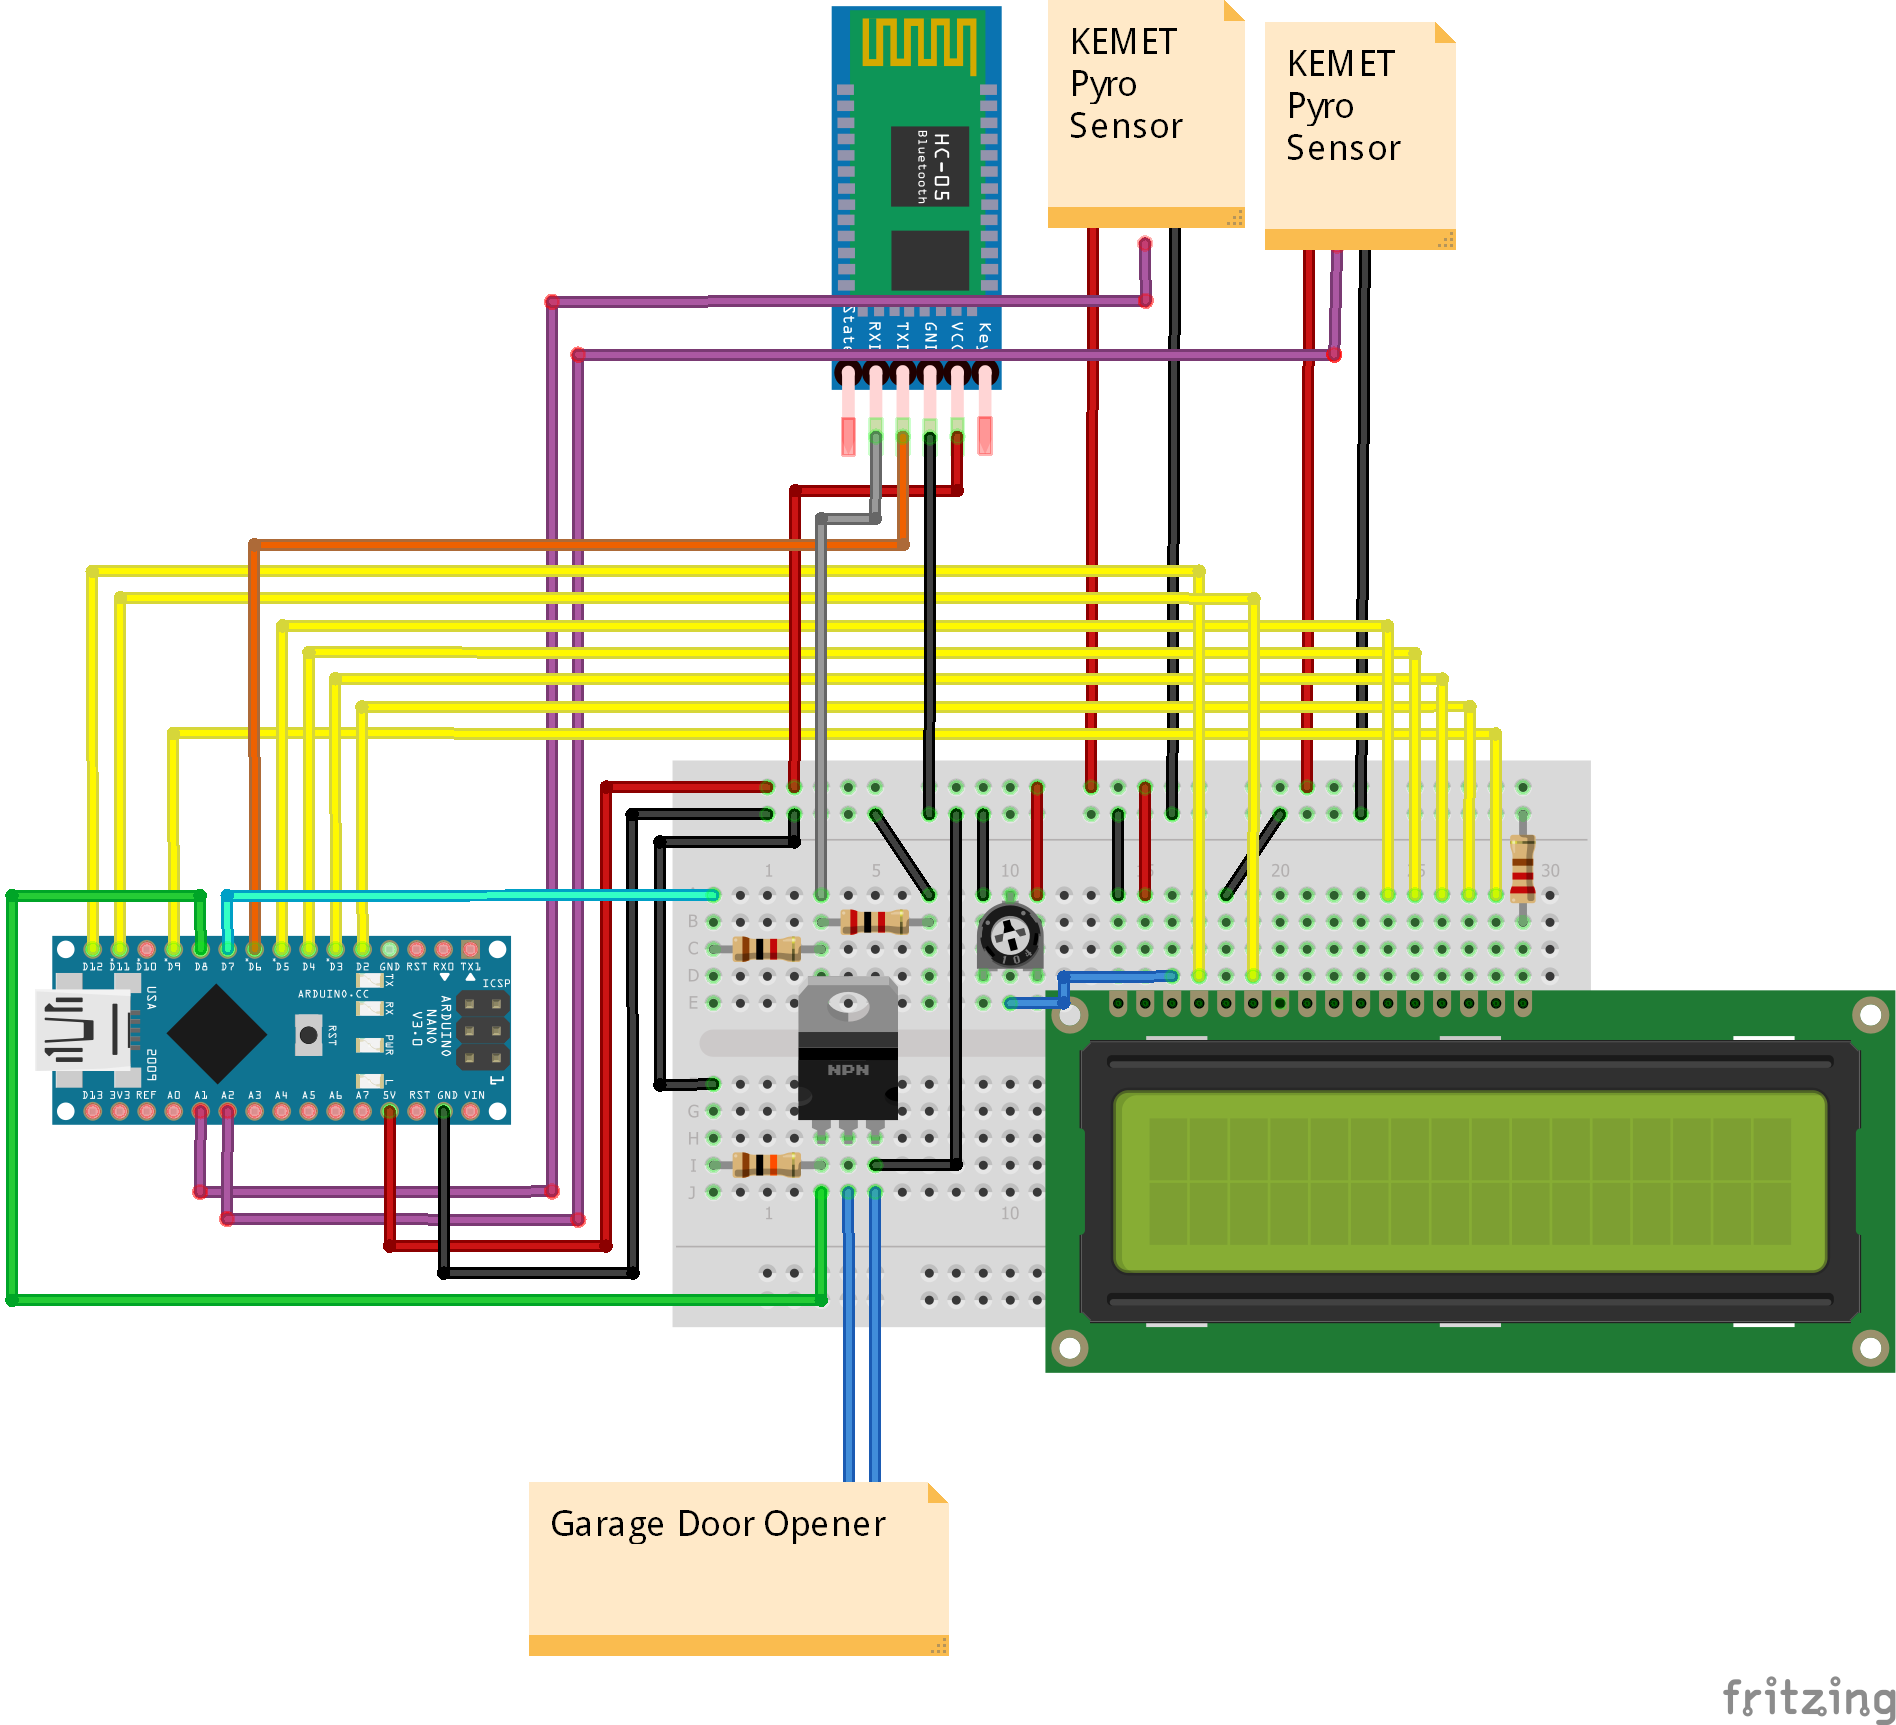
Build InstructionsThe instructions for this project involve a PCB. However, the breadboard schematic we used for the prototype is in the Schematics Section if you would like to use a breadboard instead.
1. 3D print the enclosure found in the Custom Parts and Enclosures Section.
2. Print out the PCB using the PCB Gerber File found in the Schematics Section.
3. Solder on the resistors, screw terminals, female headers, potentiometer, and MOSFET.
For the resistors, R1 is 10k ohm, R2 is 220 ohms, R3 is 1k ohm, and R4 is 2k ohm.
The header for the LCD should be soldered on the back of the PCB (the side with the resistors).
4. Connect this device to a door. We chose a garage door remote: dismantle a garage door remote until you just have the circuit board. Solder two wires behind the button that opens the door. Screw these wires into the 2-pin screw terminal.
The device will act like a button and close the circuit when the correct passcode is entered.
5. Connect the two Pyroelectric Infrared Sensors to the two 3-pin screw terminals. Voltage is the rightmost pin, signal is the middle pin, and ground is the leftmost pin.
6. Plug in the Arduino, Bluetooth module, and LCD into the headers.
So far, this is what it should look like:
7. Hot glue the pyro electric sensors into the enclosure first. Next, apply hot glue to the LCD and lower everything into the enclosure making sure the LCD aligns with the LCD hole.
8. Make sure everything fits in the enclosure and screw on the lid.
9. Upload the code found in the Code Section to the device. Make sure to change the bluetoothPassword on line 2 before you upload the code.
10. Set the code to open the door. Use any Bluetooth Low Energy serial app to connect to the device and input the password that you set on line 2 of the sketch. Then input the new code to open the door. Here is what it should look like:
YourPasswordHere
Input new door code:
1100111
New door code saved


Comments
Please log in or sign up to comment.