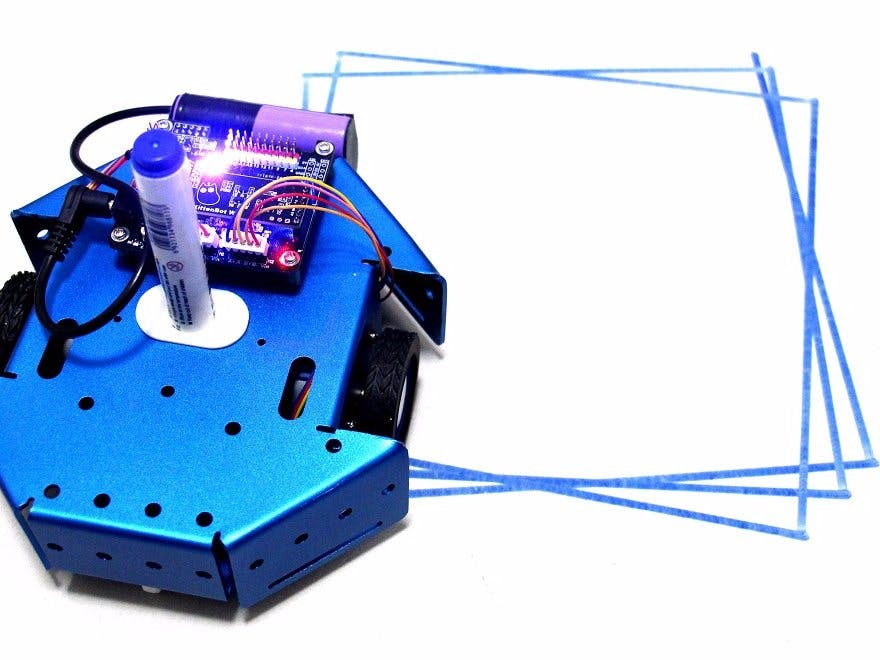
The purpose of this project is to build a simple drawing robot and help beginner to become familiar with programming.
The goals for this project were:
- Friendly to young student
- Graphical Programming
- Easy to build (not many electronics)
- Did something interesting
In order to complete these goals, we used KittenBlock which is a Scratch3.0 based software for the ease of programming. Graphical programming blocks can help beginner to avoid loads of typing and syntax, creating a bridge to learning a powerful and commonly used programming language such as C++.
We also used stepper motors for accurate motion since it's a drawing robot, and you will need a marker pen in any colors you prefer.
Parts:Robot's frame: KittenBot Anodized Aluminum Chassis
Cute and solid chassis that has tons of mounting holes (4.8mm LEGO Technic), you can definitely reuse this chassis for other fun projects.
Robot's brain: RosBot Baseboard
An Arduino UNO based mainboard with 2x on-board dual H-bridge motor drivers, supply more power than Arduino Uno.
Optional: Arduino UNO and dual motor driver
There are a number of ways to power, drive, and control robots. You may have different parts on hand that will work, but these are the ones we've tried and found to work well:
- 1 - KittenBot WiFi Module
- 1 - USB micro cable
- 1 -4 x AA Battery Holder or a 7 to 10v battery
This robot is fairly easy to assemble, follow the instruction and it takes you about 15 minutes.
First, attach your stepper motors to the sides of chassis, simply plug in the rubber wheel.
Next, attach the RosBot baseboard on the chassis, secure the battery holder or a 7.4v battery on the chassis (make sure it won't fall off).
When the robot is set, next things you will need are some glue or tape to fasten the marker pen to the hold in the middle of the chassis. In our case we 3D printed a Pen Holder.
Step 2: WiringNow you can connect the stepper motor's wires to the microcontroller. As we seen in the picture, put the two 5-pin connectors to the motor driver on the baseboard, then you are all set.
Step 3: The WiFi moduleCommonly, we use Micro-USB cable to make a connection. If you need more open space for testing, there is another way to communicate mainboard with software. You can make a WiFi connection by using KittenBot ESP8266 WiFi module.
Once plug in the WiFi module and give power to the board, connect your WiFi network to a hotspot starts with "ESP_".
Open up the software, select "ESP_" then hit yes.
Step 4: CodingBefore we start coding, let's load the default firmware on to the KittenBlock first.
Open Arduino panel and select "Restore > arduino" to load default firmware into the edit box. Then press "Upload" button, the embedded Arduino IDE in KittenBlock may automatically compile and upload the default firmware.
In the KittenBlock, the block code 'Stepper Move' in terms of drawing is basically draw a straight line.
Then the block 'Stepper Turn' is rotating the robot to the right in certain degree.
The codes from the picture above are to draw a square.
The block code 'Stepper Arc Diameter' is to make robot move in an arc.
Simple as that, try to use your own logic to draw out your name.
Step 5: Enjoy!Other than programming in PC, KittenBlock can run on iPad.
Now have fun with your drawing experience!


_ztBMuBhMHo.jpg?auto=compress%2Cformat&w=48&h=48&fit=fill&bg=ffffff)


_3u05Tpwasz.png?auto=compress%2Cformat&w=40&h=40&fit=fillmax&bg=fff&dpr=2)
Comments
Please log in or sign up to comment.