This project deals with a model of laser security alarm system design. Laser through long distance without any scattering effect and it is only visible at source and the destination point so it can be used as a mediator between source and destination but to analyze the source a sensor is needed, here the use of LDR is applicable. Just analysis is not enough alerting should be done in general alerting is the sound effect so here buzzer act as alerting. Making use of this, a laser security system is designed.
Understanding the problem:01
With the increasing number of robberies in India, the demand for using strong security which should be fast, reliable, secure, as well as cheaper.
02
We have used mechanical locks long before, and now we have moved into some latest security like biometrics. But what if we want notification for any person trying to enter the premises?
03
This Laser-based security system will be used for implementing such a system that could detect the presence of any intruder and alert everyone by ringing the alarms and turning on all lights.
Project Objective:The objective of the Laser-based Security alarm system is the same as its name suggests that is it will keep measuring the light coming from the Laser light using LDR, and the Arduino UNO MCU will check for the intensity to decrease from its initial value indicating obstacle between Laser light and LDR. And when the situation arises, Arduino will close the circuits for various buzzers and LEDs.
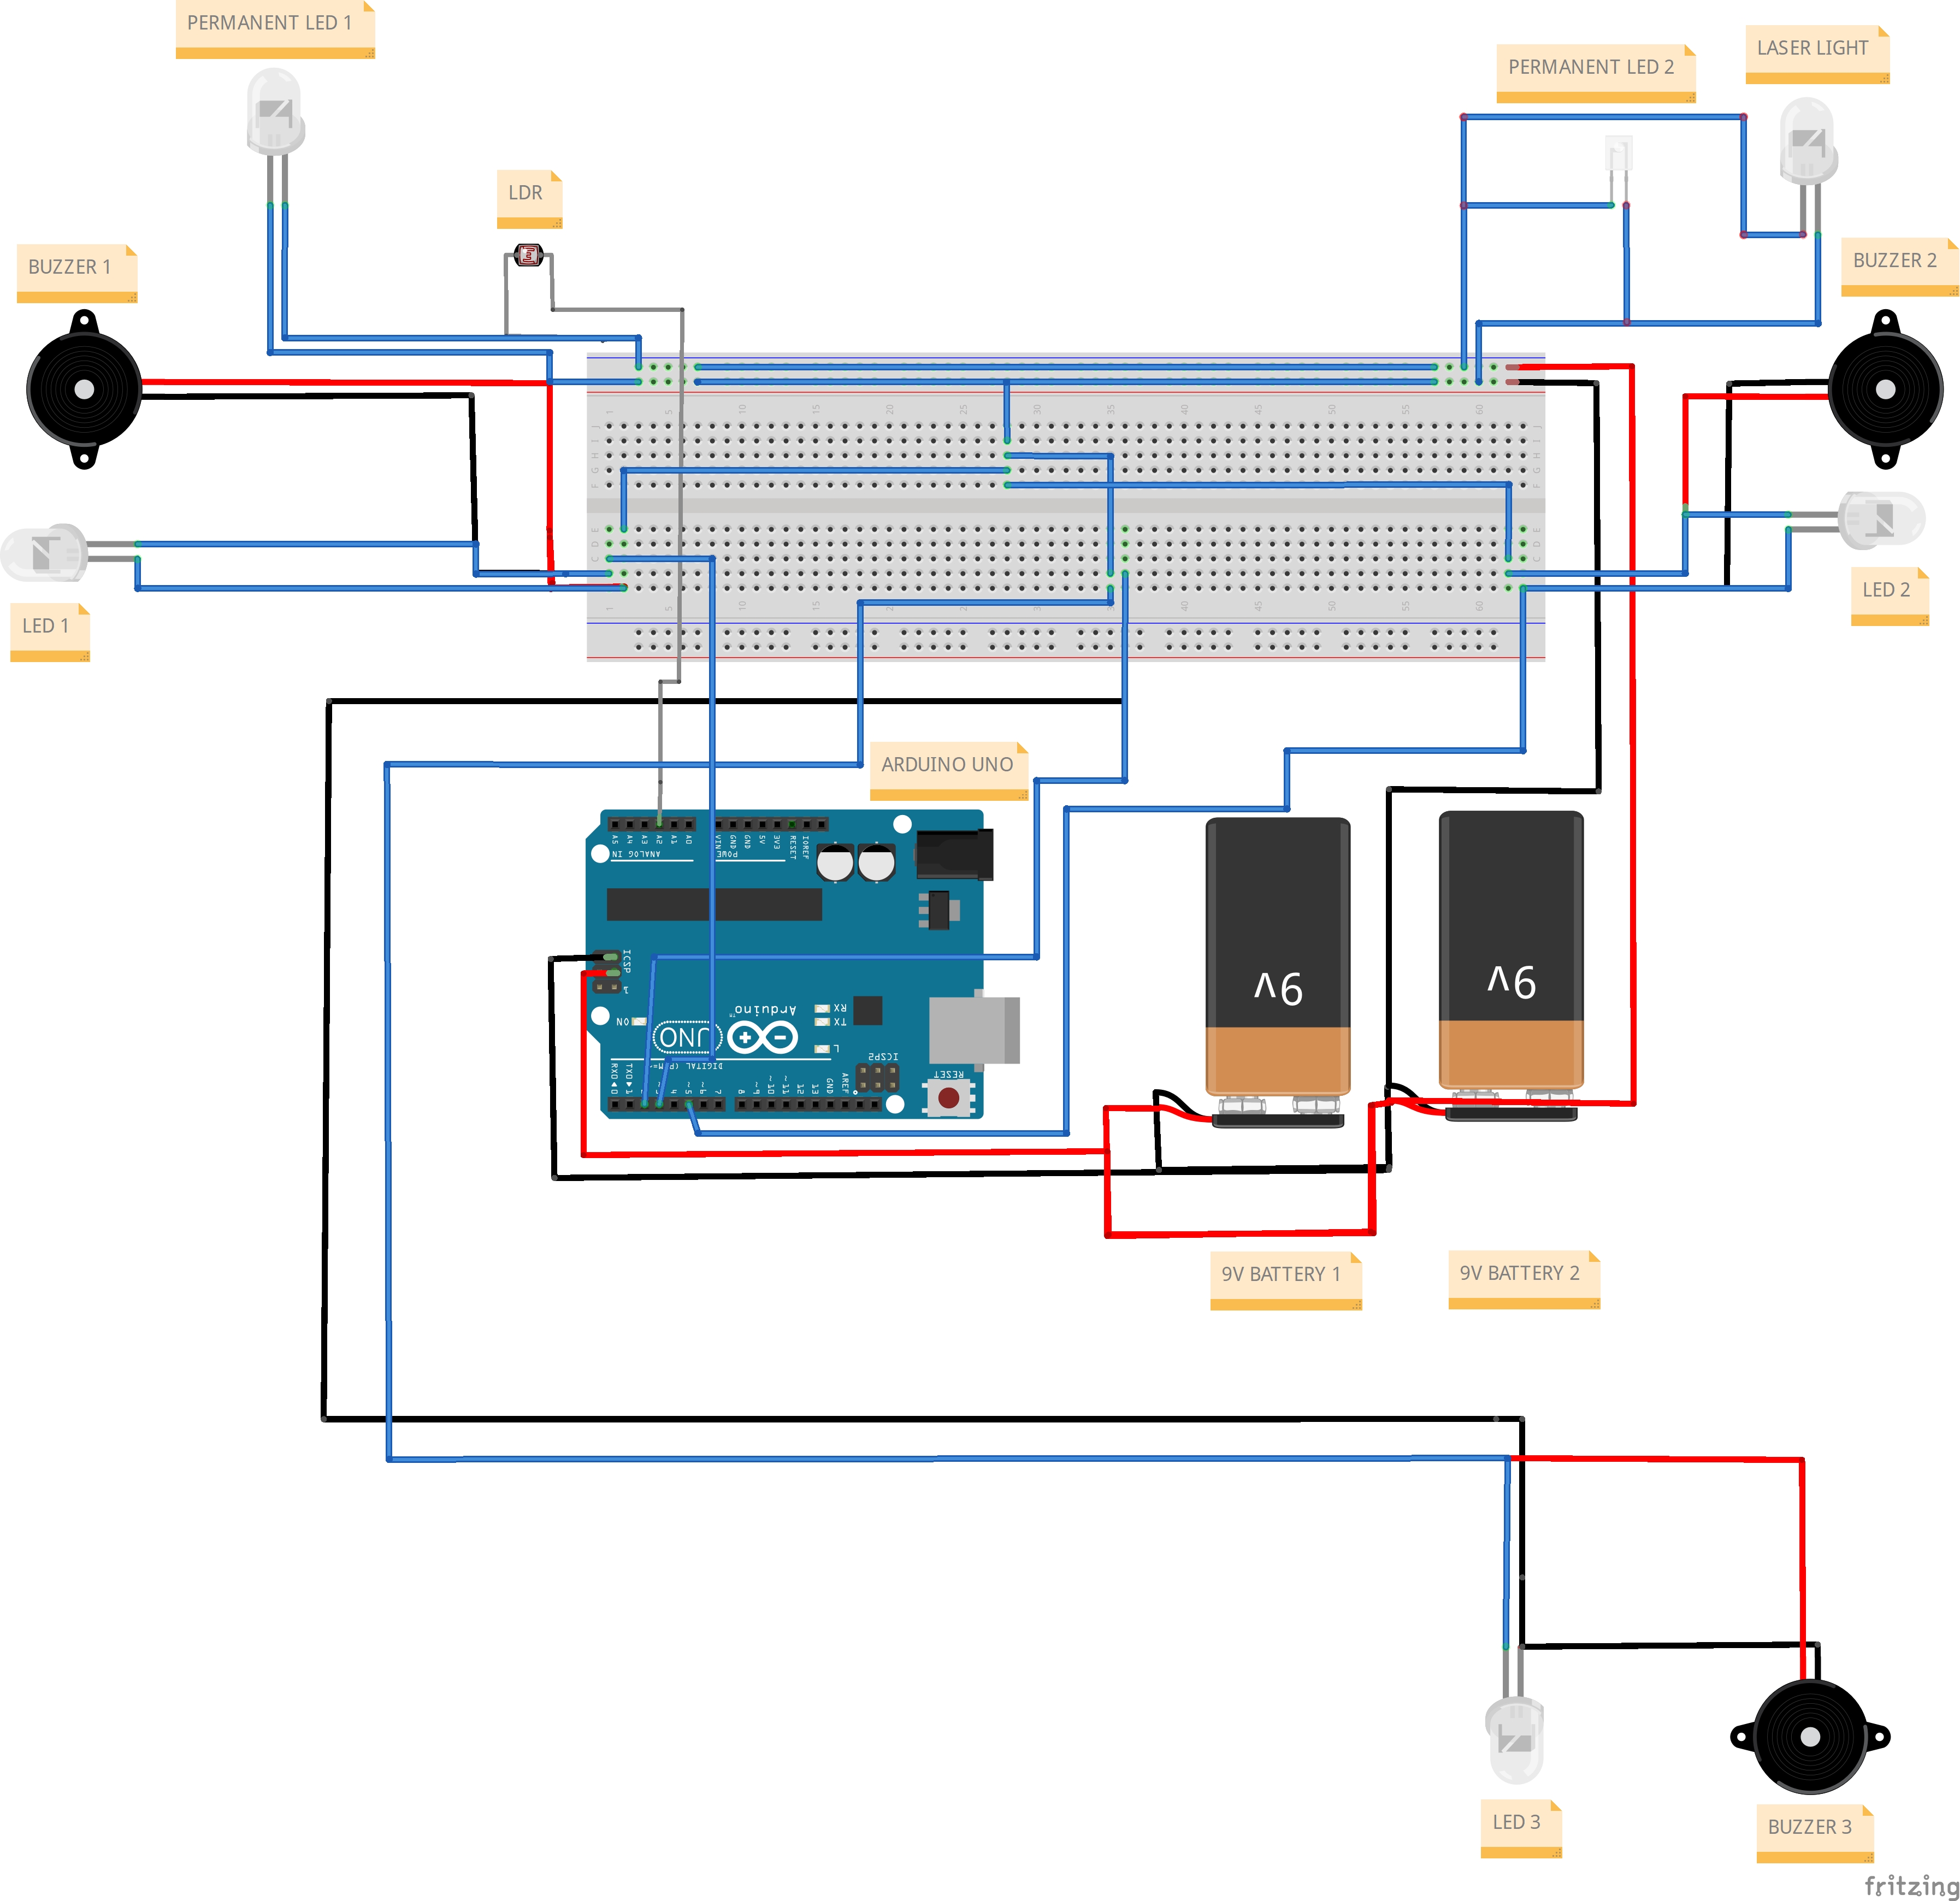
Circuit Diagram:Permanent LED 1, Permanent LED 2 & Laser Light:
Terminal + to Battery Terminal +
Terminal - to Battery Terminal -
Arduino Power Supply:
Terminal + to Battery Terminal +
Terminal - to Battery Terminal -
LDR:
Terminal Vcc to Arduino Vin Port
Terminal DO to Arduino A2 Port
Terminal GND to Arduino GND Port
LED 1 & Buzzer 1:
Terminal + to Arduino GND Terminal
Terminal - to Arduino 2 Port
LED 2 & Buzzer 2:
Terminal + to Arduino GND Terminal
Terminal - to Arduino 3 Port
LED 3 & Buzzer 3:
Terminal + to Arduino GND Terminal
Terminal - to Arduino 4 Port
Arduino USB B Port to Adapter USB A Port using USB A to B cable.
Procedure:First of all, write the code in Arduino IDE in Arduino Language.
- First of all, write the code in Arduino IDE in Arduino Language.
Now upload the code to the Arduino using the USB A to B cable.
- Now upload the code to the Arduino using the USB A to B cable.
Now connect the devices as mentioned in the hardware connections above and as per the circuit diagram shown.
- Now connect the devices as mentioned in the hardware connections above and as per the circuit diagram shown.
Now create a structure for placing all these devices.
- Now create a structure for placing all these devices.
Make sure to cover the LDR completely so that it only gets affected by the laser light, not from the outside light.
- Make sure to cover the LDR completely so that it only gets affected by the laser light, not by the outside light.
After this place and angle the laser light and LDR so that the laser light falls directly on the LDR.
- After this place and angle the laser light and LDR so that the laser light falls directly on the LDR.
At last turn on the power supply to start using the system.
- At last turn on the power supply to start using the system.
After Turning the system on by connecting all jumper wires as mentioned in hardware connections, we will get a system like this:
01Identification: We can implement a person identification system like face-recognition and fingerprint scanning features in the future.
02Various Applications: This type of system can be used in antique/expensive items protections or for various other security purposes.
03Multiple Lasers and LDRs: We can use various Lasers and LDRs to make this system more effective.
04Renewable Power Supply: We can also provide renewable energy sources like solar power to power this system.


_ztBMuBhMHo.jpg?auto=compress%2Cformat&w=48&h=48&fit=fill&bg=ffffff)


Comments
Please log in or sign up to comment.