In this project, I will show how to get started with the hc-05 Bluetooth module and learn how to create a simple led controller. For the sake of this project we will use a voltage divider across the RX and GND pins.
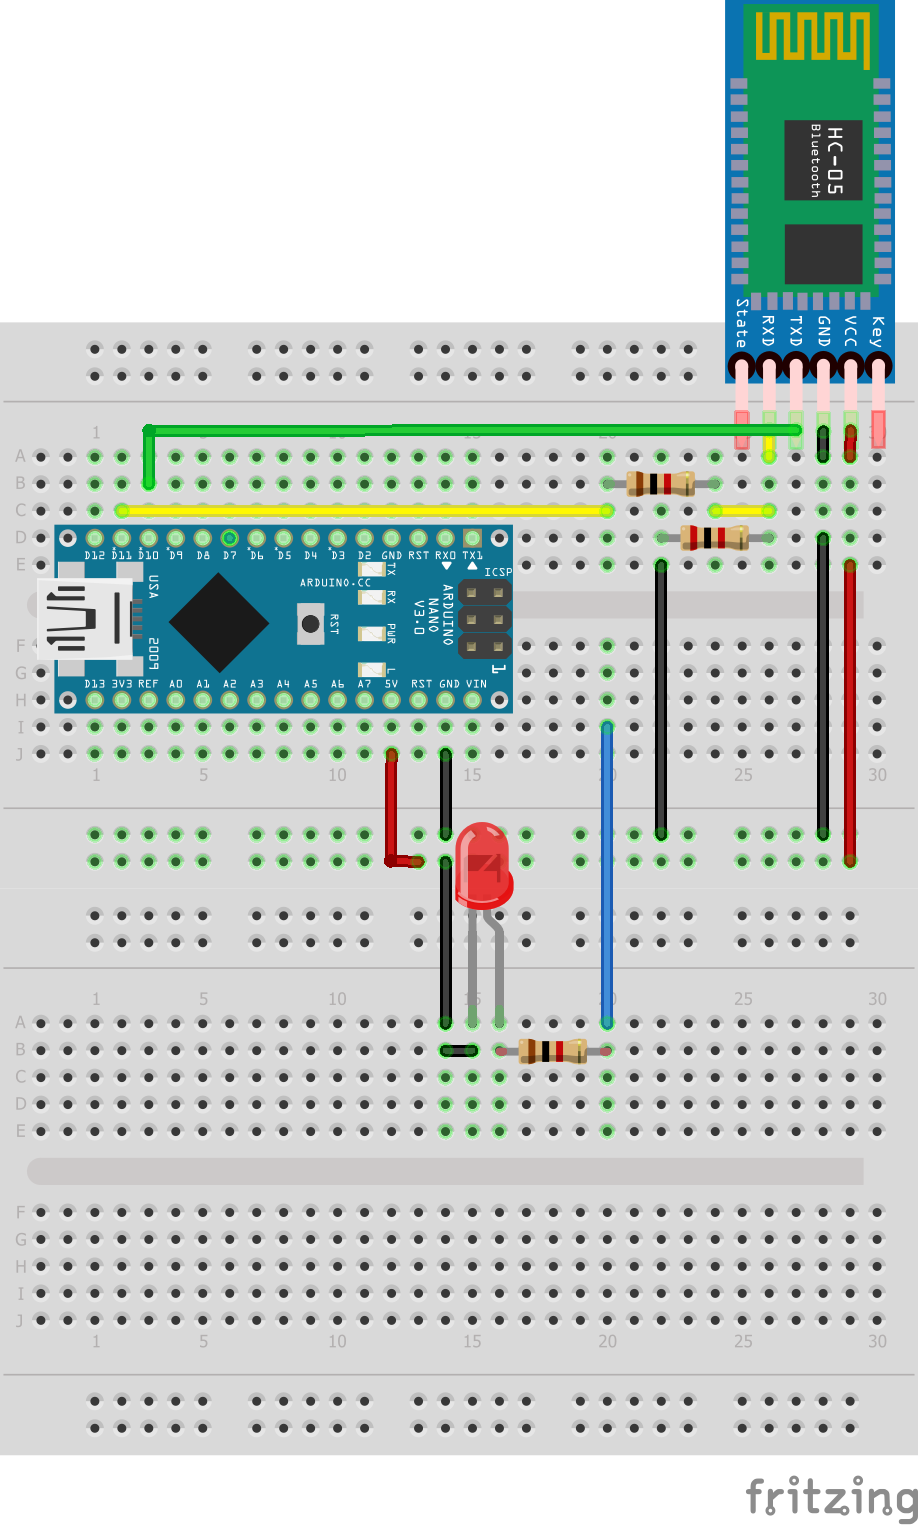
Instructions -- Make the schematic as depicted at the bottom of the page.
- Now, upload the code to your Arduino device, which is the Arduino nano in this case.
- Keep in mind that this code only works for the Arduino uno and nano.
- Do the android application set up as provided below.
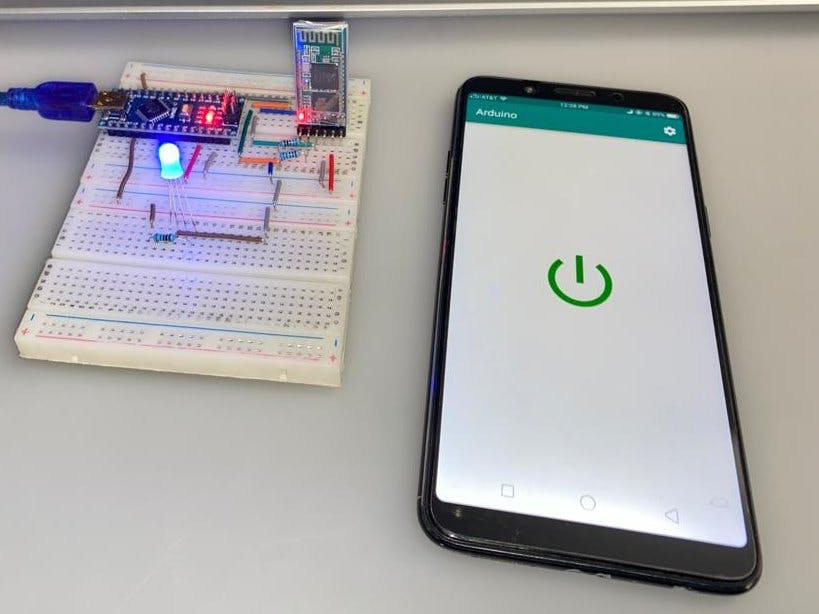
Hardware -In this section, we will discuss about the wiring of the project. We usually use this led as a test indictor for the hc-05 but, we can use it as a pre-cursor to our future projects such as a robotic arm or a car.
We are using a hc-05 Bluetooth module as it is cheap and durable. One downside of this module is that we cannot use it with iOS hence, it provides limitations. We use a voltage divider circuit across the RX pin of the module. WARNING! If we don't do this, it can permanently damage the Bluetooth module.
Code -In this section, we will help you understand the code and hopefully learn enough to write your own programs. Here we initialize the SoftwareSerial library and create a second serial port. We also create 2 variables, 1 to store the input and the second to store the output pin.
#include <SoftwareSerial.h>

SoftwareSerial bluetooth(10, 11); //RX, TX
char val;
int flag = A0;
In this snippet of the code, we initialize the serial port and the "Bluetooth" software serial port. We also initialize Pin A0 as an output pin.
void setup()
{
 bluetooth.begin(9600);
 pinMode(flag, OUTPUT);
}
We receive data from the application in the form of 1's and 0's in character form. This way, we can check for the value we received and do a task. The 'bluetooth.read();' function returns a single byte character.
if (bluetooth.available())
  {
    val = bluetooth.read();
 delay(10);
  }
 if (val == '1') analogWrite(flag, 255);
 else if (val == '0') analogWrite(flag, 0);
Android Application Set Up-Steps to set it up -
- Now, the hc-05 module should blink rapidly.
- Allow it to access Bluetooth settings.
- In the list, select hc-05.
- Now the module should blink once every 2 seconds.
- Here, click the settings icon on the top right hand corner.
- Now, near the green switch, type '1' and click done.
- Now, near the red switch, type '0' and click done.
- Click the power button on the top left hand corner.


Comments