


Hardware components | ||||||
 |
| × | 1 | |||
 |
| × | 1 | |||
 |
| × | 1 | |||
 |
| × | 1 | |||
Software apps and online services | ||||||
 |
| |||||
WizFi360-EVB-Pico is WizFi360 Wi-Fi Module + RP2040 board.First thing is you need to connect the WizFi360-EVB-Pico board to AWS.
To use AWS you need an AWS account (sign up if you do not have one).
For more information about connecting AWS to WizFi360-EVB-Pico Refer the link Below : https://www.hackster.io/user1959920/connect-wizfi360-evb-pico-to-aws-iot-core-3bb1cc.
Once logged in, go to IoT Core Service and create a thing.
AWS IoT Core Home
Create a single thing
Enter thing name and DO NOT create shadow
Auto-generate new certificates
Attach a policy (you must create one if you haven’t created one). In my case, I allowed all for testing purposes; please create your policy corresponding to your needs. For more information about policies please refer to: https://docs.aws.amazon.com/iot/latest/developerguide/iot-policies.html
Download 4 certificates from the pop-up window. FYI, public key won’t be used. Please keep in mind that you won’t be able to download these keys later, so copy them to a safe place. Also, for security reasons it is recommended to delete these keys after adding them to the firmware.
One a ‘thing’ is created in AWS IoT Core, let’s move on to the next step – Firmware.
A sample firmware can be downloaded or cloned from the following Github link: https://github.com/Wiznet/WizFi360-EVB-Pico-AWS-C
Please clone, update submodule and patch.
Input the your Wi-Fi AP SSID & Password into..WizFi360-EVB-Pico-AWS-C\examples\AWS_MQTT_Demo\socket_startup.c
Copy the downloaded keys into..\WizFi360-EVB-Pico-AWS-C\examples\AWS_MQTT_Demo\mqtt_certificate.h.
RSA 2048bit key: Amazone Root CA 1 -> mqtt_root_ca
Device certificate -> mqtt_client_cert
Private keyfile -> mqtt_private_key
Next, it is necessary to input domain, publish & subscribe topic, Client ID. This information shall be added to define variables in..\WizFi360-EVB-Pico-AWS-C\examples\AWS_MQTT_Demo\iot_demo.c
Thing name shall be used as Client ID.
For testing purposes I used shadow/update, shadow/update/accepted as Topics.
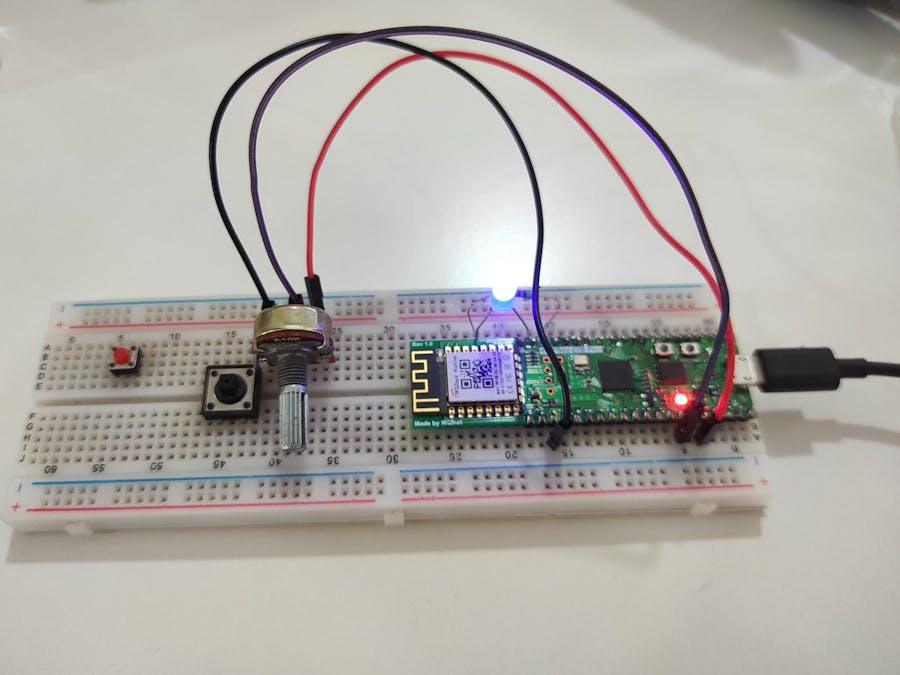
Connect LED one end to GPIO 14 that is pin number 19 on the WizFi360_EVB_Pico board.and another end(Shorter leg) to one end of 22ohm resistor and other end of the resistor should connect to GND pin of the board.
Main:For controlling the LED from AWS we need to make LED pin as PWM that is connect to GPIO 14.Need to add PWM library to main file and cmakeList files as below:
So that LED can be contolled via PWM.
so after including the library, once your system is able to connect AWS,then we need to capture the data sent from the AWS like ON and OFF conditions below function is used to receive the data from the AWS.
Once Everything is set need to RUN the code after generating the binary files as mentioned in the above Link,OUTPUTS
so user need to send the ON or OFF conditions throught AWS IOT,
while in OFF state,
while in ON state,
Terminal output:


Comments
Please log in or sign up to comment.