


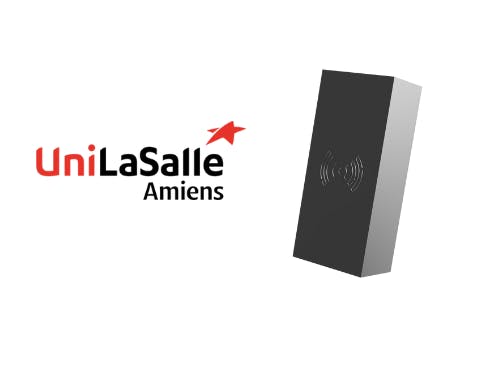
Hardware components | ||||||
 |
| × | 1 | |||
 |
| × | 1 | |||
 |
| × | 3 | |||
| × | 1 | ||||
 |
| × | 3 | |||
 |
| × | 2 | |||
Software apps and online services | ||||||
| ||||||
 |
| |||||
 |
| |||||
 |
| |||||
| ||||||
Hand tools and fabrication machines | ||||||
 |
| |||||
At the end of our fourth year of studying, we had to create an IOT project with our own idea. During this year we have learned the Lora protocol and how to program with an arduino card exploiting sensor's datas.
The storyDuring class hours, the attendance process remains cumbersome, often consuming valuable time for both teachers and students. Traditional methods, such as manual roll calls or passing around sheets, are prone to errors. To address this issue, our project aims to develop a semi-automatic attendance tracking system utilizing RFID and LoRa technology. Students will use their school cards, which they will scan upon entering the classroom using a designated device. This data will then be available on a web application. Various hardware options, such as the use of Arduino boards, offer versatile deployment possibilities suitable for both fixed and mobile classroom environments.
To send our RFID data over LoRa, there are several steps involved. Firstly, our RFID sensor will communicate with an Arduino Leonardo, which will store the received data. This Arduino Leonardo is then connected via serial ports to an MKRWAN 1310 board, which will handle the LoRa communication.
Sends RFID serial data to the MKRWAN131
// Envoi de l'UID RFID via Serial1 (vers la MKR WAN 1310)
Serial.println("Envoi de l'UID RFID...");
for (int i = 0; i < 5; i++) {
Serial1.write(UID[i]);
}
if (Serial1.availableForWrite() > 0) { // Verifie si la communication serie est prete a ecrire
Serial.println("UID RFID envoye.");
} else {
Serial.println("Erreur lors de l'envoi de l'UID RFID.");
}
Reception function
byte incomingData[5];
Serial1.readBytes(incomingData, 5); // Lit les donnees RFID entrantes
Serial.print("RFID Message Received (hex): ");
for (int i = 0; i < 5; i++) {
Serial.print(incomingData[i], HEX); // Affiche l'UID RFID en format hexadecimal
Serial.print(".");
}After sending our LoRa data via the MKRWAN card, we receive them on TTN. In order to decode the packets received by TTN, we used a formatter in javascript.
Payload formatter
function Decoder(bytes, port) {
  // Convertit les octets en une chaîne de caractères
  var rfidID = String.fromCharCode.apply(null, bytes);

  // Crée un tableau pour stocker les valeurs hexadécimales
  var HexArray = [];

  // Parcours chaque octet et le convertit en sa représentation hexadécimale
  for(var i = 0; i < bytes.length; i++){
    var hex = bytes[i].toString(16);
    // Ajoute un zéro à gauche si la représentation hexadécimale est d'un seul chiffre
    HexArray.push(hex.length === 1 ? '0' + hex : hex);
  }

  // Concatène les valeurs hexadécimales en une seule chaîne
  var HexString = HexArray.join('');

  // Si la chaîne hexadécimale est vide, retourne null
  if(HexString === 0){
    return null;
  }

  // Retourne un objet contenant l'ID RFID et l'heure de réception
  return {
    rfidID: HexString,
    receiveAt: new Date().toISOString() // Utilise la fonction Date() pour obtenir l'heure actuelle et la convertit en une chaîne ISO
  };
}
Here is an example after processing by the formatter
Finally, in order to communicate with our processing server, we have added MQTT communication.
After that, we need a server to process the data. In our case, we've chosen a NodeRed server. With this server, we can send data received via TTN to our database.
Firstly, the TTN OUT and TTN IN tags allow us to subscribe to the MQTT service we created earlier via TTN.
After that, there's the transfer tag, which defines the sql request we want to send to our DB.
Transfertfuction
// Sert à recevoir le message
// Et à l'envoyer à la base de données

// Récupère la date de réception du message
var receiveAt = new Date(msg.payload.uplink_message.decoded_payload.receiveAt);

// Récupère le payload du message
var payload = msg.payload.uplink_message.decoded_payload.rfidID;

// Formate la date pour qu'elle soit au format ISO et ne garde que les 19 premiers caractères pour supprimer les millisecondes
var formattedDate = receiveAt.toISOString().slice(0, 19).replace("T", " ");

// Vérifie si le payload n'est pas '00' (condition spécifique)
if (payload != '00') {
    // Prépare la requête SQL d'insertion avec la date formatée et le payload
    var transfert = "INSERT INTO `pass` (`Heure`, `Num_Etudiant`) VALUES ('" + formattedDate + "', '" + payload + "');";

    // Définit le sujet du message comme étant la requête SQL
    msg.topic = transfert;

    // Renvoie le message modifié pour être traité ultérieurement
    return msg;
}
Finally, there's a SQL tag that allows us to connect to our DB using its IP address, port and administrator credentials.
We also have two lines, one for testing SQL queries and the other for downward direction (TTN to our arduino board).
DatabaseFor our database, we've chosen mariaDB ( Phpmyadmin ).
In order to store student card identifiers, we had to create several tables.
Table users
CREATE TABLE IF NOT EXISTS `users` (
`ID` int(11) NOT NULL,
`username` varchar(255) NOT NULL,
`password` varchar(255) NOT NULL
) ENGINE=InnoDB DEFAULT CHARSET=utf8mb4;
This table is used to store user IDs who wish to connect to the web application.
Tableetudiant
CREATE TABLE IF NOT EXISTS `etudiant` (
`ID_Etudiant` varchar(255) NOT NULL,
`Prenom` varchar(255) NOT NULL,
`Nom` varchar(255) NOT NULL,
`Classe` int(11) NOT NULL
) ENGINE=InnoDB DEFAULT CHARSET=utf8mb4;
This table is used to store student IDs.
Tableclass
CREATE TABLE IF NOT EXISTS `classe` (
`ID` int(11) NOT NULL,
`Nombre_Etudiant` int(11) NOT NULL,
`Nom_Classe` varchar(255) NOT NULL
) ENGINE=InnoDB DEFAULT CHARSET=utf8mb4;
This table is used to store the various classes.
Tableprofs
CREATE TABLE IF NOT EXISTS `profs` (
`ID_Prof` varchar(255) NOT NULL,
`Nom` varchar(255) NOT NULL,
`Prenom` varchar(255) NOT NULL
) ENGINE=InnoDB DEFAULT CHARSET=utf8mb4;
This table is used to store teacher card IDs.
Tablepass
CREATE TABLE IF NOT EXISTS `pass` (
`Heure` datetime NOT NULL,
`Num_Etudiant` varchar(255) NOT NULL
) ENGINE=InnoDB DEFAULT CHARSET=utf8mb4;
This table allows us to store the time of each student's visit, so we know whether they are present or not.
Web siteFor our website, we chose to use HTML5 and CSS3, including javascript and AJAX.
Login page
Class inventory
Classcalllist
In short, our website offers teachers a complete view of student attendance at their classes.
ConclusionOur solution offers a new way of taking roll calls during lessons. It saves time for teachers and students, allowing them to deepen their learning.
Our solution offers a number of advantages and possible improvements for the future.
Avantages :
- Save time and increase efficiency: By automating the attendance clocking process, teachers save valuable time that can be devoted to more important teaching activities.
- Reduced errors: By using RFID cards to record attendance, the risk of human errors such as duplicates or input errors is considerably reduced, ensuring more accurate and reliable data.
- Mobility and flexibility: RFID enclosures can be deployed in a variety of environments, from traditional classrooms to flexible learning spaces, offering an adaptable solution to the changing needs of educational establishments.
- Data security: Using robust security protocols, the system guarantees the confidentiality and integrity of student data, helping to build confidence in the system.
Possible improvements
- Enable teachers to create students directly on the website.
- Real-time notifications : Integrate real-time notifications to inform teachers of students' late arrivals or absences. This could be done via alerts sent by e-mail, SMS or push notifications in the application.
- Cross-platform compatibility: Ensure system compatibility with different types of RFID cards to meet the needs of all students. Some RFID solutions may be more effective than others, depending on the environment and the specific needs of the school.
PS :
Link to our school website : https://www.unilasalle.fr/
Link to RIOC training (Computer networks and connected objects) : https://www.unilasalle.fr/parcours-reseaux-informatiques-et-objets-connectes


_t9PF3orMPd.png?auto=compress%2Cformat&w=40&h=40&fit=fillmax&bg=fff&dpr=2)


Comments