


Hardware components | ||||||
| × | 1 | ||||
_cb1jwgVyin.jpg?auto=compress%2Cformat&w=48&h=48&fit=fill&bg=ffffff) |
| × | 1 | |||
| × | 1 | ||||
Software apps and online services | ||||||
| ||||||
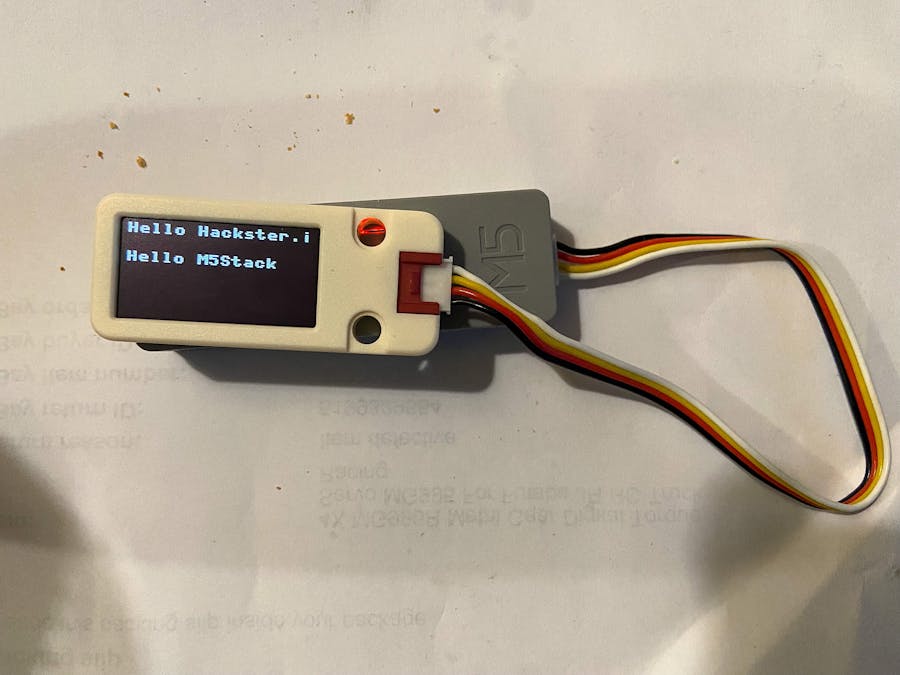
I this guide I will show you how to use the Unit OLED with the M5Atom and then in a future guide, the M5Stamp.
For this guide you will need the following M5Stack products.
- Atom Matrix,
- TailBat,
- UnitOLED,
Assembly of the parts is simple and strait forward.
The Tailbat is plugged into the Atom Matrix and the UnitOLED is plugged into the grove port of the Tailbat.
Programming the UnitOLED.
In order to program the UnitOLED we first need to add the UnitOLED. To add the UnitOLED to UIFlow we need to click on the + sign below the picture of the Atom Matrix.
In the panel that pops up, scroll down through the units to find the UnitOLED
Click on the OLED to make a green tick appear and make sure the port list is Port A.
Click on OK and the OLED will appear below the Atom Matrix.
In order to activate the UnitOLED, we first need activate the UnitOLED. This is done by placing the OLED Power On block.
Now this block has been placed, if we run this the UnitOLED will turn on showing the default screen.
In order to clear the screen before writing to it we need to blank the screen using the Fill colour block
There isn't a dedicated clear screen block and so this does the job for us. If we don't place the block, data gets continuously written to the screen until all the pixels get filled and never blanked out.
Next we add something to show to the screen
However, if this example is run, nothing will show on the screen as it has only been written to a buffer. To get the data in the buffer to appear on screen we have to use the OLED Show block at the end of the loop.
And that's all that's required to run the UnitOLED.


Comments
Please log in or sign up to comment.