


Hardware components | ||||||
 |
| × | 1 | |||
| × | 1 | ||||
 |
| × | 1 | |||
 |
| × | 5 | |||
 |
| × | 6 | |||
 |
| × | 1 | |||
| × | 1 | ||||
Software apps and online services | ||||||
_4YUDWziWQ8.png?auto=compress%2Cformat&w=48&h=48&fit=fill&bg=ffffff) |
| |||||
Hand tools and fabrication machines | ||||||
 |
| |||||
 |
| |||||
In this tutorial, you will learn how to assemble an educational Star-Shaped PCB kit I created called "Give A Star" based on the ESP32-S2 and D1 Mini to teach the basics of soldering. The materials used in this project are really simple and the soldering is really simple making this a cheap and beginner-friendly project!
✨ About the ProjectI decided to pursue this project because I wanted to create an educational PCB project that was specifically tailored toward beginners who want to learn more about programming microcontrollers and THT soldering in a fun, intuitive way. Project Give A Star is a simple, low-cost PCB kit designed to teach the fundamentals of programming via Arduino and soldering.
📷 Product ShowcaseThe kit is designed to be as intuitive and unadorned as possible opening up lots of room for customization, especially with the firmware. The baseline features of the device include:
- Five LED Animation
- Push Button Toggle to Switch Between Animation
- Graphical Display via the OLED
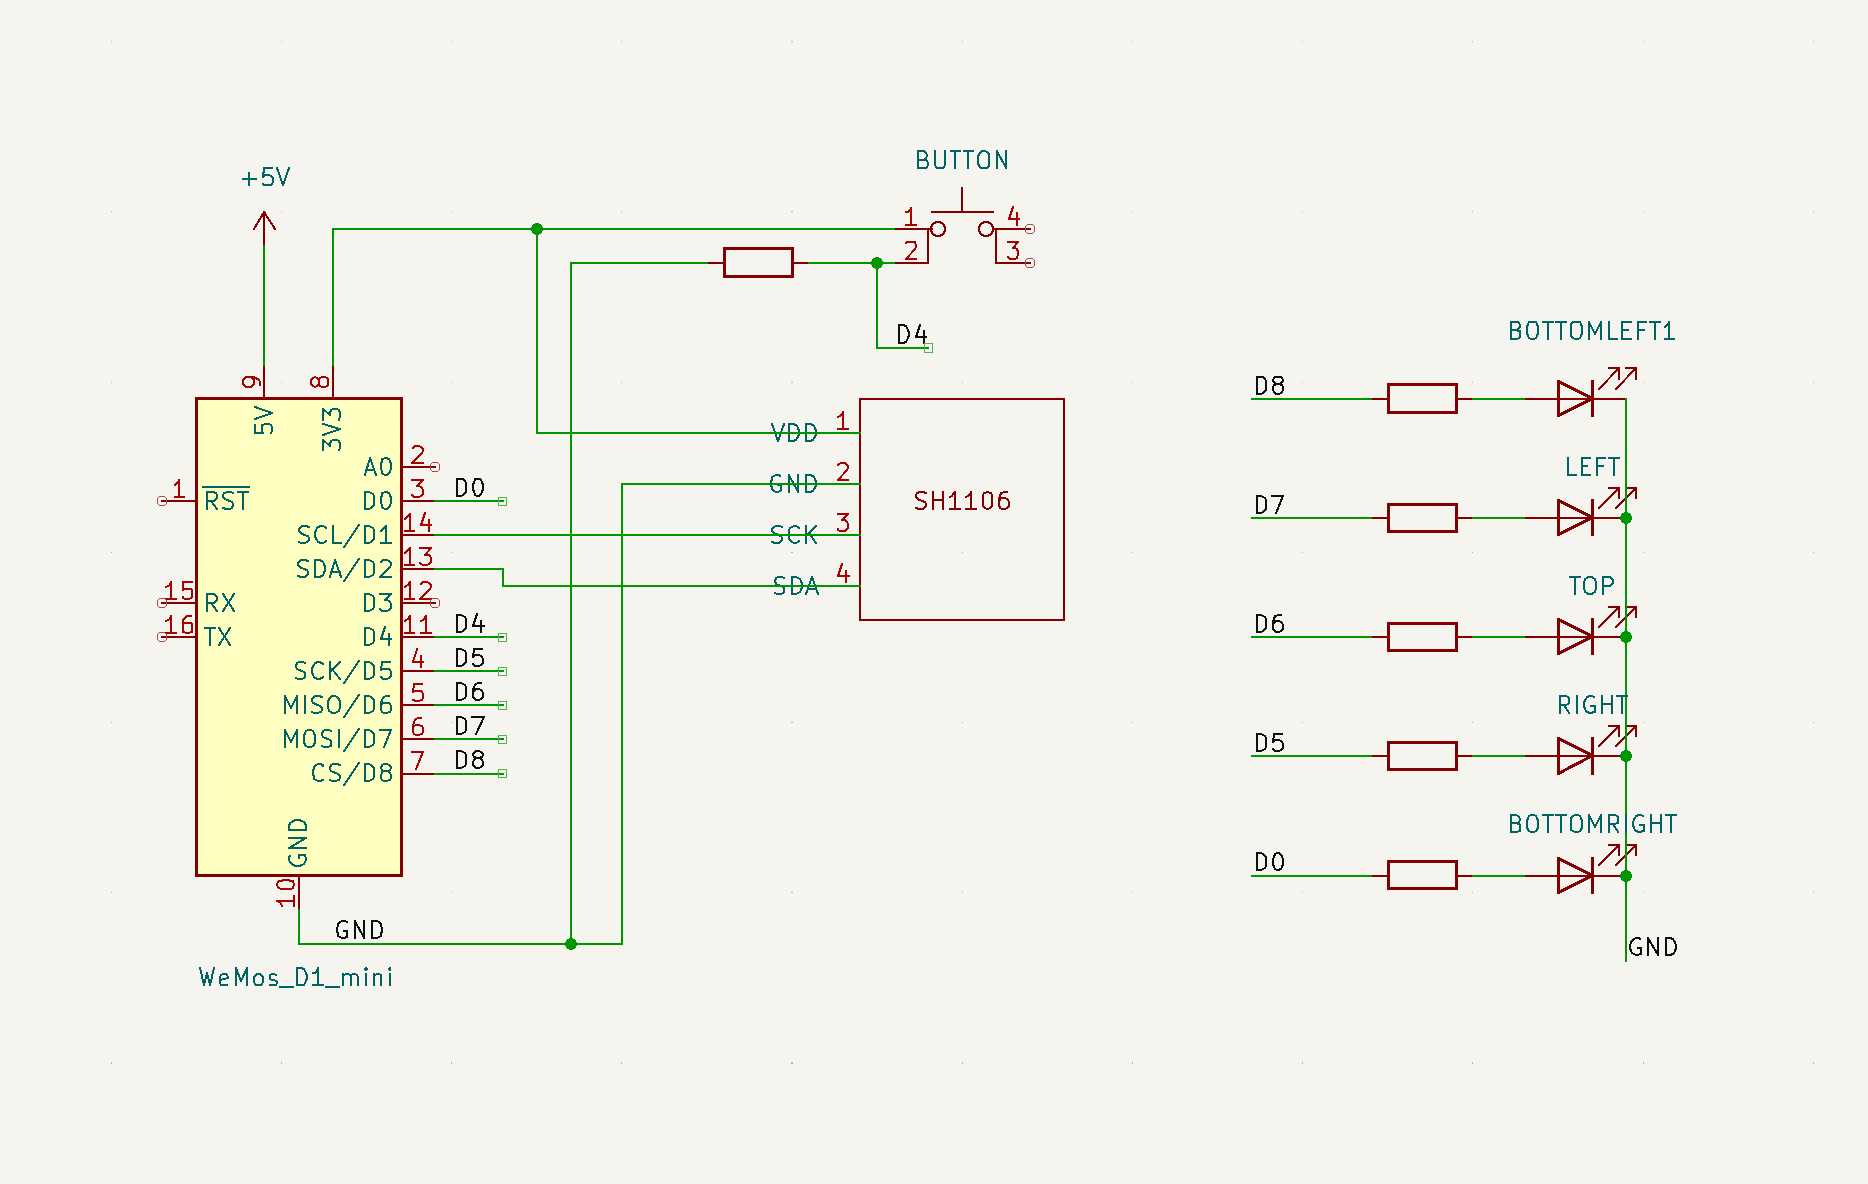
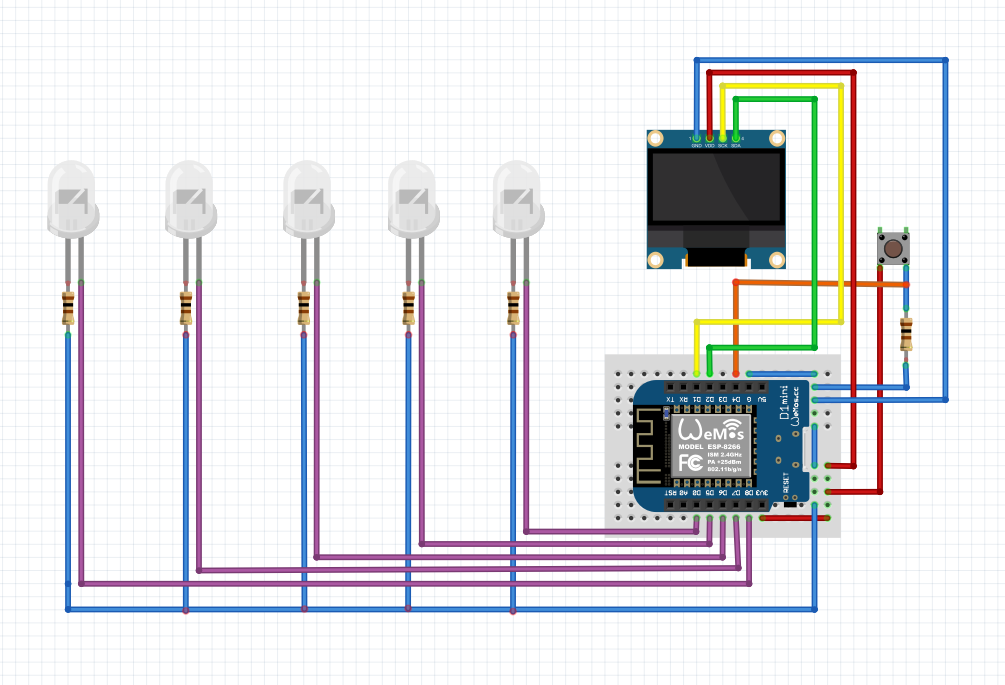
Follow the schematic or breadboard outline below to construct the device
Once the circuit is constructed, download the Arduino IDE and make sure to install the libraries below. If you are using the D1 Mini, install the ESP8266 board libraries, and use the ESP32 libraries if you are using the ESP32-S2.
- Arduino IDE with the following URL added under Preferences -> Additional board manager URL's: http://arduino.esp8266.com/stable/package_esp8266com_index.json (D1 Mini) OR https://raw.githubusercontent.com/espressif/arduino-esp32/gh-pages/package_esp32_dev_index.json (ESP32-S2)
- ESP8266 boards added in Arduino IDE by going to Tools -> Boards -> Boards Manager, and installing ESP8266 by ESP8266 Community (D1 Mini)
- ESP32 boards added in Arduino IDE by going to Tools -> Boards -> Boards Manager, and installing ESP32 by Expressif Systems (ESP32-S2)
- Install Zip file from https://github.com/wonho-maker/Adafruit_SH1106 and unzip the file inside Arduino -> libraries
- Adafruit GFX library installed in Arduino IDE by going to Sketch -> Include Library -> Manage Libraries and installing "Adafruit GFX Library" by Adafruit
- Optional: Depending on which type of OLED screen you use, you might have to install this library esp8266-oled-ssd1306 or SSD1306 by Adafruit: Sketch -> Include Library -> Manage Libraries and installing "Adafruit GFX Library"
After you configure your dev environment, download the GitHub repo for this project by following the link below.
GitHub Repo: https://github.com/angelina-tsuboi/Give-A-Star
The code is relatively straightforward, but some things worth mentioning are...
starAnimation controls which animation is running on the device
setup() configures the OLED and setups the pinouts of the LEDs
loop() checks for anytime the button is pushed and changes the animation
accordingly
showStarImage() changes the graphics of the OLED display to match the
animation number
resetLEDs() turns off all LEDs
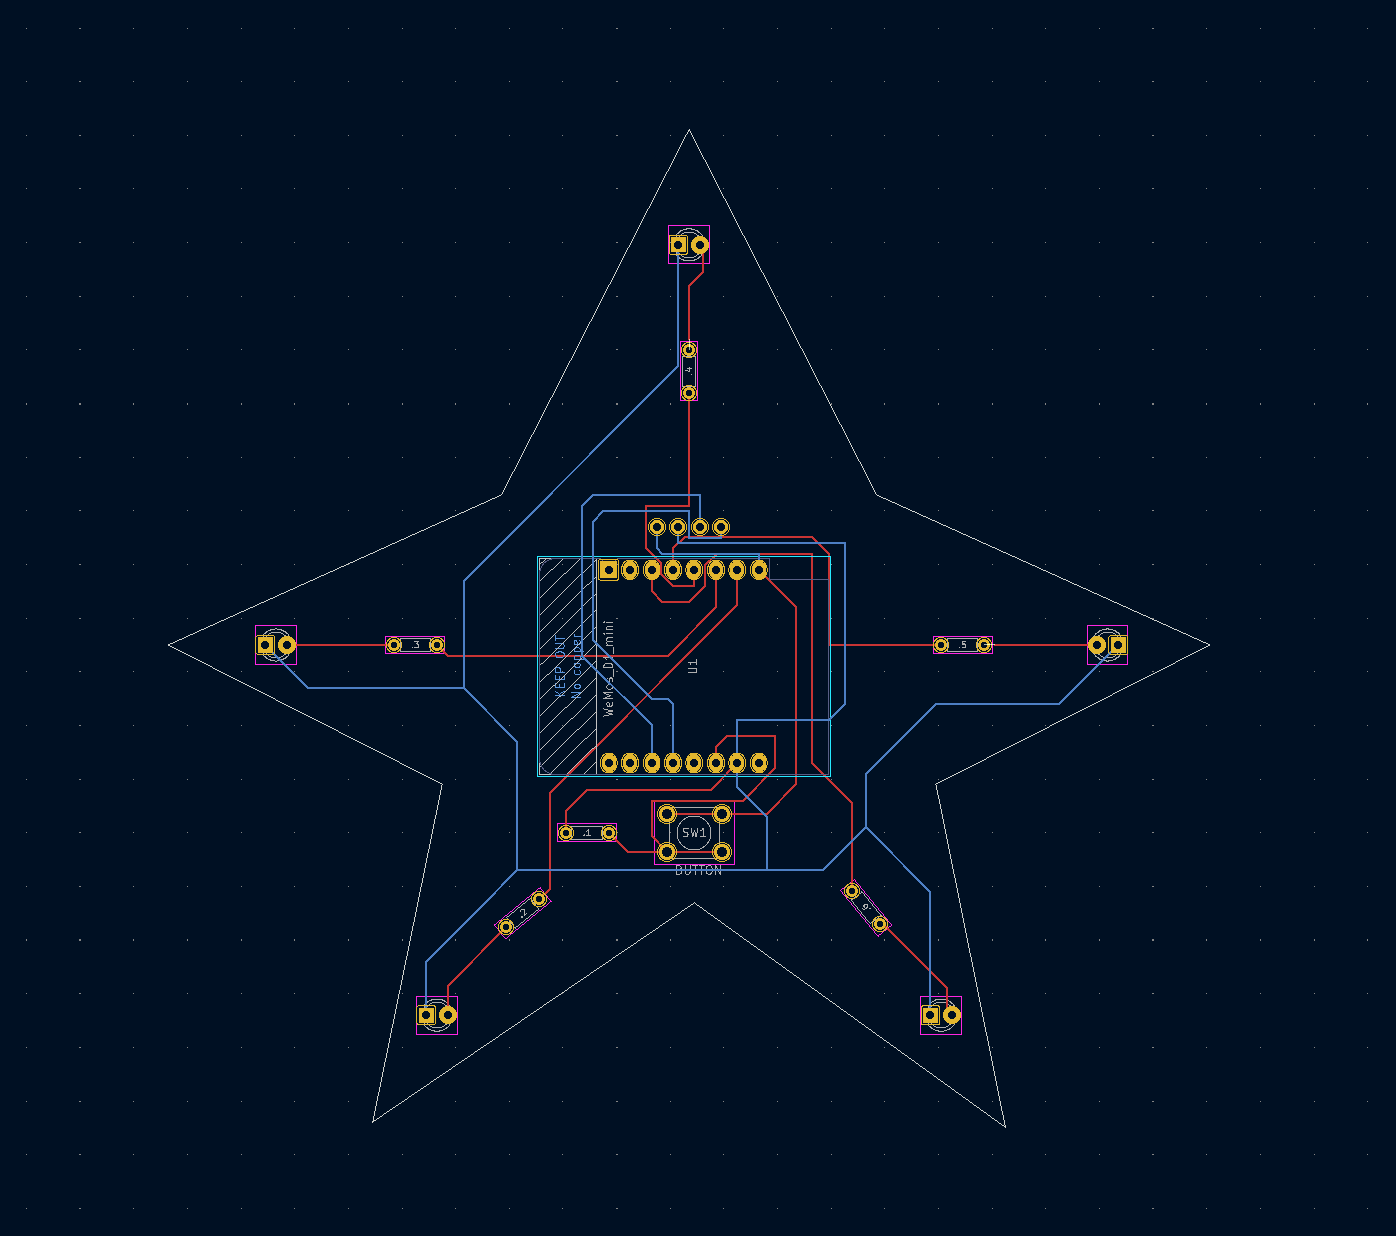
To assemble the device, use a soldering iron and solder to connect all the components to the circuit board. Here is the sequence I recommend you follow for the soldering process.
To get the PCB board, you can reference the gerber files in the GitHub repo:
https://github.com/angelina-tsuboi/Give-A-Star/tree/main/development
1. Solder Header pins to the ESP32-S2
2. Solder ESP32-S2 to the back of the PCB board
3. Solder resistors to the front of the PCB board
4. Solder push button to the front of the PCB board
5. Solder OLED to the front of the PCB board
6. Solder LEDs to the front of the PCB board (pay attention to cathode + anode pins)
7. Clean up the device by cutting off excess wires poking out the back with scissors
🚀 UsageOnce you solder together the device and upload the code to the microcontroller on the back, your device should be ready to use!
Power up the microcontroller using a cable and the device should light up!
- Push the button to toggle between animations
- The OLED display should change for each animation
- LEDs should light up according to the animation number
If you have any questions, feedback, or concerns, feel free to reach out!
GitHub: https://github.com/ANG13T
LinkedIn: https://www.linkedin.com/in/angelina-tsuboi-322028211/
Instagram: https://www.instagram.com/builds.by.ang
Help Support my Work: https://www.buymeacoffee.com/angelinatsuboi

_Ujn5WoVOOu.png?auto=compress%2Cformat&w=40&h=40&fit=fillmax&bg=fff&dpr=2)

Comments
Please log in or sign up to comment.