April Fools' may be over, but hilarious pranks can happen at any time.
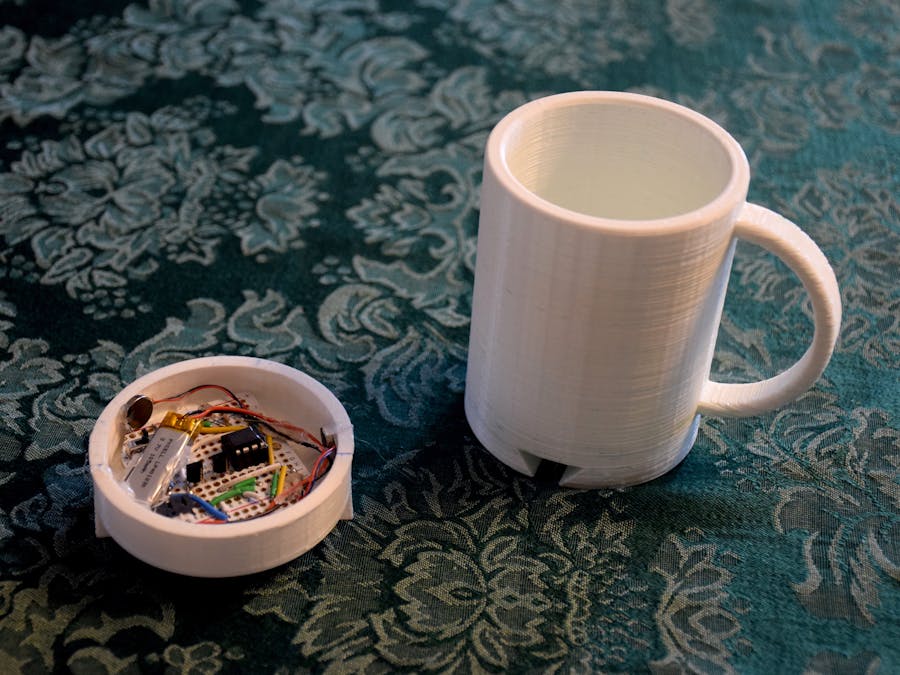
Picture the following: you have an nice white cup in front of you. It's filled to the brim with sparkling, cool, and refreshing H20. Your fingers curl around the nicely curved handle, and you bring the cup to your lips. Suddenly, a strong vibration assaults the nerves in your hand, causing you to drop the cup and spill water all over every surrounding surface, including yourself. This might not sound too fun for the participant, but I can personally guarantee you that it will elicit much more than a chuckle from any bystanders. Let's get started making it!
Step One: Print it!In the attachments section of this build are two .stl files: base.stl and cup.stl. You're going to have to print both of these out on some type of 3D printer. I have had success with higher infills and small layer heights to maintain the waterproofness of the mug, but you can experiment. Infills around 50% or above give the cup a nice solid feel as well. To print it out really quickly but have some leaks you can use about 20% infill and a layer height of 0.3mm. Don't use any supports!
Note the orientation of the parts in the screenshot above - this is how they should be printed. The attached files may not default to this.
The reason the mug is in two pieces is so that the electronics can be removed, allowing you to wash it.
Step Two: The Circuit BoardNow you're going to need to construct the circuit that makes this whole thing fun. It's actually pretty simple! The way the cup detects if it's picked up is by measuring ambient light. When there's a sudden spike in light, it's safe to assume that the mug has been lifted, and the motors should start vibrating! This light measuring is done through a phototransistor. The motors are driven using small transistors as switches. They are pretty small, so there's not really any need for a dedicated motor driver chip or circuit; the transistors will do quite nicely. Just don't connect the motors directly to the pins on your microcontroller!
I personally like perma-proto boards from Adafruit, but if you like building things on perf boards you can do that too. Just make sure that your perf board can fit in the cylindrical cutout in the base of the cup! The circuit above shouldn't take more than an hour and a half to build if you have some experience with electronics. Replace the 3xAA power pack in the breadboard layout shown above with any 3.7V LiPoly battery, and the motors shown should be of the small DC vibrating motor variety. If you want, you can also add in a switch to turn the circuit off and on.
If you're using a quarter-size perma-proto board with default sizing on the 3D files the corners of the board will need to be snipped off to make it fit.
Step Three: Programming the ATtiny85Before you put the ATtiny85 in the socket you can program it. Instructions can be found here: https://create.arduino.cc/projecthub/arjun/programming-attiny85-with-arduino-uno-afb829. If you need to reprogram the ATtiny just make sure you're careful when you pull it out of the socket.
The code may need some slight modifications in order to get it to work. All photoresistors are slightly different, as are ambient light levels. Try adjusting the threshold variable in my sketch to experiment with different results.
Step Three: Putting It All Together!My video at the top describes how you can go about putting the whole thing together. It's important that the base fits really snugly with the rest of the cup, and that the vibration motors are securely attached to the base. Otherwise, the vibrations won't be able to travel throughout the cup.
Whenever you want to wash the cup, simply slide off the base and give it a wash. It might initially seem like having a cup full of liquid with electronics under it might not be the smartest plan. However, I've noticed that the electronics actually stay remarkably dry even if the cup gets tipped over.
Step Four: Going Further!I have included a Fusion archive of my design, so if you have Fusion you can open it up and modify my design to suit your needs. A fun change might be extruding some text out of the bottom of the cup.


_ztBMuBhMHo.jpg?auto=compress%2Cformat&w=48&h=48&fit=fill&bg=ffffff)


_t9PF3orMPd.png?auto=compress%2Cformat&w=40&h=40&fit=fillmax&bg=fff&dpr=2)

Comments
Please log in or sign up to comment.