The Doorbell is a great example of how to connect your devices to Arduino Cloud and make them talk to each other.
The Doorbell allows you to open the door from everywhere as long as a WiFi network is available.
The project is composed of two part: the transmitter and the receiver. The transmitter is the one that actually opens the door and it is connected to it. The receiver is the device that rings and that you can use to open the door from everywhere.
Understanding Arduino CloudArduino Cloud is a simple tool to connect your Arduino/Genuino boards to the internet and to each other through an mqtt communication.
Mqtt is a machine-to-machine connectivity protocol that allows publishers and subscribers to exchange messages.
The connection between two different devices happens when one device subscribes to the topic in which the other one is publishing information.
Getting Started with Arduino CloudIf this is the first time you are using Arduino Cloud we highly encourage to follow the getting started guide.
Following a few simple configurations steps you will be given a basic Arduino sketch to start your project.
In the example's code is important to understand how to publish and how to receive messages.
In order to publish a message we will use:
client.publish("/username/device1/topic", "text");
While the username and the device name were defined before, the topic can be named as we like, it is where our messages will be published.
The text field is the message we want to publish in a string format.
In order to receive a message we first have to subscribe to a topic, where some other device is publishing:
client.subscribe("/username2/device2/ChannelName2");
Those fields have to be filled with the credential of the transmitter device.
Now we receive messages and read them using this code:
void messageReceived(String topic, String payload, char * bytes, unsigned int length) {
 Serial.println(payload)
}
Now we can start building up our project.
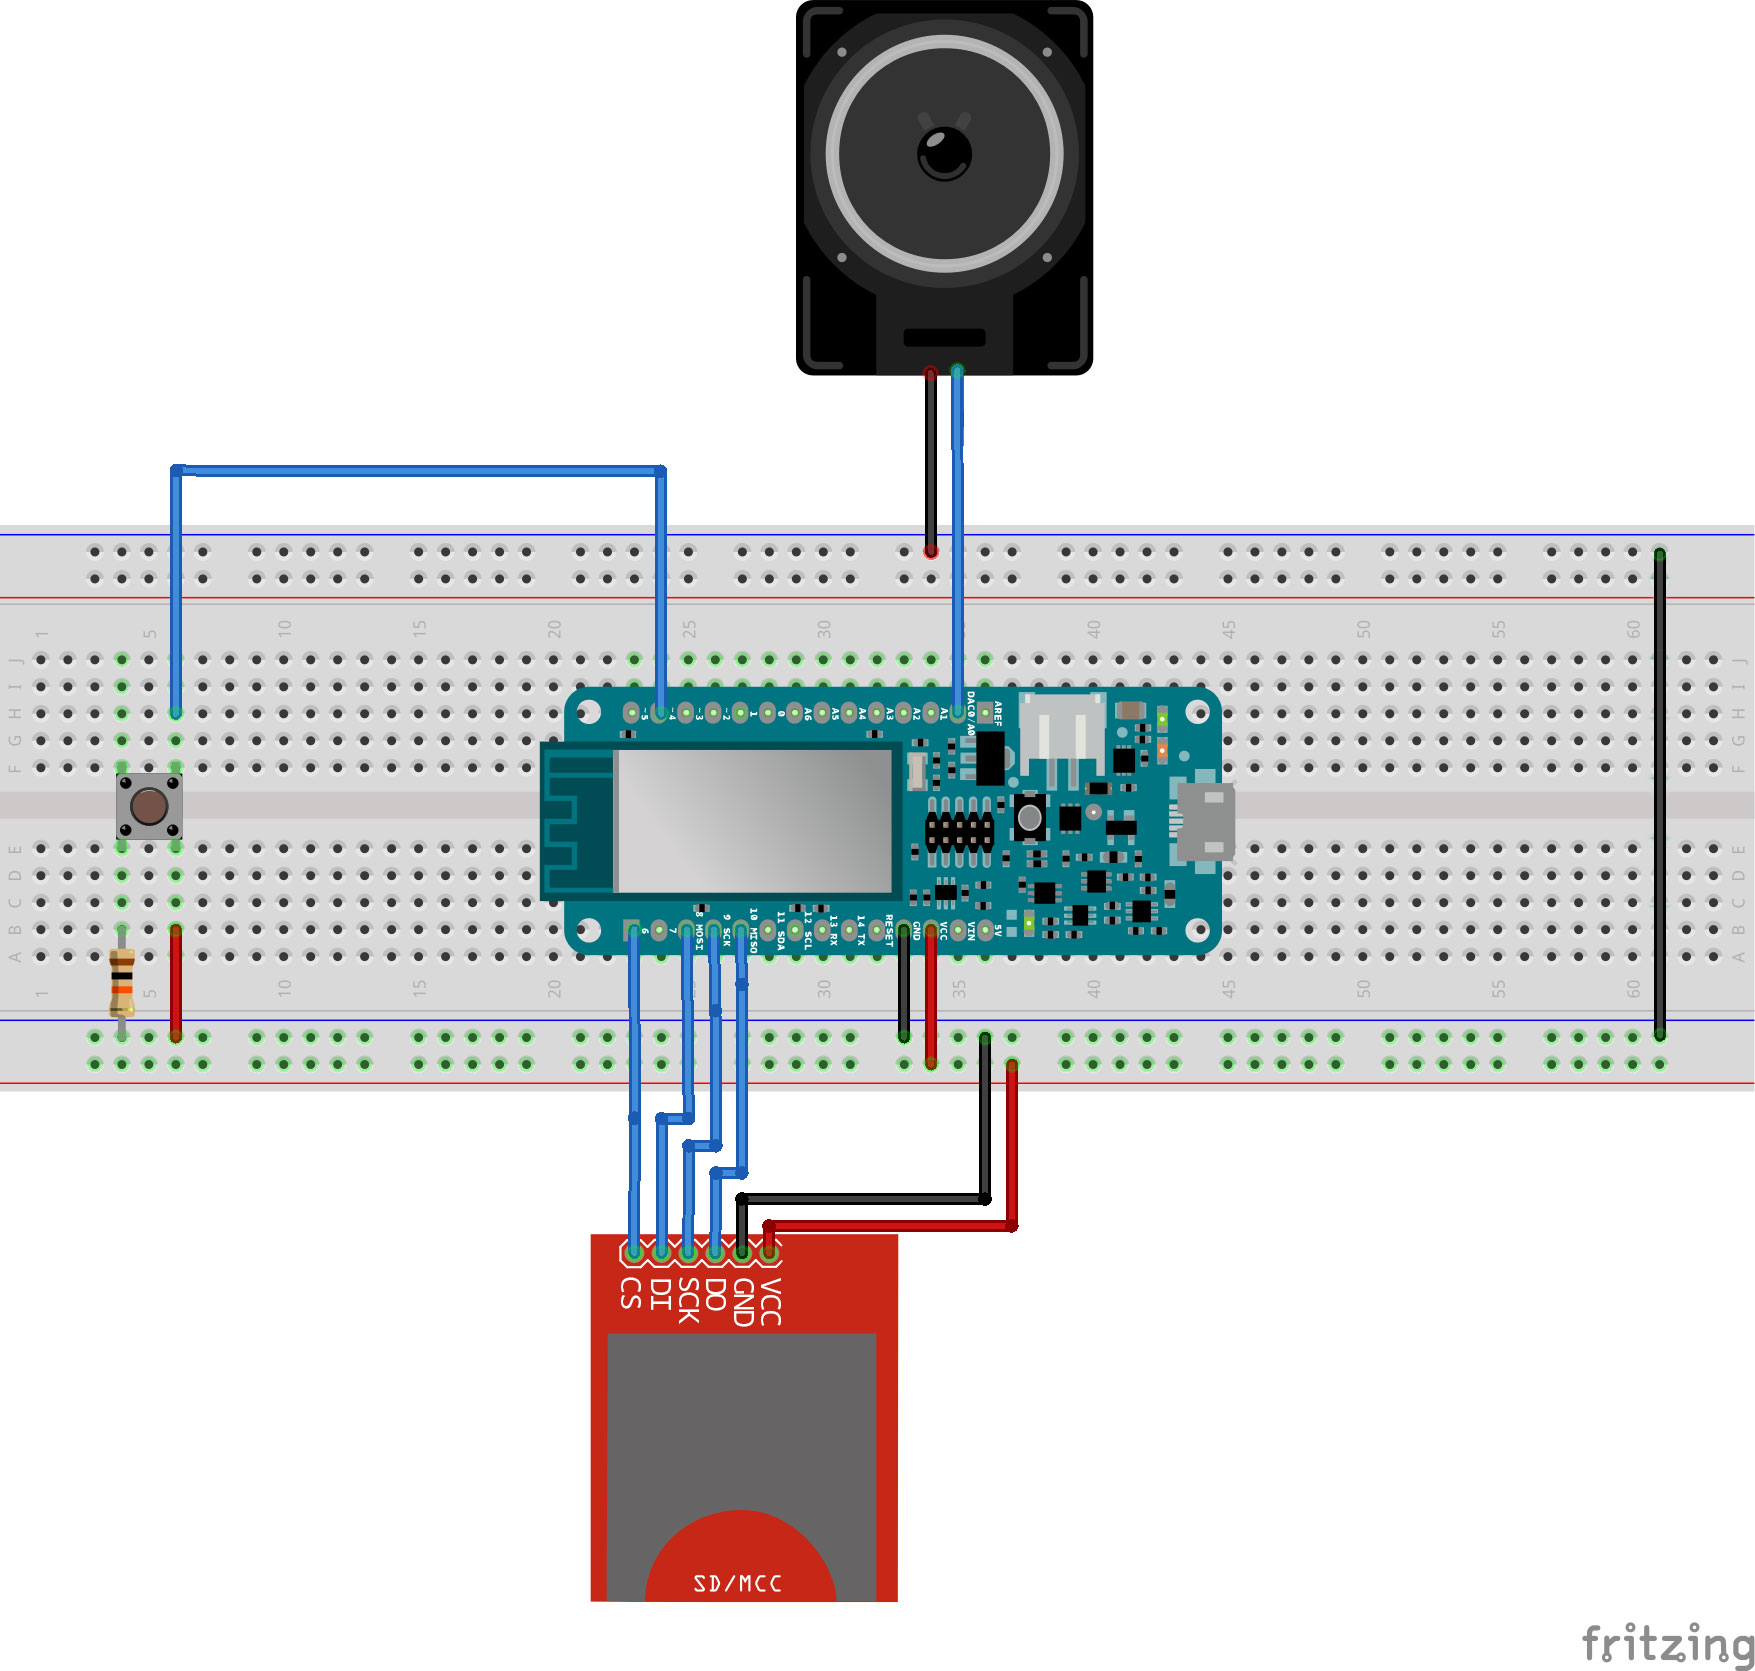
We want the receiver to play a song when the right message is received and to send the "open" message when the button is pressed.
To do so we need to connect to our board a button, a speaker and an sd breakout board.
In order to make it play we need the AudioZero library. For better quality the Audio file to store on the SD card must be in the .wav format with 88200 Hz, 8-bit unsigned PCM mono quality. This type of file can be easily obtained using audio programs like audacity.
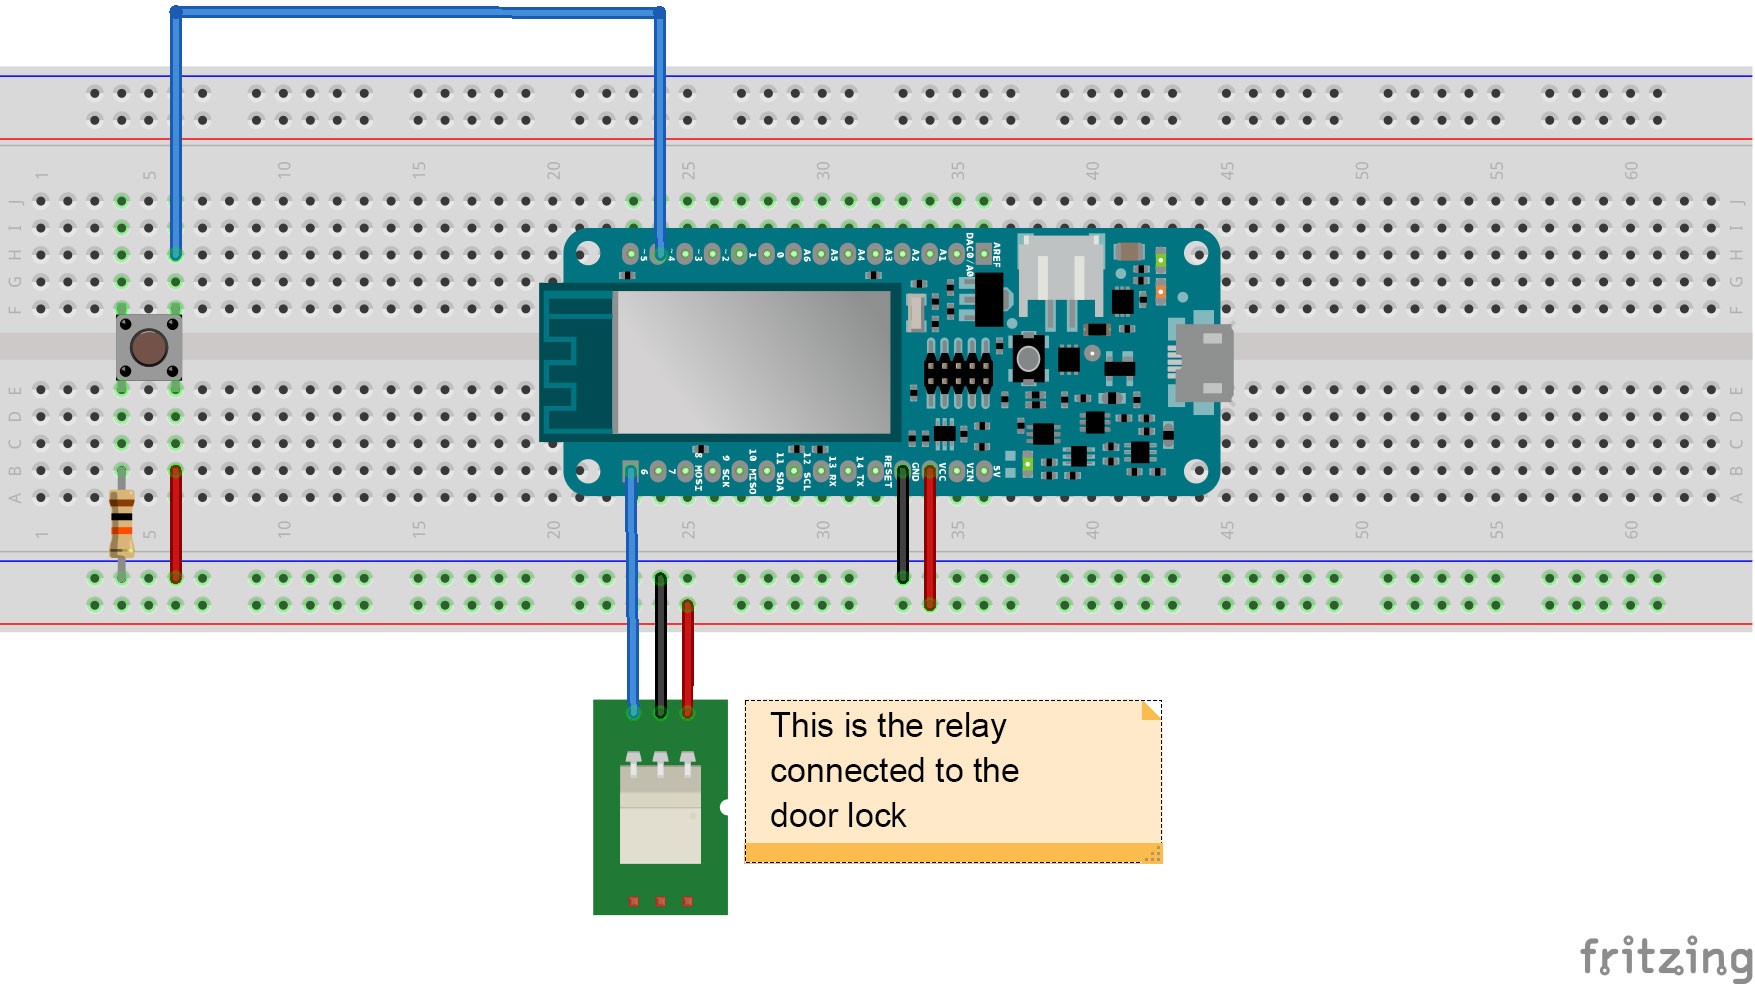
The TransmitterPlease note that for this example we presume our door is already connected to a relay that can lock and unlock the door by switching on and off.
What remains to do is simply to connect our board to this relay and to the front door button.


Comments
Please log in or sign up to comment.