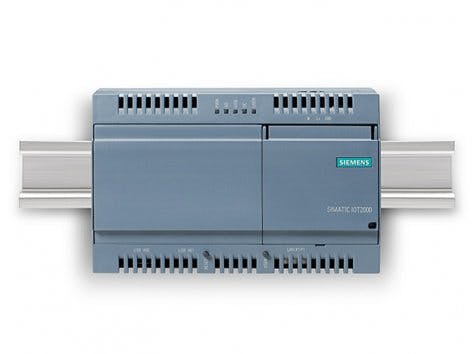
The first step involves transferring the operating system image onto the microSD card that will run on your IoT2020 board. This can be done using open source software like Etcher.
Next you will need to:
- Download the IoT2020 image
- Download and install Etcher
Once the download has finished, launch Etcher:
Select the source image:
And the destination SD, then click Flash!
Download and launch the latest Arduino IDE when choosing your OS. Install the Intel Galileo core in your IDE by clicking on Tools > Boards Manager and searching for "Galileo."
- Connect the IoT2020 with your computer using a micro USB cable.
- Upload a blink to test if the IDE is correctly configured.
- Load the LED blink example sketch: File > Examples > 1.Basics > Blink.
- Select the Intel® Galileo Gen 2 in the Tools > Board.
- Select the serial device of the board from the Tools > Serial Port menu.
- Click the Upload button in the upper left to load and run the sketch on your board.
After the upload process has completed, you should see your onboard led blinking.
If you encounter difficulties, please see the Intel® Galileo Gen 2 Getting Started Guide.
Upload the Configuration Sketch on Your BoardNow it's time to connect your board to Internet using a standard RJ45 Ethernet cable, then insert the microSD card into the slot indicated.
Power on the board. Now you have to upload the following code onto your board. Copy the code and paste into the IDE sketch window.
Select Intel® Galileo Gen 2 from the boards menu Tools > Boards > Intel® Galileo Gen 2 and the right port under the Tools > Port menu. Click on upload.
void setup() {
 Serial.begin(115200);
 while (!Serial) {}
 Serial.println("Connect your IOT2020 to the ethernet");
 system("udhcpc eth0");
 // put your setup code here, to run once:
 FILE *lsofFile_p = popen("ifconfig | grep inet | cut -f2 -d: | cut -f1 -d \" \"", "r");
 if (!lsofFile_p)
 {
   return;
 }
 char buffer[1024];
 char *line_p = fgets(buffer, sizeof(buffer), lsofFile_p);
 pclose(lsofFile_p);
 String ipaddr = String(line_p);
 ipaddr.trim();
 Serial.println("You can now connect using SSH, port 22");
 Serial.println("IP: " + ipaddr );
 Serial.println("Username: root");
}
void loop() {
 // put your main code here, to run repeatedly:
}
Once the upload is done, open the serial monitor and take note of your board's IP address.
Now that you have your board's IP address, you can access it on port 22 by using a tool like PuTTY (available for Windows).
On OSX and Linux ssh is part of the operating system: open a terminal session and type:
i.e. ssh root@192.168.0.222
Access as root. No password is required. Once connected to the board, enable the mosquitto service by typing:
useradd mosquitto
Now you can launch mosquitto MQTT Broker by typing:
mosquitto
You can find more information on Mosquitto's official page.
Installed ServicesThe IoT 2020 image contains the following services:
- upm
- python
- node
- node-red + plugins
- mraa
- iot2000setup
- ibm-iotf-embeddedc
- galileo packages (Arduino support)
- aws-iot-device-sdk


Comments
Please log in or sign up to comment.