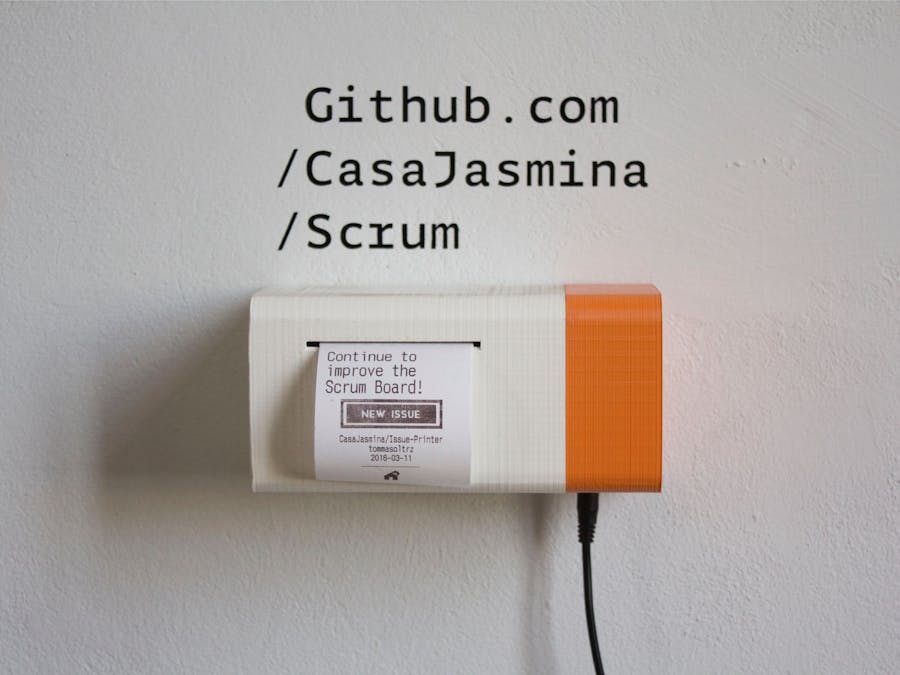
You love the digital world, but you still find post-it and paper more effective tools?
This Internet-connected printer will help you keep track of any issue that get opened on your Github repository. Pile up the issues on your desk and enjoy yourself physically trashing all the issues you close!
Understanding a Github APIGithub offers a beautiful set of open APIs you can use in your projects.
All the APIs are accessible at https://api.github.com/ and are well documented here.
All the APIs can be tested simply using you browser; for instance if you want to collect informations regarding your Github account just type:
https://api.github.com/users/{username}
In case you want to access information of a Github organization you can use:
https://api.github.com/orgs/arduino
To collect all the repositories of an organization instead just use:
https://api.github.com/orgs/arduino/repos
In this tutorial we want to get the list of all the events happening in a specific repository or organization, and filter the ones regarding a new issue.
This will be our starting point:
https://api.github.com/orgs/{organization}/events
Github APIs, like many other Rest APIs, are accessible using a secure HTTPS connection only.
Thank god the MKR1000 and the WiFi Shield 101 support SSL connection and the WiFi101 Library includes a nice object called WiFiSSLClient.
You can upload the following code on to your board to test this feature.
It will connect to your WiFi network, connect to api.github.com and use the client.print() Function to perform a GET request to the server.
#include <SPI.h>
#include <WiFi101.h>

char ssid[] = "xxx"; //  your network SSID (name)
char pass[] = "yyy";    // your network password (use for WPA, or use as key for WEP)

int status = WL_IDLE_STATUS;

const char* host = "api.github.com";  //this address is given by Github itself
const int httpsPort = 443;

WiFiSSLClient client;
void setup() {
  Serial.begin(9600);
  while (!Serial) {
    ; // wait for serial port to connect. Needed for native USB port only
  }

  // attempt to connect to Wifi network:
  while (status != WL_CONNECTED) {
    Serial.print("Attempting to connect to SSID: ");
    Serial.println(ssid);
    status = WiFi.begin(ssid, pass);
    // wait 10 seconds for connection:
    delay(2000);
  }
  Serial.println("Connected to wifi");
}
void loop() {
  if (client.connect(host, httpsPort)) {    //Connect to github
    String url = "/orgs/arduino/events?page=1&per_page=1";  //   /orgs/myRepository/events
    Serial.print("requesting URL: ");                           //  " ?page=1&per_page=1 " add this to get events
    Serial.println(url);                                        //    one by one avoiding the filling of SRAM memory
    client.print(String("GET ") + url + " HTTP/1.1\r\n" +       //send an HTTP request
                 "Host: " + host + "\r\n" +
                 "User-Agent: MKR1000\r\n\r\n");
    // "Connection: close\r\n\r\n");
    Serial.println("request sent");
  }
  delay(5000);
  String line = "";
  while (client.connected()) {
    line = client.readStringUntil('\n');
    if (line == "\r") {
      Serial.println("headers received");
      break;
    }
  }
  line = client.readStringUntil('\n');
  Serial.println(line);
}
To read the response from the server you can use the client.readStringUntil() function.
With this code we are going to read the response and split the headers from the content of the message.
  while (client.connected()) {
    line = client.readStringUntil('\n');
    if (line == "\r") {
      Serial.println("headers received");
      break;
    }
  }
  line = client.readStringUntil('\n');
  Serial.println(line);
}
Once uploaded the sketch, if you open the Terminal, you should see the response from the server getting printed.
Arduino JSONAs you can see, the response from the server is in JSON format.
Although it is possible to parse the response string looking for specific substrings in the message, since the SAMD21 mounted on ZERO and MKR1000 has enough memory, we are going to use the Arduino JSON library, to parse the message and extract the information we need.
You can easily download the Arduino JSON library from the Library Manager.
The printerThe printer needs a library to work. You can install the Adafruit Thermal Printer Library from the Library Manager as well.
ConnectionsDifferent models of this printer might look different from this one. Especially regarding the colours of the wires coming out of it.
Consider that you just have to identify 3 wires :
- VCC: usually red
- GND: usually black
- RX: if you bought this on the Arduino Store this should be the blue wire.
In order to power the printer you will need an external power supplier, the USB power supplier is not enough. We suggest using a 5V (min. 2A) power supplier to provide the required current.


Comments