


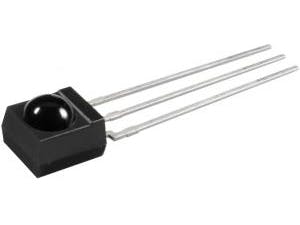
Hardware components | ||||||
_PnKPri8a6q.jpg?auto=compress%2Cformat&w=48&h=48&fit=fill&bg=ffffff) |
| × | 1 | |||
| × | 1 | ||||
| × | 1 | ||||
| × | 1 | ||||
| × | 1 | ||||
To use the infrared sensor your Arduino needs a special library written by Ken Shirriff. This library contains also an example sketch that you will use to discover how your remote control works.
Download the library from this Gihub repository.
Click on «Download as ZIP» then extract the archive and add the library to your Arduino IDE.
If this is the first time, follow this guide to add libraries http://arduino.cc/en/Guide/Libraries
2. Make the circuitNow it's time to build the circuit for your Arduino. Below you can see how to build the circuit.
To see what commands your remote control sends open the sketch IRrecvDemo. You can find it in File>Example>IRremote in the Arduino IDE. This example shows you how to use the circuit you made in the previous step and it is useful to see what is the code associated to the keys of your remote control.
Upload this sketch and then open the Serial Monitor. Then aim your remote control to the IR receiver and press some keys. You will see the some codes appearing in the serial monitor. These codes are the value that your remote control sends when you press its keys. Note these values, you will need to write your own sketch.
4. Write the sketchNow you can insert your key codes in the final sketch. In our example we used codes as below:
play: 0x800F046E
volumeUp: 0x800F0410
 volumeDown: 0x800F8411
 forward: 0x800F8414
 backward: 0x800F0415
 mute: 0x800F040E
You have to modify the value of the constant that store the key code. Each command has a constant declared at the begin of the sketch. Then the sketch will read the value received from the remote control and it will compare it to each commands value with the switch case construct. The red LED connected to your Arduino will blink if a command is received and executed.
/* VLC IR REMOTE CONTROLLER
 *
 * Control your computer while using VLC
 * with any IR remote controller you want.
 *
 * Created by
 * Angelo Scialabba
 * Arturo Guadalupi
 *
 * Based on IRremote library by Ken Shirriff
 */
#include <irremote.h>
int RECV_PIN = 11;  //IR receiver connected on pin 11
int LED_PIN = 2;
int commandExecuted = 0;
//Change these values to match data sent by your remote control
/*-----COMMANDS------*/
const long play = 0x800F046E;
const long volumeUp= 0x800F0410;
const long volumeDown= 0x800F8411;
const long forward= 0x800F8414;
const long backward= 0x800F0415;
const long mute= 0x800F040E;
/*-----END COMMANDS------*/
IRrecv irrecv(RECV_PIN);  //initialize IR library on RECV_PIN
decode_results results;   //received data will be stored here
void setup()
{
  pinMode(LED_PIN,OUTPUT);
  digitalWrite(LED_PIN,LOW);
  irrecv.enableIRIn();  // Start the receiver
  Keyboard.begin();  //Start arduino as keyboard
}
void loop() {
  if (irrecv.decode(&results)) {
    switch(results.value){  //fetch received data
    case play:
      Keyboard.press(' ');
      commandExecuted = 1;
      break;
    case volumeUp:
      Keyboard.press(KEY_LEFT_CTRL);
      Keyboard.press(KEY_UP_ARROW);
      commandExecuted = 1;
      break;
    case volumeDown:
      Keyboard.press(KEY_LEFT_CTRL);
      Keyboard.press(KEY_DOWN_ARROW);
      commandExecuted = 1;
      break;
    case forward:
      Keyboard.press(KEY_LEFT_CTRL);
      Keyboard.press(KEY_RIGHT_ARROW);
      commandExecuted = 1;
      break;
    case backward:
      Keyboard.press(KEY_LEFT_CTRL);
      Keyboard.press(KEY_LEFT_ARROW);
      commandExecuted = 1;
      break;
    case mute:
      Keyboard.press('m');
      commandExecuted = 1;
      break;
    }
    if ( commandExecuted == 1) {   //turn on the LED a command was executed
       digitalWrite(LED_PIN,HIGH);
       commandExecuted = 0;        // reset the flag value
    }
    delay(100);
    digitalWrite(LED_PIN,LOW);
    Keyboard.releaseAll();
    irrecv.resume(); // Receive the next value
  }
}
You can control any software you want, not only VLC. What you need to control a generic software is to know which key you have to press to do actions you want.
For example if you want to go to the next slide while you are making a presentation you have to press RIGHT ARROW. Once you know that you have to modify the sketch in order to send the right key combination to your computer. In the code below you can see how to associate the RIGHT ARROW key to the play command. If you want you can create a totally new command, you can see how to do it in the second code below:
case play:
      Keyboard.press(KEY_RIGHT_ARROW);
      commandExecuted = 1;
      break;
const int nextSlide = 0x0x800F046E  // this line need to be inserted at the begin of the sketch
//this case statement needs to be added inside the switch construct
case nextSlide:
      Keyboard.press(KEY_RIGHT_ARROW);
      commandExecuted = 1;
      break;


Comments
Please log in or sign up to comment.